Normal view

There are new articles available, click to refresh the page.
Before yesterdayMain stream

Exploring Shortwave Radio Signals: A Peek into Non-Local Communications

3 July 2024 at 02:17
Curious about what you can hear on shortwave ham radio? This video is a brief survey of the diverse world of communications on the shortwave spectrum. Expand your radio horizons and enhance your emergency communication preparedness by tuning in to the world of shortwave ham radio. If you’ve started delving into radio communications beyond local […]

Deep Dive – Node-RED QO-100 Satellite Ground Station Dashboard

By: M0AWS
12 June 2024 at 19:25

Following on from my article about my QO-100 Satellite Ground Station Complete Build, this article goes into some detail on the Node-RED section of the build and how I put together my QO-100 Satellite Ground Station Dashboard web app.

The Node-RED project has grown organically as I used the QO-100 satellite over time. Initially this started out as a simple project to synchronise the transmit and receive VFO’s so that the SDR receiver always tracked the IC-705 transmitter.

Over time I added more and more functionality until the QO-100 Ground Station Dashboard became the beast it is today.

M0AWS QO-100 ground Station Control Dashboard built using Node-RED.
M0AWS QO-100 Ground Station Control Dashboard built using Node-RED.

Looking at the dashboard web app it looks relatively simple in that it reflects a lot of the functionality that the two radio devices already have in their own rights however, bringing this together is actually more complicated than it first appears.

Starting at the beginning I use FLRig to connect to the IC-705. The connection can be via USB or LAN/Wifi, it makes no difference. Node-RED gains CAT control of the IC-705 via XMLRPC on port 12345 to FLRig.

To control the SDR receiver I use GQRX SDR software and connect to it using RIGCTL on GQRX port 7356 from Node-RED. These two methods of connectivity work well and enables full control of the two radios.

M0AWS Node-RED QO-100 Ground Station Dashboard - 12/06/24
M0AWS Node-RED QO-100 Ground Station Dashboard Flow as of 12/06/24

The complete flow above looks rather daunting initially however, breaking it down into its constituent parts makes it much easier to understand.

There are two sections to the flow, the GQRX control which is the more complex of the two flows and the comparatively simple IC-705 section of the flow. These two flows could be broken down further into smaller flows and spread across multiple projects using inter-flow links however, I found it much easier from a debug point of view to have the entire flow in one Node-RED project.

Breaking down the flow further the GQRX startup section (shown below) establishes communication with the GQRX SDR software via TCP/IP and gets the initial mode and filter settings from the SDR software. This information is then used to populate the dashboard web app.

M0AWS - Node-RED QO-100 Ground Station Dashboard - GQRX Startup
M0AWS Node-RED QO-100 Ground Station Dashboard – GQRX Startup Flow

The startup triggers fire just once at initial startup of Node-RED so it’s important that the SDR device is plugged into the PC at boot time.

All the startup triggers feed information into the RIGCTL section of the GQRX flow. This section of the flow (shown below) passes all the commands onto the GQRX SDR software to control the SDR receiver.

M0AWS - QO-100 Ground Station Dashboard - GQRX RIGCTL flow
M0AWS Node-RED QO-100 Ground Station Dashboard – GQRX RIGCTL Flow

The TCP RIGCTL -> GQRX node is a standard TCP Request node that is configured to talk to the GQRX software on the defined IP Address and Port as configured in the GQRX setup. The output from this node then goes into the Filter RIGCTL Response node that processes the corresponding reply from GQRX for each message sent to it. Errors are trapped in the green Debug node and can be used for debugging.

The receive S Meter is also driven from the the output of the Filter RIGCTL Response node and passed onto the S Meter function for formatting before being passed through to the actual gauge on the dashboard.

Continuing down the left hand side of the flow we move into the section where all the GQRX controls are defined.

M0AWS - QO-100 Ground Station Dashboard - GQRX Controls
M0AWS Node-RED QO-100 Ground Station Dashboard – GQRX Controls Flow

In this section we have the VFO step buttons that move the VFO up/down in steps of 10Hz to 10Khz. Each button press generates a value that is passed onto the Set DeltaFreq change node and then on to the Calc new VFO Freq function. From here the new VFO frequency is stored and passed onto the communications channel to send the new VFO frequency to the GQRX software.

The Mode and Filter nodes are simple drop down menus with predefined values that are used to change the mode and receive filter width of the SDR receiver.

Below are the HAM band selector buttons, each of these will use a similar process as detailed above to change the VFO frequency to a preset value on each of the HAM HF Bands.

The QO-100 button puts the transmit and receive VFO’s into synchro-mode so that the receive VFO follows the transmit VFO. It also sets the correct frequency in the 739Mhz band for the downlink from the LNB in GQRX SDR software and sets the IC-705 to the correct frequency in the 2m VHF HAM band to drive the 2.4Ghz up-converter.

The Split button allows the receive VFO to be moved away from the transmit VFO for split operation when in QO-100 mode. This allows for the receive VFO to be moved away so that you can RIT into slightly off frequency stations or to work split when working DXpedition stations.

The bottom two Memory buttons allow you to store the current receive frequency into a memory for later recall.

At the top right of this section of the flow there is a Display Band Plan Info function, this displays the band plan information for the QO-100 satellite in a small display field on the Dashboard as you tune across the transponder. Currently it only displays information for the satellite, at some point in the future I will add the necessary code to display band plan information for the HF bands too.

The final section of the GQRX flow (shown below) sets the initial button colours and starts the Powermate USB VFO knob flow. I’ve already written a detailed article on how this works here but, for completeness it is triggered a few seconds after startup (to allow the USB device to be found) and then starts the BASH script that is used to communicate with the USB device. The output of this is processed and passed back into the VFO control part of the flow so that the receive VFO can be manually altered when in split mode or in non-QO-100 mode.

M0AWS - QO-100 Ground Station Dashboard - Powermate VFO section
M0AWS Node-RED QO-100 Ground Station Dashboard – Powermate VFO Flow

The bottom flows in the image above set some flow variables that are used throughout the flow and then calculates and sets the RIT value on the dashboard display.

The final section of the flow is the IC-705 control flow. This is a relatively simple flow that is used to both send and receive data to/from the IC-705, process it and pass it on to the other parts of the flow as required.

M0AWS - QO-100 Ground Station Dashboard - IC-705 control flow
M0AWS Node-RED QO-100 Ground Station Dashboard – IC-705 Control Flow

The IC-705 flow is started via the timestamp trigger at the top left. This node is nothing more than a trigger that fires every 0.5 seconds so that the dashboard display is updated in near realtime. The flow is pretty self explanatory, in that it collects the current frequency, transmit power, SWR reading, PTT on/off status and S Meter reading each time it is triggered. This information is then processed and used to keep the dashboard display up to date and to provide VFO tracking information to the GQRX receive flow.

On the left are the buttons to change band on the IC-705 along with a button to tune to the VOLEMT on the 60m band. Once again there two memory buttons to save and recall the IC-705 VFO frequency.

The Startup PTT Colour trigger node sets the PTT button to green on startup. The PTT button changes to red during transmit and is controlled via the Toggle PTT function.

At the very bottom of the flow is the set transverter IF Freq function, this sets the IC-705 to a preselected frequency in the 2m HAM band when the dashboard is switched into QO-100 mode by pressing the QO-100 button.

On the right of the flow there is a standard file write node that writes the 2.4Ghz QO-100 uplink frequency each time it changes into a file that is used by my own logging software to add the uplink frequency into my log entries automatically. (Yes I wrote my own logging software!)

The RX Audio Mute Control filter node is used to reduce the receive volume during transmit when in QO-100 full duplex mode otherwise, the operator can get tongue tied hearing their own voice 250ms after they’ve spoken coming back from the satellite. This uses the pulse audio system found on the Linux platform. The audio is reduced to a level whereby it makes it much easier to talk but, you can still hear enough of your audio to ensure that you have a good, clean signal on the satellite.

As I said at the beginning of this article, this flow has grown organically over the last 12 months and has been a fun project to put together. I’ve had many people ask me how I have created the dashboard and whether they could do the same for their ground station. The simple answer is yes, you can use this flow with any kind of radio as long as it has the ability to be controlled via CAT/USB or TCP/IP using XMLRPC or RIGCTL.

To this end I include below an export of the complete flow that can be imported into your own Node-RED flow editor. You may need to make changes to it for it to work with your radio/SDR but, it shouldn’t take too much to complete. If like me you are using an IC-705 and any kind of SDR controlled by GQRX SDR software then it’s ready to go without any changes at all.


More soon …

Using AI to generate modern QSL Cards

By: M0AWS
15 May 2024 at 21:41

With the recent explosion of artificial intelligence (AI) art generators that are making the news of late for all the wrong reasons, I decided to see if I could put it to good use and design some futuristic QSL cards.

Having recently been contacted by the Special Callsigns QSL Manager and being advised that there were 18 QSL cards waiting for me, I decided it was time to create some QSL cards of my own for future use.

Having never used any form of online AI and not having any artistic abilities I was amazed how easy it was to create images using nothing more than a paragraph or so of text to describe what it was I wanted to create.

Since all the QSL cards I received were for contacts on the QO-100 satellite, I set out to create a visually futuristic QSL card that was based around a radio HAM operator and satellite communications.

M0AWS - 1st attempt to create a futuristic QSL card using AI Art
M0AWS – 1st attempt at creating a futuristic QSL card image using AI Art

To my surprise the results of my first image generation were surprisingly good. The AI generated an image that resembled the simple text that I entered, although I never requested a one legged HAM operator!

Pleased with my very first attempt I gradually improved the description of what I was looking for, adding more and more detail to the text and including things that I wanted to see in the image. Over a fairly short period of time this approach started to generate some very interesting images.

M0AWS - AI Art QSL Image attempt 2
M0AWS – AI Art QSL Image attempt 2
M0AWS - AI Art QSL Image attempt 3
M0AWS – AI Art QSL Image attempt 3
M0AWS - AI Art QSL Image attempt 4
M0AWS – AI Art QSL Image attempt 4

With each iteration I gradually got closer to what I was trying to achieve but, never quite got exactly what I wanted so, I decided to rewrite the descriptive text adding even more information than before. The text was now a full blown paragraph with quite specific things described including the angle at which the scene was being viewed from.

The other option I wanted to try out was the theme functionality that the AI offered. This allows you to set a theme for the image from things like steampunk, cartoon, manga, real world and many more. The results were quite impressive and added yet another angle to the image generation.

M0AWS - AI Art QSL Theme 1
M0AWS – AI Art QSL Theme 1
M0AWS - AI Art QSL Theme 3
M0AWS – AI Art QSL Theme 3
M0AWS - AI Art QSL Theme 2
M0AWS – AI Art QSL Theme 2

I disappeared down the theme AI Art generation rabbit hole for quite some time and generated some very interesting and fun results. The best by far though was the Thunderbirds themed image, this did put a smile on my face!

M0AWS - AI Art QSL Thunderbirds Themed
M0AWS – AI Art QSL Thunderbirds Themed

At the other end of the spectrum I tried the Salvador Dalli theme, it produced an image that was very like the work of the famous artist but, wasn’t quite what I was looking for.

M0AWS - AI Art QSL Salvador Dalli Themed
M0AWS – AI Art QSL Salvador Dalli Themed

After much fun I eventually settled on the image I was after, a futuristic scene of a radio HAM with a satellite ground station over looking a mountain range and city below.

M0AWS Satellite QSL Card generated using online AI

I’m really pleased with the results from my ventures into AI generated art. The next challenge is to create a QSL card for HF bands Contacts.

More soon …

New to Amateur Radio? What is a Repeater?

27 June 2024 at 17:53
If you have not yet explored ham radio repeaters, this might be interesting to you. What is an amateur radio repeater and how do they work? In this video, with a non-amateur-radio viewer in mind, I chat about the very basic concepts of a repeater. It is filmed in a relaxed, “ride along with me,” […]

Why I Read Blogs

 I read blogs! It's my preferred method of tooling around the internet.

I read Simon Willison's blog to fill me in on the latest in LLM AIs. I read Thomas Witherspoon's blog to hear about a variety of ham radio QRP (low power < 5 Watts) operations and POTA (Parkds on the Air) activations. I reach W6CSN's blog to keep abreast of what's going on POTA-wise around me here in San Francisco. I also find things that I think are super-cool that have nothing to do with what I set out to learn.

For example, reading Simon's blog two days ago, I wound up at this really nice post from Andrew Stephens about well, reading blogs. So, that was kinda meta, but here's the cool part. I'm a huge Edward Tufte fan. Reading sheep.horse on a cell phone, I didn't notice the big reveal right away, but as I toodled around the site, I found it! Holy smokes! There's a CSS package that formats web documents like an Edward Tufte book! Or handout. I just learned about handouts yesterday as well!

Blogs are cool. Here's another post about reading blogs to create a different web.


QSO logging

By: M0RVB
30 March 2024 at 15:12

Some time ago I wanted a logging program that would do things my way. Although there is absolutely nothing wrong with any of the various offerings they generally try to be everything for everyone and none of them really sat well with me. So I wrote my own in PHP (learning Python is high on my list of things to do, along with Mandarin, Morse, cooking…) which uses the QRZ.com logbook as the backend. Ok then, really I wrote a series of various scripts in PHP that make it all work. The advantage is it does just what I need and nothing more and can easily be modified to add functionality. The downside is I never was a coder (well, ok, I have a certification in COBOL from the 1970’s!) and it is not going anywhere other than my own server. So you can’t have it…

The way I tend to log stuff is via wsjt-x or other software that logs to a local file. I then have a script that takes the ADIF data and populates QRZ.com on a QSO-by-QSO basis. Somehow having to actually do something after each QSO feels like I am actually engaging in the process. But I am not a contester… it would simply not work for any stress situations (but then I could easily make it work if I so desired…)

With QRZ.com being the master a script then populates a local database which does all manner of stuff that I personally need. For example, it holds records of eQSL sent/received, real QSL sent/received, and various tabular data for Worked All Britain (WAB).

Scripts also modify the wsjt-x log file on all my systems such that each has a record of all QSOs. As QRZ.com is globally accessible (not tried from China mind… not that I plan to take any radio gear there anyway) and my main database is on a VPS so is also globally accessible the various scripts work from anywhere.

I do plan to move the database from the VPS to a system at home once we get FTTP broadband and use the VPS as a backup, synchronising between the two. But that will wait.

One plan which is more immediate is LoTW integration because as yet my LoTW logging is via QRZ.com which means an extra step. No biggie, I mean it’s its a few clicks and a password… but it would be nice to integrate it. The same goes for eQSL sends, but as yet I only send on receipt and I have scripts to deal with that anyway.

Stowing the AX1

The Elecraft AX1 comes in a cardboard shipping box, as you'd expect. Not exactly what you might have in mind for including in your backpack, tote or whatever you use to carry your portable ops equipment.

To my knowledge, Elecraft doesn't offer an AX1 pouch, so I had originally put mine into a soft pouch that was designed to store an external CD ROM for a laptop computer - if you look up above in the header photo, you can see a portion of it in the lower left hand corner.. Call me what you will, but I rescued it from a dumpster destiny. HiHi!  It worked, but everything was loose inside and I didn't like the thought of the AX1 jostling around inside it. I was concerned that maybe the telescoping whip might end up in a position where it might get bent. I wanted something that provided a bit more protection.

So I went to eBay and did a search on "zippered tool pouches", and found these. They were offered in three sizes and I chose "medium" which is 10 inches long by 6 inches wide by 2 inches deep. (25 X 15 X 2 cm).


I also purchased two kid's kite winders to store the counterpoise wires on. I knew that just having them wrapped up in coils in plastic bags would probably not end up well in the long run. I probably could have gotten away with the smaller case, but I do have enough extra room in there if I want to store a few pens or pencils for logging.

I'm a fossil. I log on paper and then enter the data into AC Log on my laptop or HamLog on my phone if I'm away from the laptop. I am proficient enough with a keyboard to be able to do it, but I find that computer logging while being on the air at the same time is too much of a distraction.  If I get involved in a Sprint like FOBB or the Zombie Shuffle or the Skeeter Hunt, I will miss out on making QSOs if I pause to enter each contact into my computer in real time.  Like I said before, I'm proficient with a keyboard, but I'm not a speed demon. And if I'm in a situation where the QSOs are coming in bang, bang, bang - one right after another, I'd get all bollixed up.

72 de Larry W2LJ
QRP - When you care to send the very least!

QO-100 Satellite Update

By: M0AWS
23 June 2023 at 08:45

I’ve been active on QO-100 for a few days now and I have to admit that I’m really pleased with the way the ground station is performing. I’m getting a good strong, quality signal into the satellite along with excellent audio reports from my Icom IC-705 and the standard fist mic.

I’m very pleased with the performance of the NooElec v5 SDR receiver that I’m now using in place of the Funcube Dongle Pro+ SDR receiver. Being able to see the entire bandwidth of the satellite transponder on the waterfall in the GQRX SDR software is a huge plus too.

M0AWS QO-100 Satellite Log map showing contacts as of 23/06/23

As can be seen on the map of contacts above, I’ve worked some interesting stations on some of the small islands in the Atlantic and Indian Oceans. The signals from these stations are incredibly strong on the satellite and an easy armchair copy.

DX of note are ZD7GWM on St. Helena Island in the South Atlantic Ocean, PP2RON and PY2WDX in Brazil, 8Q7QC on Naifaru Island in the Maldives, VU2DPN in Chennai India, 5H3SE/P in Tanzania Africa and 3B8BBI/P in Mauritius.

There are many EU stations on the satellite too and quite a few regular nets of German and French stations. I’ve not plucked up the courage to call into the nets yet, perhaps in the future.

There are a lot of very experienced satellite operators on QO-100 with a wealth of information to share. I’ve learnt a lot just from chatting with people with some conversations lasting well over 30mins, a rarity on the HAM bands today.

We also had our first Matrix QO-100 Net this week, an enjoyable hour of chat about all things radio and more. We have a growing community of Amateur Radio enthusiasts from around the world on the Matrix Chat Network with a broad spectrum of interests. If you fancy joining a dynamic community of radio enthusiasts then just click the link to download a chat client and join group.

More soon …

UPDATE: QO-100 Node Red Dashboard

By: M0AWS
7 June 2023 at 19:31

I’ve been making a few improvements to my QO-100 Node Red Dashboard whilst waiting for the 2.4Ghz hardware to arrive. I’ve added the ability to split the RX and TX VFOs so that I can tune away from the TX frequency for working split stations or for tuning to slightly off frequency stations. I also added a series of tuning buttons to the top of the GQRX side of the dashboard to enable easy tuning using the trackball connected to my Kubuntu PC. This worked well but, I really missed having a real VFO knob like a conventional radio.

As I had a Griffin Powewrmate USB VFO from a previous SDR radio I added it to the flow as well so that I had a physical VFO knob for the SDR receiver. Details on how I got it working using evtest and a simple BASH script are in the Griffin Powermate article.

M0AWS QO-100 Node Red Dashboard Flow

The Node Red flow is looking a little busier with the addition of split mode and the Griffin Powermate USB VFO which has really enhanced the useability of the solution. It’s very impressive what can be achieved with Node Red with a little imagination. You really don’t need to be a heavy weight programmer to make things work.

M0AWS QO-100 Node Red Dashboard as of 07/06/23

I also put together some code to calculate the S Meter reading from the dBFS data the GQRX SDR software generates. It’s not 100% accurate but, it’s close enough to be useful.

On the IC-705 side of the Dashboard I also now display the 2.4Ghz uplink frequency so that it’s available for logging.

So with the QO-100 Dashboard ready to go live I have now started putting together the 2.4Ghz transmit path of the ground station. I have the 2.4Ghz transverter and matching 12w amplifier from DXPatrol, the IceCone Helix 2.4Ghz antenna from Nolle Engineering, some LMR-400-UF and connectors from Barenco and an appropriate water proof enclosure from Screwfix to fit all the kit into however, I’m now being held up by one simple little SMA male to SMA male connector that I need to connect the transverter and amp together.

M0AWS Waterproof enclosure from Screwfix
M0AWS Laying out the 2.4Ghz TX kit in the enclosure
M0AWS LMR-400-UF coax from Barenco

The SMA connector has been ordered but, is taking a month of Sundays to arrive! Hopefully it’ll arrive soon and I’ll finally get on the QO-100 satellite and start enjoying the fun.

More soon …

Thank You To Our Readers – Over 1 Million Views!

By: fkemmerer
4 July 2023 at 13:28

1 Million Views

I want to thank all our followers and subscribers for making stationproject.blog a useful and popular resource for the Amateur Radio community. We’ve hit a significant milestone of late – we’ve surpassed 1 Million views. We very much appreciate your support for our site!

Fred, AB1OC

The post Thank You To Our Readers – Over 1 Million Views! appeared first on Our HAM Station.

How I Manage My Contact Logs

When I’m out activating a SOTA summit, which is where is where most of my logged contacts come from, I put them into Outd logging software on my iPhone.  It makes it super easy to upload to the SOTA database.  (I’ve done a review of outd HERE if you are interested.)  When I’m at home, I use N3JFP’s Amateur Contact Log (ACLOG) on my PC.  I’ve also been known to use a paper log when things get wet on a summit.  Most importantly, no matter how I log contacts, all of them are uploaded into ACLOG.   This article is about N3JFP’s Amateur Contact Log, and how I configure it and use it to centralize all of the logged contacts that I make from home or on the road.   Think of ACLOG as the clearing house for all of my amateur radio logging.  (updated 6/2/2023)  (Presentation on this topic HERE)


ACLOG

N3JFP’s Amateur Contact Log (ACLOG) is pretty well known in the ham community.  ACLOG is software that runs on Windows (sorry mac users) that hams use to log their contacts with other stations.  The software is very inexpensive and the author also publishes add-ons for contesting.  It was designed and developed by a ham for other hams.  Here are the things that I like most about it.

     It’s highly configurable.  For example, it has the ability to add custom fields.  (see more about this below).

     Ability to change the order of fields.

     Data is exportable in the portable ADIF format used by other apps and services.

     You can import from other logging apps (see more below on this).

     The import feature is very smart.  If you name a custom field the same as a field that is being imported from another app, it puts from that source into the right place. 

     Using the app to log contacts is very simple (or you can make it complex).

     It integrates with Logbook Of The World (LOTW).  (More below)

     Call lookup using the online service QRZ.  It does callsign lookup against QRZ when you are entering a contact callsign  and fills in name, state and other data automatically.

     Cool automation features, like the ability to highlight a bunch of contacts and tell it to fill in the blanks by using a lookup against QRZ.com  You’ll see this is important when importing logs from my iPhone, where the data for state and some other data is missing.

     It talks to my radio home radio by reading in the current frequency and mode, saving you from having to enter that.  That’s super handy during a fast paced contest.

I tried only one other logging app out there, Ham Radio Deluxe.  It was expensive and it was a hodgepodge of multiple applications smashed together, so it felt a little kludgy at the time.  I'm sure it’s improved over the years and there’s probably other great software out there too, but I’m sticking with ACLOG until something breaks with it.

I’m not going to delve into a full review of ACLOG, you can probably find that somewhere else.  I’m going to move onto the main purpose of this article, explaining how I use ACLOG for SOTA and my general workflow of how I ingest, update, and push data out into LOTW and QRZ for confirmations.


My Configuration Of ACLOG

I configured four custom fields for my use, and most of these are key for importing and managing my SOTA activities. My custom fields are named, “Other”, “MY_SOTA_REF”, “SOTA_REF”, and “QSL Sent?”.

The first custom field is “Other” (bad title I know).  This field contains mainly three possible options right now, Home, CHASE, and SOTA.

  1. Home is what I flag contacts that I made from home when I’m playing with my setup in a contest for instance and trying to work stations in the US and around the world.

  2. CHASE is what I flag contacts with to indicate that I was chasing a SOTA operator.  It allows me to identify which contacts I should export and then push up to sotadata.org.uk so I can track my SOTA contacts there and get my points. 

  3. SOTA is the designator that indicates that the contact was made from a SOTA summit.  Most of my log entries (currently about 9,000+) have the SOTA designation.


The next custom field is “MY_SOTA_REF”.  This is a standard ADIF field used by Summits On The Air logging apps and sotadata website for import.  This field indicates which summit I was on when I created a SOTA log entry for a contact.  This field happens to match the field name for the ADIF export of my logging app, Outd.  Because my custom field and the import datafile from Outd match, the import logic correctly pulls my sota summit id into this field.   This is super handy for multi-summit days!!!

SOTA_REF is another custom field that I added.  This field is used for holding the summit ID of a “chased summit”.  That is, when I chase a summit either from home, or from my summit while doing SOTA (summit-to-summit), this field holds the summit ID that the SOTA operator was on.  Because it matches the Outd ADF format, it comes across perfectly.  I really enjoy chasing other summits while on a mountain top.  It’s challenging and I feel a bit of comodery with the other operator that is battling some of the same things I am, cold, wind, dirt, etc.

QSL Sent?” is my final custom field.  It 
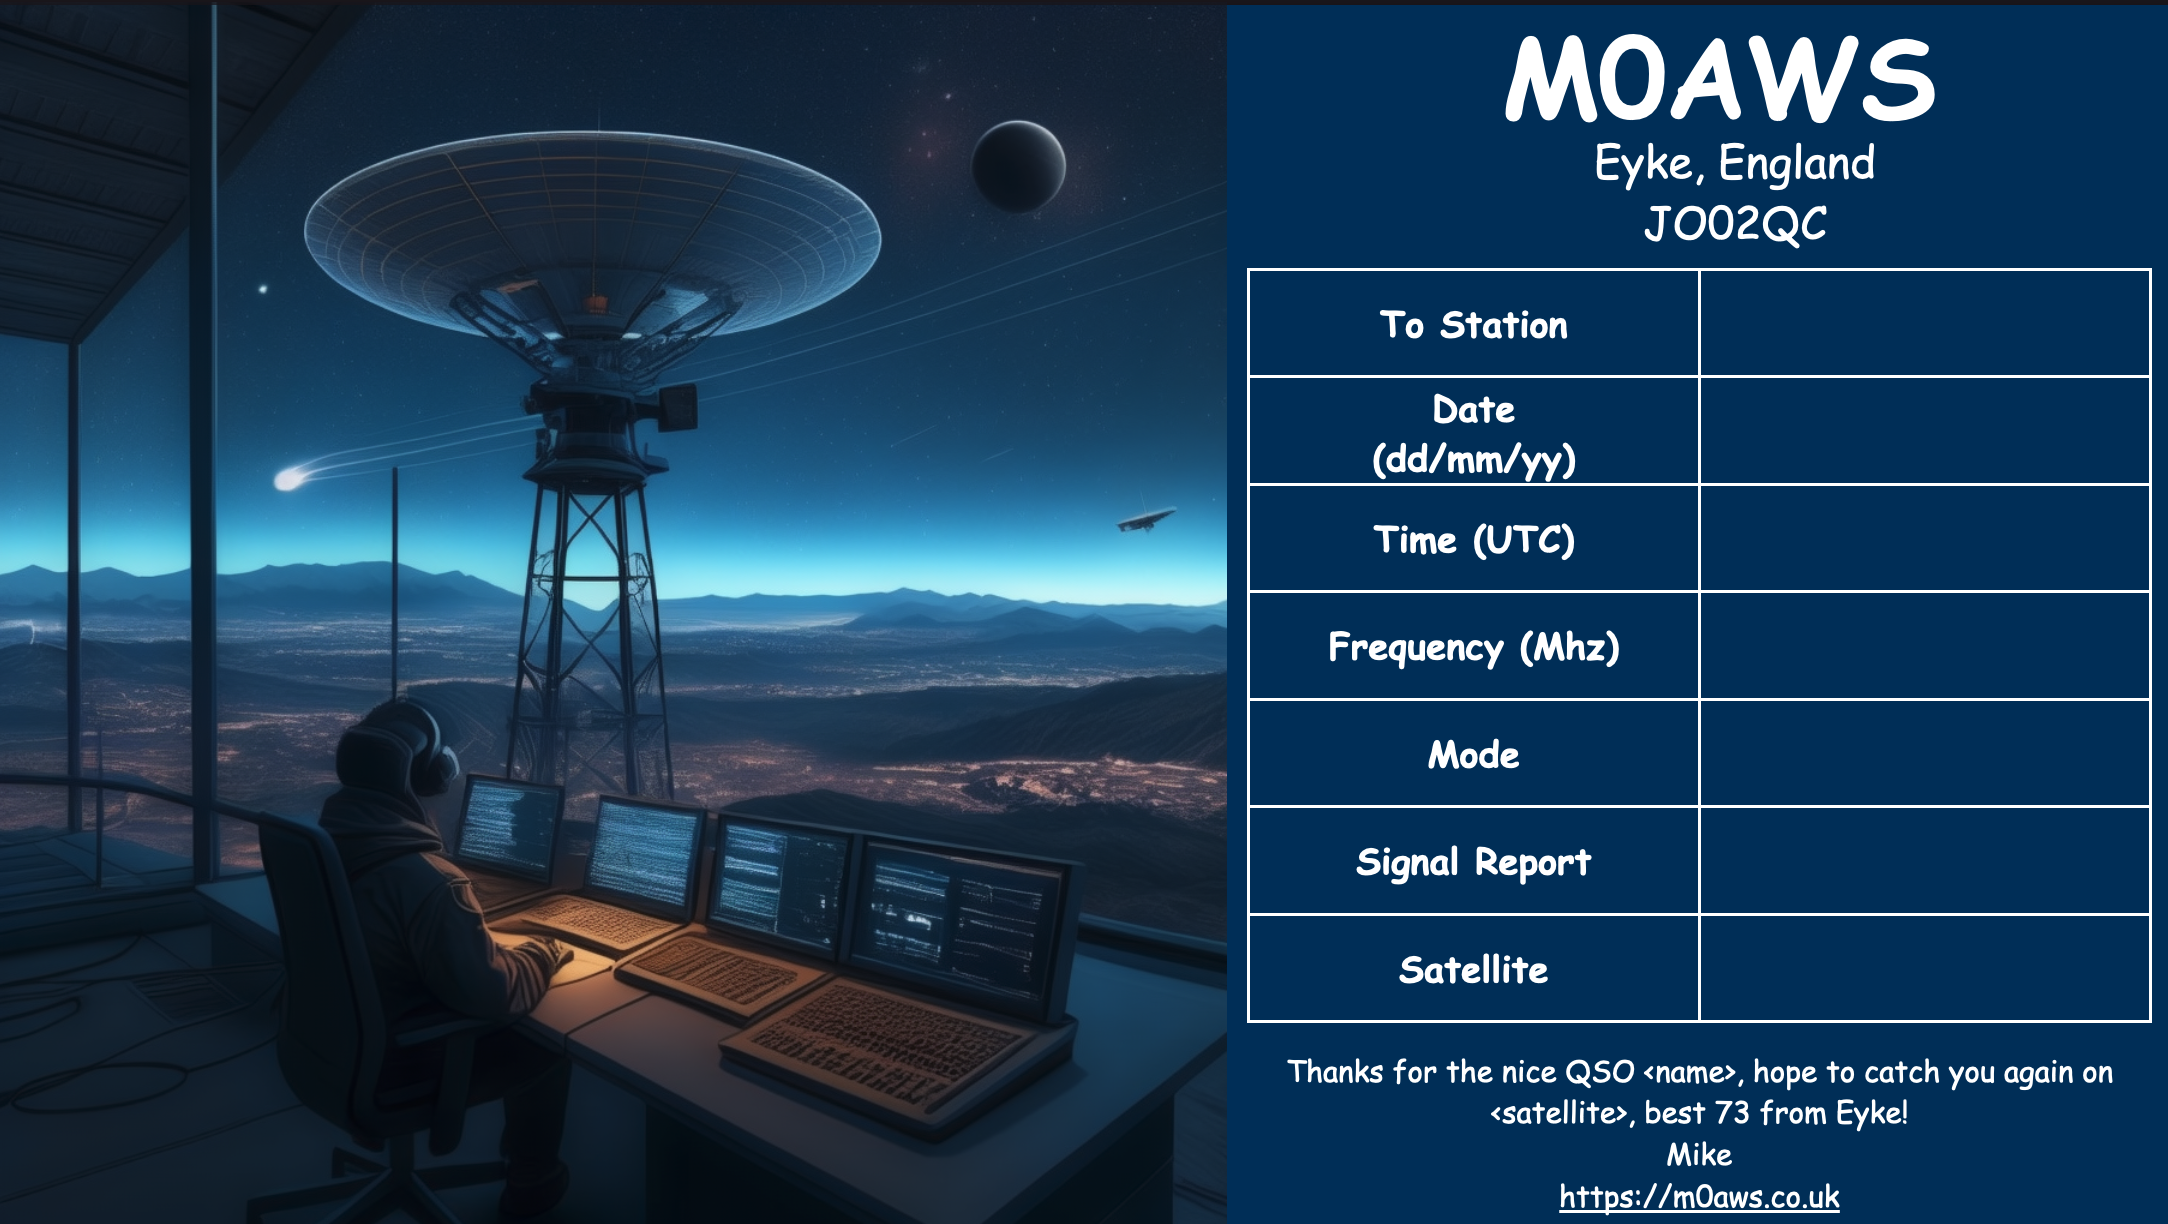
indicates the date that I sent a QSL card to an operator.  I enjoy sending one of my custom greetings and thank you cards to other Ham operators.  It’s been a tradition in the hobby for quite some time.  Originally, it was the only way that operators could prove that they had a particular contact with someone in order to earn credit toward some award, like “worked all states” for example.  Now confirmations are made electronically via qrz.com or Logbook Of The World (LOTW).  I don’t send a card to everyone that I contact, and if I do, I don’t want to keep sending them cards every time I make a contact, so I use this field to keep track of who I sent a card to.   Sending QSL cards is still a fun part of the hobbie and if you send cards, you are more likely to receive a “QSL card”.  I have quite a few with very cool art from all over the world. 


ACLOG is my logging clearinghouse. 

As I mentioned, I run all my logs through ACLOG.  That means that no matter where I log a contact, paper, phone, or directly using the app, those log entries will be loaded into ACLOG. 

Confirming:

Because ACLOG has a cool integration with LOTW, I can upload new logs directly to LOTW with a click of a button.  When I’m done, I export one or more days of contacts and then import them to QRZ.  Some operators really want you to confirm the contact so that they get credit as they are working toward some goal or award.  By uploading all my contacts to LOTW and QRZ, it covers most  everyone's needs.  If it doesn’t, they can request a QSL card.  I’m happy to send a QSL card in the mail but they really aren’t needed anymore and I’ve yet to have someone request one except when they send me one.

Export from Outd and Import to ACLOG

As I mentioned, I use Outd on my iPhone to log contacts when I’m out doing SOTA.  At the end of the day, I export my contacts from one or more SOTA expeditions and then do a quick pre-process prior to import.  Here are the steps that I follow:

  1. In Outd, I use the export feature to export to ADIF and use the email option, sending it to myself.

  2. On my PC, I open the email and download the attachment and move the file to a folder for that day.

  3. I upload that file to sotadata.org.uk so I can get my SOTA points and summit-to-summit points.  (I can also upload directly from my phone if I want to).

  4. I then open the file with a text editor called textpad. (any text editor will work)

  5. I use “save as” and change the file name suffix to “.adi”.

  6. I replace ALL “QPMSG” with “Comment”.  This puts that data into the comment field in ACLOG which typically contains “SOTA <my summit ID>”. The data is there so I figure why not bring it over to the comments field in ACLOG.  In addition, this is a standard field in QRZ logbook and since QRZ doesn’t have a “MY_SOTA_REF” field, this is an easy way to see what summit I was on if I’m browsing that logbook.  (Not sure if comments are visible to others).

  7. I replace ALL “<eor>” with “<Other:4>SOTA<My_Gridsquare:4>DM53<eor>”
    This populates my “Other” field in ACLOG and I populate the grid square field in ACLOG with the proper one for this summit.
    In the example above, I use the grid square that the summit is in (so it’s not always DM53), and I only use the first four characters of the grid square.  A four character grid square is close enough for users who want to prove they chased a county for example. 

  8. If I also was in a park and want to document and push into pota.app on the web then I also append the POTA Park ID into the field MY_SIG_INFO which is a out of box field in ACLOG. (eg. "<MY_SIG_INFO:6>K-0070").  Although you can upload the log as-is without this field in pota.app on the web and choose the POTA park ID when you upload, why not document it in ACLOG too.  I don't do a lot of POTA right now, but when I do, I populate MY_SIG_INFO.

  9. Save and close the file.

  10. In ACLOG I import the recently edited .adi file using File/Import

Note: N6ARA created a python script to do the file post processing a little quicker.  He may use a tad different scheme but check it out, he also distributes the source code located HERE.

Now all of the contacts that I made on one or more summits are loaded into ACLOG.  The one last thing that I do is go into ACLOG and fill in the blanks for name, state etc that are not captured in Outd.  I do this by highlighting all of the calls that I want to update, then use the edit menu, then “Fill Fields Determined by Call” then choose “selected records”.  ACLOG then quickly goes through all of the records, looking them up in QRZ via an API, and fills in the blank fields where it can.  This is a super cool feature in ACLOG.


Push records to LOTW using ACLOG

As mentioned above, I confirm via LOTW and ACLOG as a built in tool that does all the work for you.  The one thing you need to ensure is that you’ve created a new “location” using TQSL tool for each grid square that you will upload records for.  Because I only use the first four characters of the grid square, I didn’t have to create that many “locations” because a four digit grid square can contain a LOT of summits.
(By clicking on the image above, you can see that records in blue are "confirmed" via LOTW.)

When you are ready to upload directly from ACLOG to LOTW, highlight the records you want to upload, then select the “eLogs” menu and choose LOTW.  On the upload dialog, use the pulldown and choose the matching grid square for the records you will upload, then click on the button “Selected Contacts from Main Form”.  

Once you’ve pushed records to LOTW, you can use the “eLogs” menu / LOTW, and then choose the “All Since” button.  This pulls down all of the confirmations in LOTW into ACLOG.  It’s a super easy way to to integrate with LOTW.

Export chase logs from ACLOG for import

The sotadata ADIF import supports exports from aclog because of how I named my optional fields (see above) so that it would accept the chased SOTA summit.  The process is simple:
  1. I just highlight the chase log entries and then export to a file.
  2. Upload it to sotadata using the ADIF format.

Importing Contacts to QRZ.com

I upload my contacts for the day to my qrz.com logbook, a cloud based logging app used by many hams.  Some hams use the automated feature that looks at the logbooks of the people you contact to see if they also logged you, which is a good way to “confirm”.  It’s a simple way to prove that you really did make a contact with someone at a date, time, band and location.
UPDATE 6/2/22: ACLOG now supports pushing data into QRZ just like LOTW.  They have also added comments upload so it works perfectly via a push of a button.

  1. In ACLOG, Highlight the records you want to import to QRZ

  2. Choose eLogs dropdown menu.

  3. Choose "QRZ Logbook".

  4. Click on "Selected Contacts from Main Form" or you can chance the "All Contacts Not Uploaded" 

  5. I “Import from LOTW” once in a while.  If LOTW has completed processing your file, all of your records will turn green and it will have a special icon that shows confirmations that came from LOTW. 


The above is a snapshot of my from my QRZ log 
A star with a circle indicates a confirmation via LOTW
A star without a circle indicates a confirmation from QRZ only.

You may wonder why I don’t just import from LOTW since we used ACLOG to push the records up there in an earlier step. This is because fields like comments aren’t in the LOTW database so if you want the comments to come along, you’ll need to import a file you exported from ACLOG.

This process of importing from the iPhone then using LOTW, and exporting, and importing to QRZ may sound like an all day affair, but in reality, all of this just takes a few minutes. Also, I might only do this once per week.

 There is no rule that says that you need to keep a log of all your contacts, and my hams don’t (I don’t log all of the contacts that I make using my hand-held or VHF radio around town for example).  Over time, it’s kinda cool to see all of the people and places that you’ve contacted.  ACLOG has a bunch of stats as well so it provides a bit of entertainment for data geeks like me.

 I hope my approach to centralizing my logs for statistics fun was helpful.

Importing Contacts to POTA.app

Use the "My Log Uploads" menu page to upload your log.  Because we added the POTA field at the top, it will correctly guess the park number but if you didn't add that field to the ADIF file, don't worry, the upload page allows you to choose the park during the process.

Reference:

Example ADIF Record:

Below is an excerpt from my log after doing SPOTA (SOTA & POTA).  It shows the mods after export from Outd.
<CALL:4>WU7H<QSO_DATE:8>20231018<TIME_ON:4>2044<MY_SOTA_REF:10>W7Y/TT-139<FREQ:6>14.062<OPERATOR:5>N1CLC<STATION_CALLSIGN:5>N1CLC<SOTA_REF:0><MODE:2>CW<NAME:15>Joshua J Gibbs
<QTH:0><TX_PWR:2>10<RST_RCVD:3>549<RST_SENT:3>559<Comment:15>SOTA W7Y/TT-139<Other:4>SOTA<My_Gridsquare:4>DM44<MY_SIG_INFO:6>K-0070<eor>

Other tools for logging

  • G0LGS log editor for your PC
  • Paper (Write In the Rain paper log)
  • Fas Log Entry (FLE) is a super fast way to log for contest, SOTA, POTA, and it supports multiple exports.
  • HamRS for your phone
  • Outd for your phone.
  • VKPortaLog for your phone
  • RumlogNG for your phone

73,
N1CLC
Chris Claborne
(aka christian claborne)

❌
❌