Normal view

There are new articles available, click to refresh the page.
Before yesterdayMain stream

Venturing into the world of AllStarLink

By: M0AWS
27 June 2024 at 22:07

We’ve recently added a new room to the Matrix HAM Radio Space for Digital Voice modes as this was an area of interest that didn’t really fit into any of the other rooms.

The new Digital Voice room has attracted a lot of attention from members, with a lot of the focus being on the AllStarLink system. Michael, DK1MI built an AllStarLink node in the cloud for us all to use for Matrix Nets and so I decided I had to get in on the fun.

Jumbospot SHARI SA818 Amateur Radio AllStarLink Radio Interface Front Panel View
Jumbospot SHARI SA818 Amateur Radio AllStarLink Radio Interface Rear View
Jumbospot SHARI SA818 Amateur Radio AllStarLink Radio Interface stripped down View

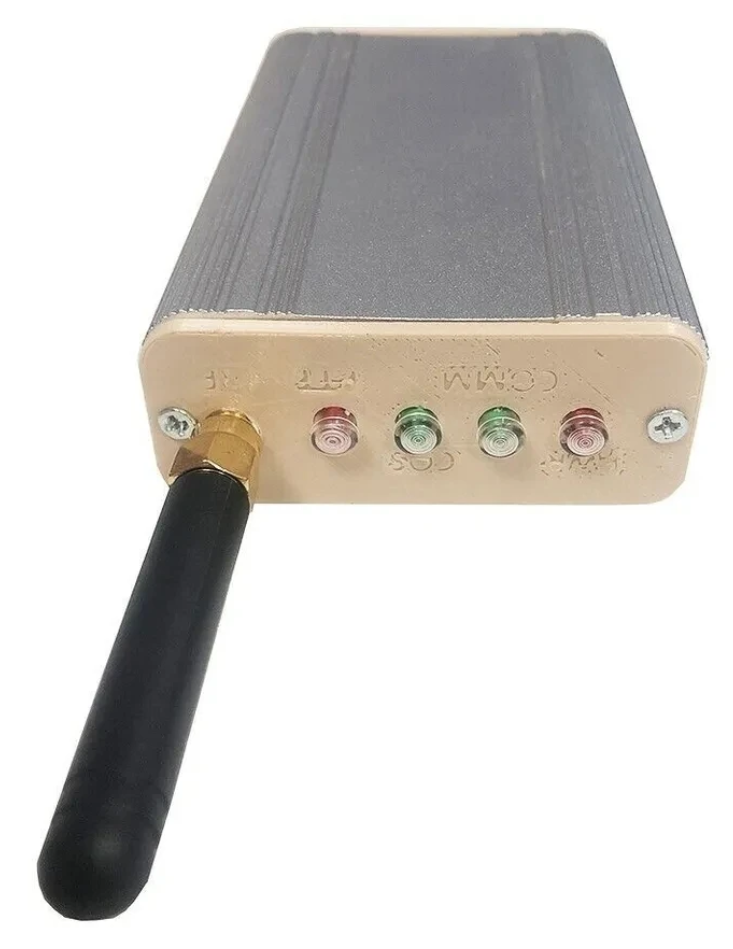
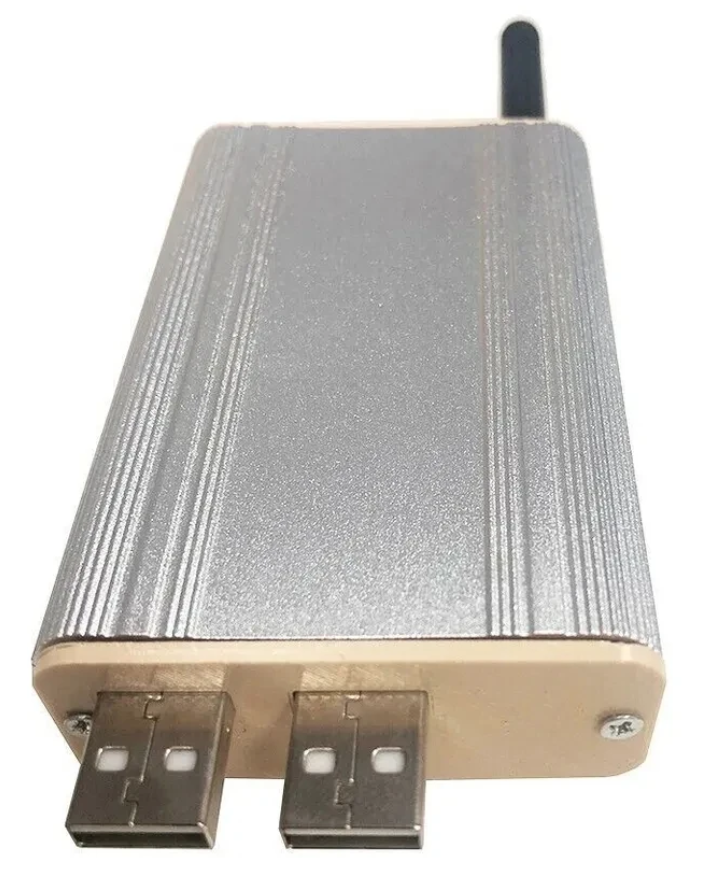
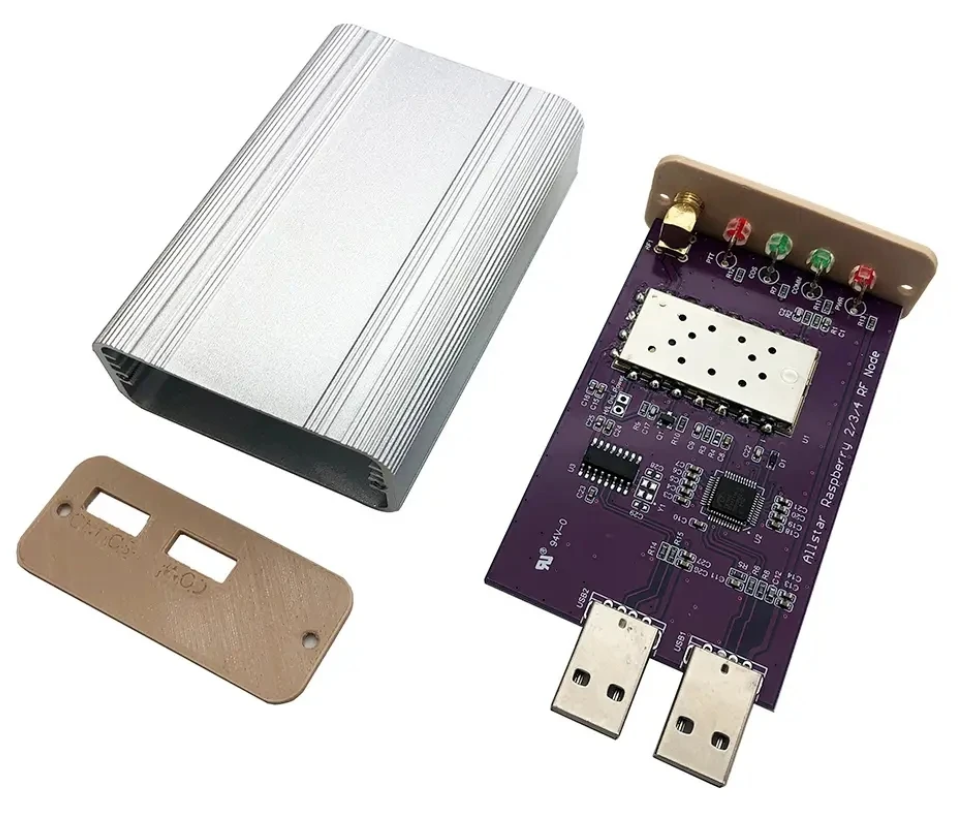
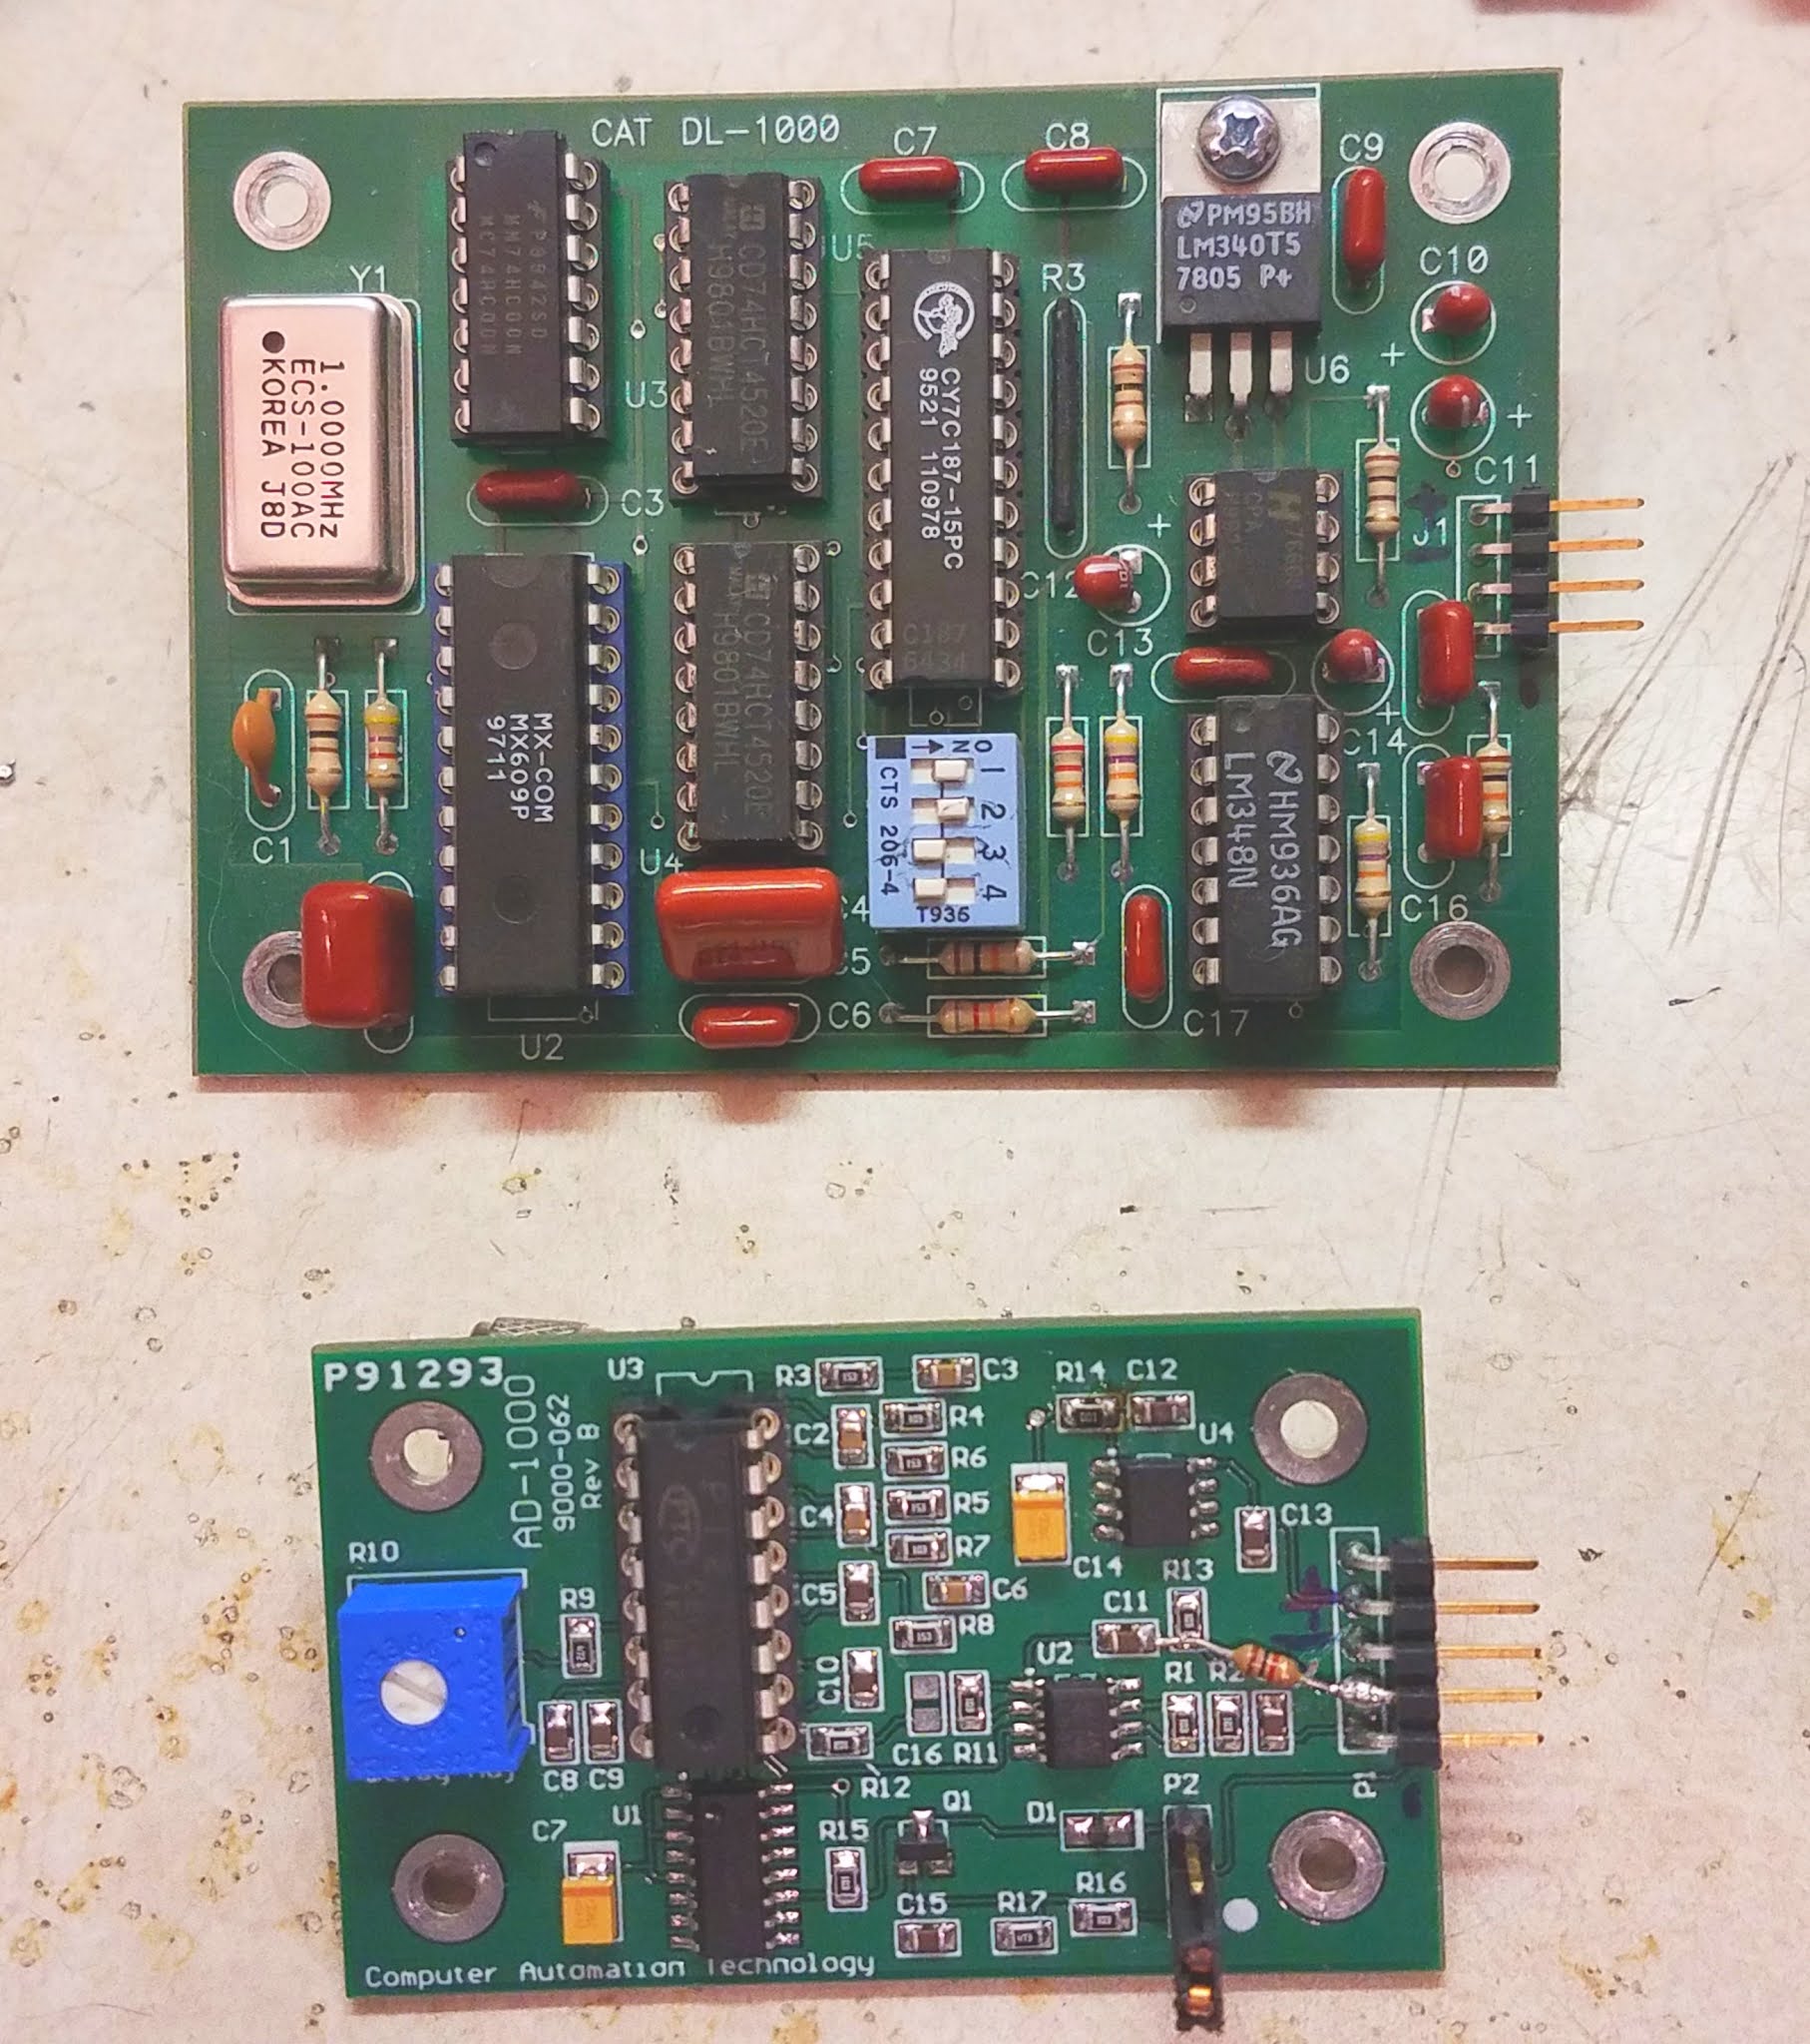
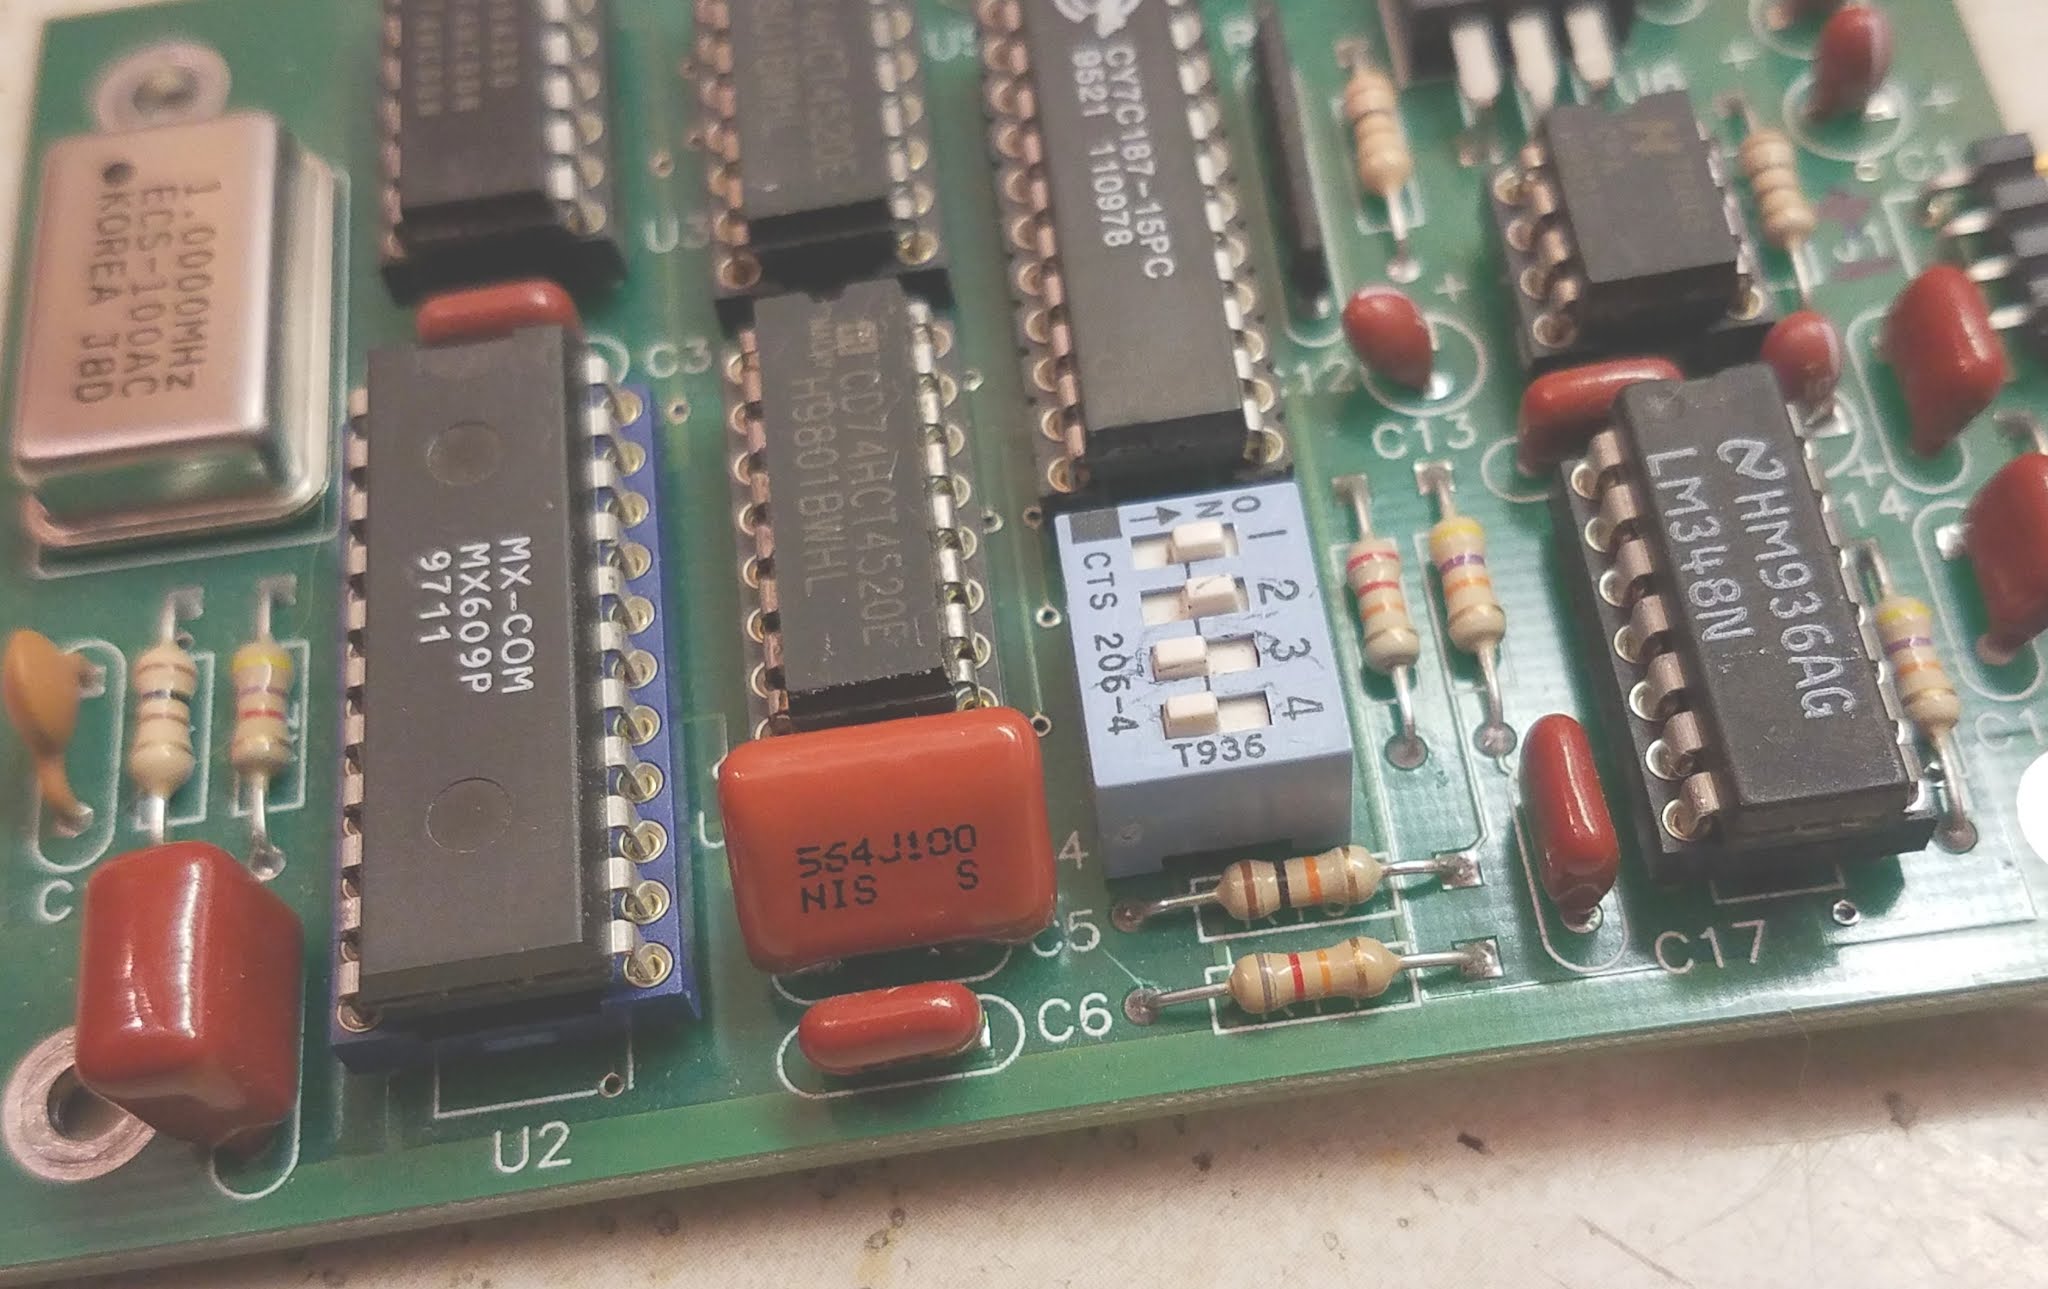
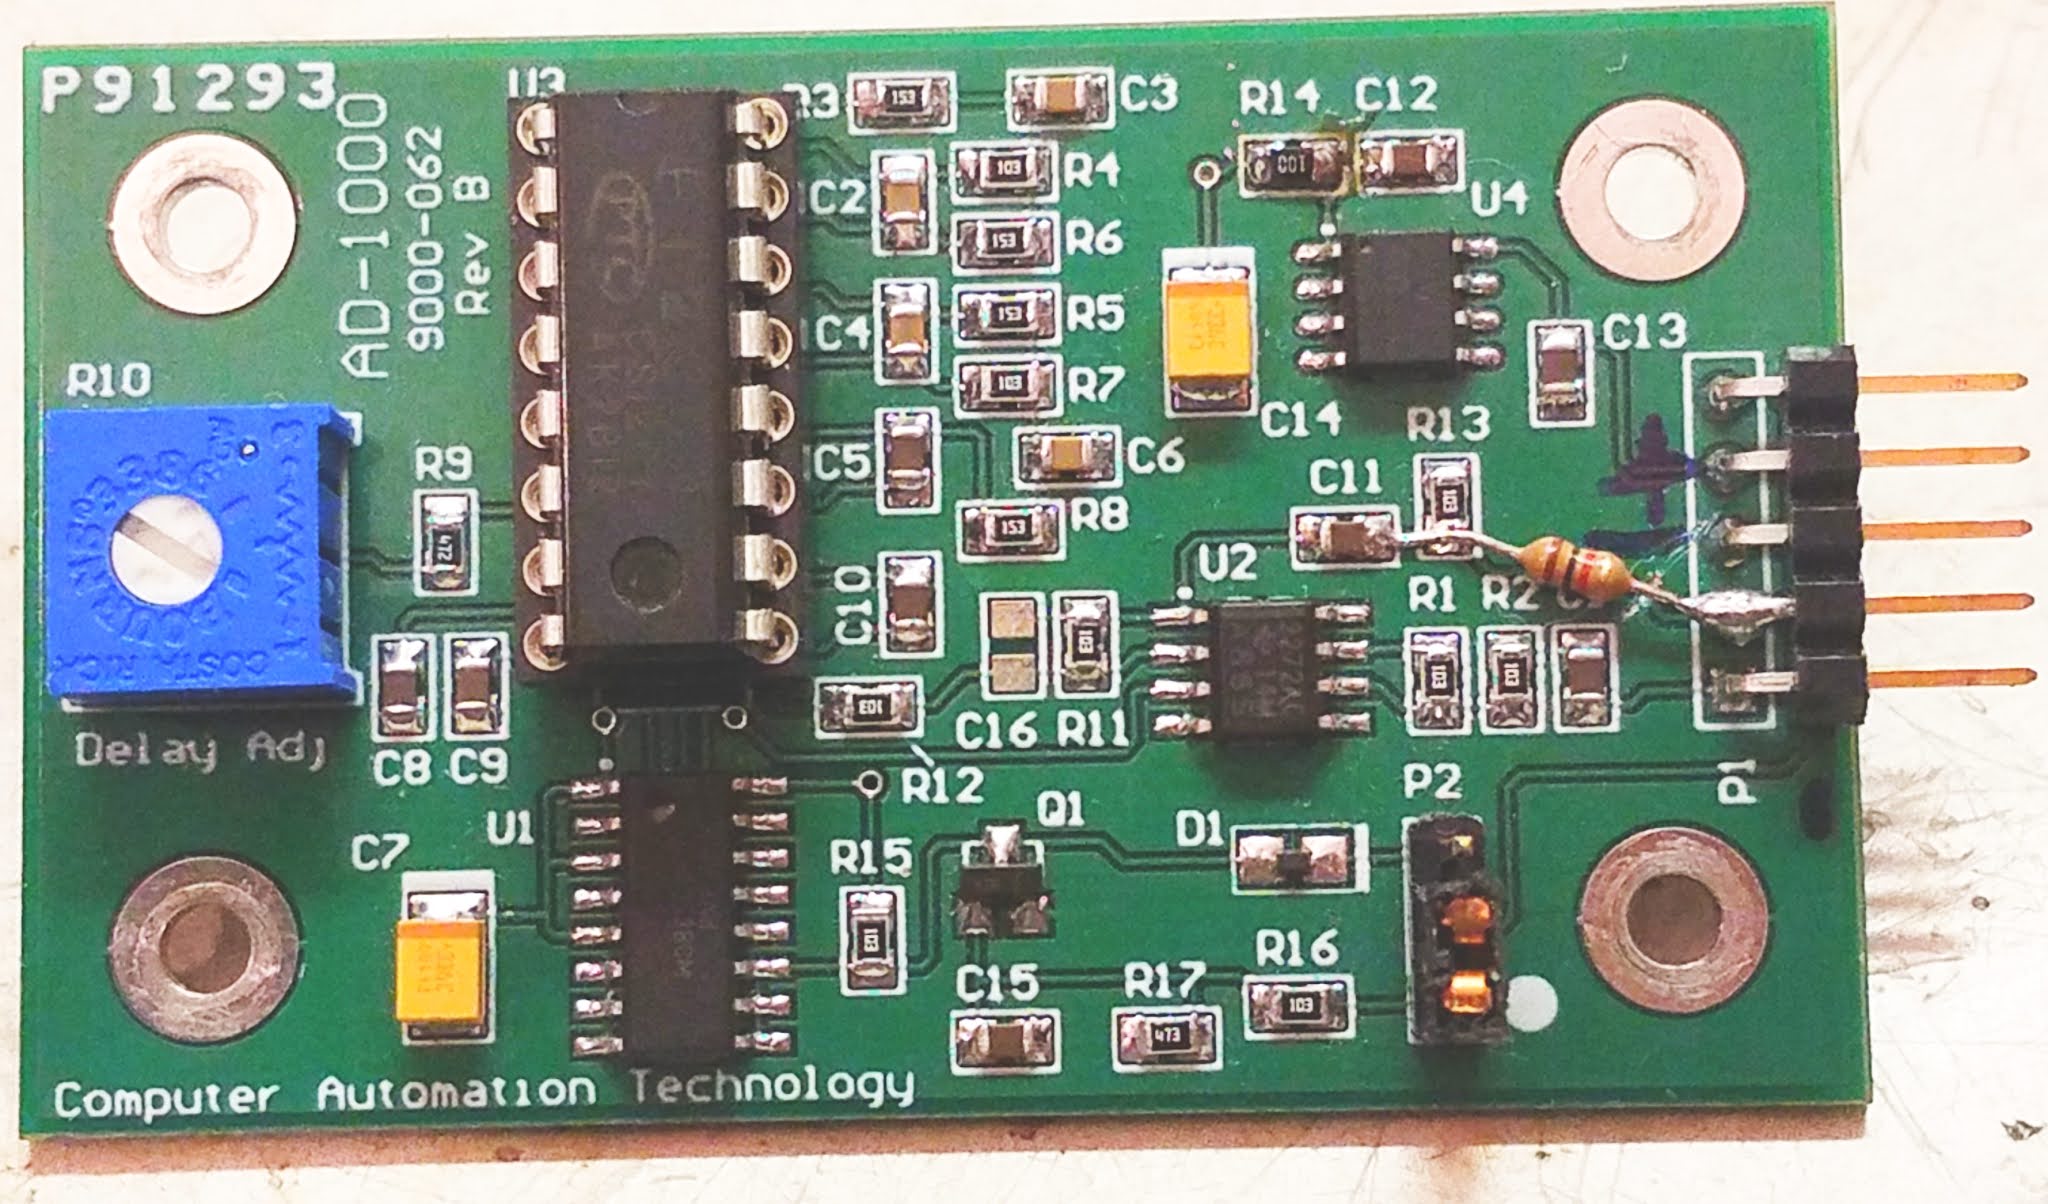
The Jumbospot SHARI SA818 Amateur Radio AllStarLink Radio Interface was originally designed by N8AR and implements a RaspberryPi 2/3/4 hosted AllStarLink node using a NiceRF SA818 embedded VHF/UHF radio module and sound card.

The two USB connectors on the SHARI device are position such that they plug into two of the available 4 USB ports on the RaspberryPi without the need for cables. This keeps the whole solution together in one neat package.

Before you start you will need to obtain a node number and secret (password) from the AllStarLink Portal. To get this you will need to provide proof to the AllStarLink administrators that you are a licensed Amateur Radio (HAM) operator. This is done by uploading a copy of the first page of your HAM licence to the website for the admin team to check. This can take 24hrs to be completed so make sure you get this all done before trying to build your node. You cannot build a node successfully without a node number and secret.

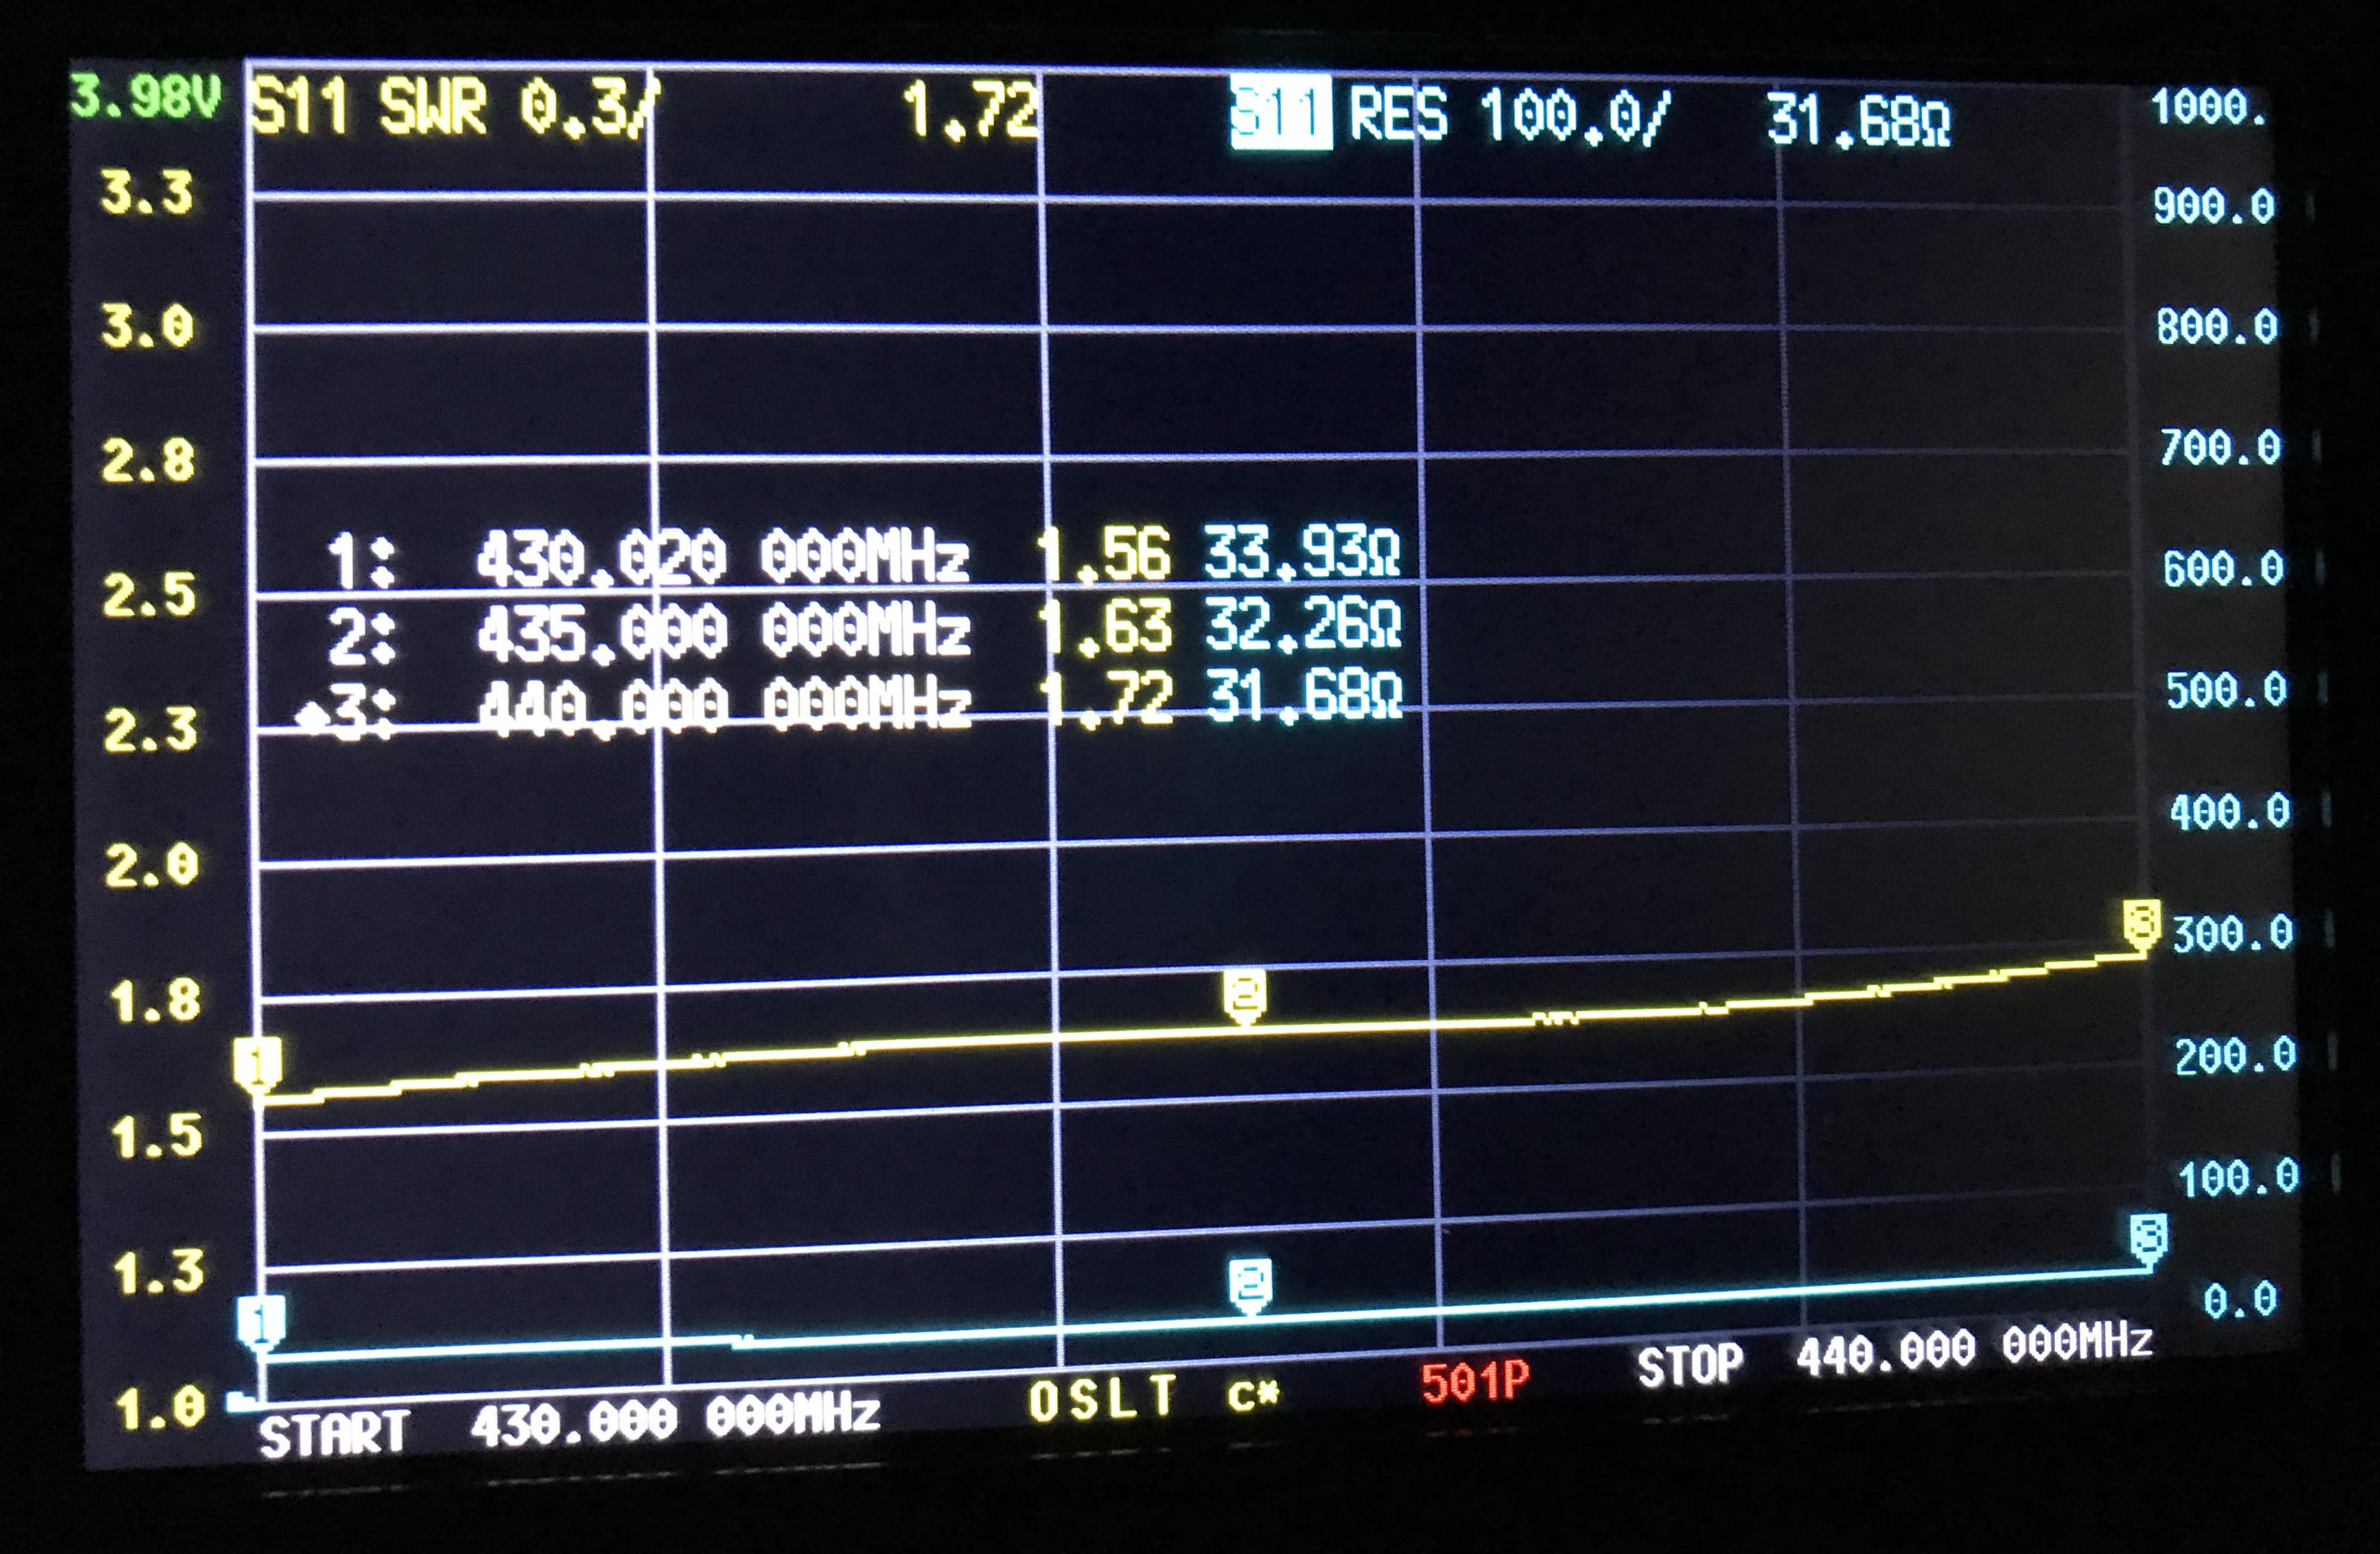
Of course you will also need a transceiver that can operate on the 438.800Mhz frequency or other frequency of your choice on the 2m or 70cm HAM band.

You will also need to open port 4569 on your internet router and setup port forwarding to the IP Address that you will be using on your RaspberryPi node. It’s important to use a static IP Address on your RaspberryPi.

There are quite a few different Linux based operating system (O/S) images that are available for the RaspberryPi devices that have been specifically tailored for the AllStarLink node and include all the necessary software and library packages out the box.

I decided to use the Raspbian GNU/Linux 10 (buster) based distribution as it is based on the very stable and reliable Debian Linux distro. You can download the exact version I am using from the Raspbian link above or directly from my website here.

Once downloaded you need to burn the ISO image onto a suitable SD card for your RaspberryPi. I use BalenaEtcher as it’s extremely quick and reliable at burning ISO images to SD cards.

Of course if you are a hardline Linux command line junkie you can always use dd to create the SD card.

Once you’ve got your O/S onto your SD card, slot it into your RaspberryPi making sure your SHARI device is connected to the two USB ports and then power it up. Make sure you have a good PSU for the RaspberryPi as the two devices together draw around 3A of current during the transmit cycle. (I use a 3.6A PSU from Amazon).

The default login for the Raspbian O/S is shown below. Login via SSH and configure your RaspberryPi for your local network. It’s important to use a static IP Address configured either directly on the RaspberryPi or via DHCP in your router.

Login: repeater
Passsword: allstarlink
SSH port: 22

Once you have your RaspberryPi connected to your LAN you are ready to start configuring it for AllStarLink.

The first thing you need to do is login to the raspi via SSH and then become root user using sudo as shown below:

sudo su -

Once you are root user, you need to add the AllStarLink repo to the sources file and update the operating system using the following command:

curl -s http://apt.allstarlink.org/repos/repo_signing.key | apt-key add
apt update --allow-releaseinfo-change
apt dist-upgrade

Copy and paste each line one at a time into your terminal. Once the last command finishes, the system is up to date and can be rebooted as follows:

reboot

Once the raspi has rebooted, login again via SSH as user repeater and then become root user again.

You now need to install a couple of Python components that are required by the system to function. Use the commands below as user root:

apt-get install python3-dev python3-pip
pip3 install pyserial

Next you need to change directory into the asterisk config file directory using the command shown below:

cd /etc/asterisk

In this directory you will find all the default config files that come as part of the distro. For this build we’re not going to use them and so we need to move them out of the way ready for a set of config files that have already been configured correctly.

Using the following commands create a new directory, move into that new directory and then move all the unwanted configuration files into it:

mkdir ORIGINAL-CONF-FILES
cd ./ORIGINAL-CONF-FILES
mv ../*.conf ./
ls -la
cd ../

You should now be back in the /etc/asterisk directory which will now be empty apart from the custom directory which we left in place.

You now need to copy the correctly configured configuration files into the /etc/asterisk directory. Start by downloading the zip file containing the new configuration files

Once downloaded, copy the .zip file into the repeater users home directory (/home/repeater) using either scp on the Linux command line or if using Windows you can use the FileZilla Client in SFTP mode using the login details above.

Once you have the .zip file in the repeater user’s home directory you need to copy the file into the /etc/asterisk directory as user root:

cp /home/repeater/AllStarLink-Config-v3.zip /etc/asterisk/

Next as user root, change directory into the /etc/asterisk directory and unzip the .zip file:

cd /etc/asterisk
unzip ./AllStarLink-Config-v3.zip

Once the file is unzipped you need to move a couple of files into the repeater users home directory using the following commands:

mv ./SA818-running.py /home/repeater
mv ./gpio /home/repeater

Once the files have been moved you need to set the correct ownership and privileges on the files using the following commands:

chown -R root:root /etc/asterisk/*.conf
chown repeater:repeater /home/repeater/gpio
chown repeater:repeater /home/repeater/SA818-running.py
chmod 755 /home/repeater/gpio
chmod 755 /home/repeater/SA818-running.py

The gpio BASH script and configuration details were supplied by Mark, G1INU in the Digital Voice room on the Matrix. It adds the COS light functionality to the setup. The COS light will now light every time the SA818 hears RF on the input.

The next thing you need to do is configure the SA818 radio device in the SHARI. The script I used was originally from https://wiki.fm-funknetz.de/doku.php?id=fm-funknetz:technik:shari-sa818 all I’ve done is change the entries to switch off CTCSS and changed the frequency to 438.800Mhz. Configuring the SA818 is done by running the SA818-running.py Python programme that you moved into the repeater user home directory. Making sure you are still user root, run the following commands:

cd /home/repeater
./SA818-running.py

At this point your SHARI SA818 device will be configured to operate on 438.800Mhz and CTCSS will be disabled.

If you want to change the frequency or enable and set a CTCSS tone to access the node you will need to edit the Python programme using your favourite text editor and change the entries accordingly. Once changed rerun the program as shown above and your SHARI will be reconfigured to your new settings.

Next you need to move the allmon.ini.php file into the correct directory so that it enables access to the Allstar Monitor web page on the device so that you can manage connecting/disconnecting nodes. Use the following commands as user root to achieve this:

cd /etc/asterisk
mv ./allmon.ini.php /var/www/html/allmon2/
chown root:root /var/www/html/allmon2/allmon.ini.php
chmod 644 /var/www/html/allmon2/allmon.ini.php

The allmon.ini.php file needs to have your node name entered into it for it to work correctly. As user root, change directory and edit the file using your favourite editor.

cd /var/www/html

Using your text editor, search for the line starting [XXXXX] and change the XXXXX to your node number. Save the change and exit the file.

At this point you are almost complete, all that is left to do is add your node number and node secret into the appropriate configuration files in the /etc/asterisk directory.

Since I am a Linux command line junkie I use vi to edit all the configuration files on the command line as user root, but you can use any editor of your choice.

cd /etc/asterisk

Start with the extensions.conf file. Search for the line starting with NODE = and delete the XXXXX entry and insert your node number. Save the file and edit it.

Next you need to edit the iax.conf file. This time search for the line starting with
register= and change the XXXXX for your node number and the YYYYYYYYYYYY for your node secret. Be careful not to accidentally delete any other characters in the lines otherwise it will corrupt the configuration file.

In the same file search for the two lines that start with secret = and change the YYYYYYYYYYYY for your node secret. Once you have changed both of the secret entries, save and exit the file.

The final file to edit is the rpt.conf file. Once again open the file using your favourite editor and search for the line starting with XXXXX = radio@127.0.0.1:4569/XXXXX, change the XXXXX entries for your node number making sure not to delete any other characters next to the XXXXX entries.

Further down in the same file there is a line that starts with [XXXXX], once again change the XXXXX for your node number making sure to keep the square brackets at each end of the node number as you edit it.

Finally move down to the very bottom of the file and find the two lines that start with /home/repeater/gpio, once again change the XXXXX entries for your node number.

Once this is done, save and exit the file. At this point your node should be fully configured and will only require a reboot to get it working.

As user root, reboot your raspi using the reboot command.

reboot

Once your raspi comes back online, login using SSH as user repeater and then become root user using the sudo command detailed above.

You now need to create the admin user password for the Allstar Monitor web page on the device. This is done using the following commands as user root:

cd /var/www/html/
htpasswd -c .htpasswd admin

You will be asked to enter a password twice for the admin user, make sure you make a note of this password as you will need it to login to the web page.

Once this is done your configuration is complete, logout from the terminal session by entering exit twice (once to logout as user root and another to logout as user repeater).

Using your favourite web browser enter the IP Address of your raspi into the URL bar as shown below:

http://<Your-Raspi-IP>/allmon2

Note: remove the <> from the URL once you have entered the required information.

Once this is done you should be presented with your node control panel as shown below.

First visit to the AllStar Monitor Web Page

Login using Admin and the password you set above and you are now ready to start using your node.

It’s a good idea to connect to node 55553 which is a parrot test node to check your audio levels. you can do this by entering the node into the field at the top left and pressing the connect button.

M0AWS AllStarLink Node 61928 connected to 55553 Parrot

Once connected, tune your radio to 438.800Mhz FM and transmit a test message using your callsign and test123, or something similar. The parrot will then play your recording back to you so that you can hear how you sound. It will also comment on your audio level as to whether it is OK or not.

You are now connected to AllStarLink network and have the world at your finger tips. Below is a small list of nodes in the UK, Australia and America to get you started chatting with other HAMs via your node.

55553	ASL Parrot for testing
41522	M0HOY HUBNet Manchester, UK
60349	VK6CIA 439.275 Perth, Western Australia
51077	VK6SEG South West Hub B Albany WA
2167	M0JKT FreeSTAR UK HUB 2 freestar.network
53573	NWAG NW AllStar Group Lancashire, UK
27339	East Coast Hub Wilmington NC USA
M0AWS AllStarLink Node 61928 sitting on the equipment rack

Thanks to Michael, DK1MI for building and hosting the Matrix HAM Radio Space AllStarLink Node (57881) and getting us all kicked off into the world of AllStarLink!

We hope to be having regular Matrix Net’s on the node soon for all Matrix members and visitors. We’ll organise days/times via the Digital Voice room.

More soon …

New to Amateur Radio? What is a Repeater?

27 June 2024 at 17:53
If you have not yet explored ham radio repeaters, this might be interesting to you. What is an amateur radio repeater and how do they work? In this video, with a non-amateur-radio viewer in mind, I chat about the very basic concepts of a repeater. It is filmed in a relaxed, “ride along with me,” […]

Net Control

5 June 2024 at 08:00

Before I get started, I’m going to throw out the plugs:

support some repeaters financially, or with donations of equipment, or by connecting an existing repeater to the Pride Network

Buy some cool stuff to support my passion projects!

Net Control for the NARS Club Net

Last night was my first time ever being net control! I volunteered to host a monthly net for the Narwhal Amateur Radio Society (NR7WL), of which I am a proud member. The Pride Radio Network graciously has allowed us to connect our hub to their network, so that our members (and non-members!) can connect via the plethora of bridges they have set up (DMR, YSF, D-Star, P-25, NXDN, Allstar, Echolink, etc.)

Because I figured we’d probably only have a handful of check-ins for this first time around, I decided to do the net “E-Cars” style, where as net control, I’m on for the hour, and just put out periodic calls for check-ins. I felt like that went very well, and it made me wonder why more repeater-based and network-based nets don’t run in that style, instead of the “be here at the exact right moment” variants.

I felt like it makes it easier for participants, because they can show up whenever they want during the hour, and it takes the pressure to feel like the airtime has to be filled up, off the net control and other participates. Instead, it makes it a time where you just kind of hang out, call for check-ins periodically, and either chit chat with folx who checked in, or wait quietly while multi-tasking between check-ins, based on whatever the net control, participants, and vibe for the net seem to dictate.

Anyway - I had a blast! If you’re potentially interested in checking in in the future, here are the net details:

Narwhat Amateur Radio Society Monthly Net Details

Check out the Narwhal Amateur Radio Society, and our Nets Page (details coming soon, if they aren’t already there!) for more info.

Net details as follows:

Narwhal Amateur Radio Society Monthly Net

Time: 1st Tuesday of Every Month at 7pm Pacific, 10pm Eastern

Location: Hosted on the NR7WL Allstar Node (61672), the N3VEM Repeater (Allstar 56001 & Echolink 994842), and the Pride Radio Network.

We’d like to specifically thank the Pride Group for allowing us to connect our hub to their system - The Pride Radio Network enables club members and non-members wishing to check in to connect via DMR, System Fusion, D-Star, IRLP, Echolink, M-17, NXDN, P-25, Hams over IP, Hamshack Hotline, plus some others. Be sure to check out the Pride Radio Network site as they regularly make updates and improvements to their network.

If you want to join the net via Allstar, you can simply point any Allstar enabled repeater, hotspot, or VOIP application at node 61672 during the net. If you’d like to connect via any of the other modes mentioned, please visit the Pride Radio Network Information Page for details on node numbers etc.

The NARS Club Net is a directed net, and also serves as a 1 hour time slot where net control will be monitoring the hub even if there are no check-ins. This means that folx can feel free to check in at any point during the hour that works for them; just tune in and listen for the preamble and call for check-ins which will be repeated periodically, or throw out your callsign if a few minutes goes by and you don’t hear anything.

When checking in, feel free to share your name and location as you are comfortable (or not), answer the net question, and/or share anything else that is on your mind. We strive to be welcoming and accommodating, so don’t worry about whether or not you are ‘doing it right’ - with us, you’re always doing it right as long as you’re following the guidelines of your license and having fun!

Please refer to the Narwhal Code of Conduct, which governs our behavior during the net.

All the Things

31 May 2024 at 08:00

It’s been a busy few months, and the folx who I interact with on Mastodon already know that I’ve got lots of irons in lots of fires. I figured it’s probably time for me to do a quick ‘state of the shack’ post to give a quick highlight on where all my various projects and activities stand, in case anyone has been wondering about the status of any particular item.

So, in no particular order, here we go:

Repeater

Check out the Repeater Page and posts tagged repeater for more details.

The quick summary here, is that my Motorola GR1225 died, so I currently have a machine on the air using a pair of Kenwood TK840 radios, the duplexer from the Motorola, and a new USB interface from Repeater-Builder to connect it to the computer that runs the Allstar software. After some very positive feedback on the post I wrote as I was trying to get the machine running again, I decided to start a fund-raiser to support some upgrades to the repeater, and to also help repair and get some additional repeaters on the air, which brings us to the next project…

r4e

Check out the r4e project pages for more details.

r4e is an acronym for Repeaters 4 Everybody.
As a way to support upgrades on my repeater and some additional repeaters that are operated with a purposeful mission of openness and acceptance, and to help bulk up the RF side of the Pride Radio Network, I’ve started the r4e project which some of you may have stumbled across already in the header of my site. If you’re willing to help support some repeaters financially, or with donations of equipment, or to just connect an existing repeater to the pride network, those gifts and actions can go a long way towards our roadmap!

Subversive Radio

Check out the Subversive Radio Shop for details, and to buy cool stuff!

This project is an offshoot of the r4e project, and is a way to raise additional funds for those projects by selling radio merch that (I hope) is unlike most of the stuff already out there. Buy some cool stuff to support the project!

Radio Rocket

Check out the Radio Rocket Page and the Radio-Rocket Tagged Posts for more details.

Version 3 of the rocket (Ponzu) had some body tube damage during its first flight, which is now repaired, and it’s ready to fly again. I also built a new ground station that is an all-in one unit with the single board computer, LoRa receiver, an RTL-SDR dongle for receiving APRS packets, touchscreen for launch control and data display, etc. Motors are ordered for the next launch, which will be on June 13th or 14th, as weather permits.

Club Net

Check out the Narwhal Amateur Radio Society, and our Nets Page (details coming soon, if they aren’t already there!) for more info.

A while back I joined the Narwhal Amateur Radio Society (NR7WL) - they’re a relatively new club, but have values that I dig. We had kicked around the idea of a club ‘network’ to be able to connect via digital modes, and potentially a club net. That idea sat for a little bit, but bubbled back up recently, so I took the initiative to set up an Allstar node for the club (61672) which will serve as our hub, and the location for our first club net, for which I’ll be serving as net control!

Net details as follows:

Narwhal Amateur Radio Society Club Net

Time: 1st Tuesday of Every Month at 7pm Pacific, 10pm Eastern

Location: Hosted on the NR7WL Allstar Node (61672) and the Pride Radio Network. The Pride Radio network has bridges that will allow you to connect via DMR, IRLP, System Fusion, M-17, NXDN, P-25, D-Star, Echolink, Hamps Over IP, Hamshack Hotline, plus others!

Shack

Check out posts tagged shack for more details.

I haven’t made any major updates to the shack recently, but I have moved a few things around. In the utility space behind the operating position I added a DIY rack made from lumber to move the various computer and network bits and bobs into. My next project in the shack is related to re-doing some of the audio routing - I have designs drawn up in KiCad for an interface device that will sit beside my mixer and convert all the audio to the OHIS standard. The basic reasoning behind this for me, is that by converting the audio to OHIS, I can leverage an existing standard to run a single shielded cat6 cable to each radio and device, instead of the 3 or 4 audio and PTT cables that run to each radio now. I currently have some bursting-at the seams cable management, and doing this should reduce the mess in there quite a bit. The plan is also to eventually replace my aging mixer, and build a new rack mount arrangement to the left of my operating position to house the mixer, interface, and some other related shack equipment.

ARIP

Check out the ARIP website for more info.

Diversity is something important to our hobby. If you disagree, or think this statement is somehow political, you’re part of the problem in the hobby, and I won’t engage with you on the subject. If you do feel the same way I do however, the ARIP is one of my projects that is essentially a tool that clubs, individuals, or other organizations can use as a way to show their commitment to inclusion in the hobby. The most recent update on this effort is some changes to the website and methodology to make it more of a self-serve tool. There is more information about that available on the ARIP Website

Radio League of America

Check out the Radio League of America website for more info.

Currently, the Radio League of America (RLA) is little more than an idea. That idea being that the amateur radio community is too large and diverse for everyone to have their voices heard by a single national organization. There are many amateurs who have voiced a desire for something different to be available, and the RLA is just one of many potential avenues as that movement takes life. I have committed to at some point in the near future getting together an initial presentation of what that might look like, and setting up a recurring (probably quarterly) series of meetings for people who are interested to see if it is something worth fleshing out in more detail and organizing around.

Repeater Rumination

30 April 2024 at 08:00

Many of you are aware that I run a repeater based in Witmer PA.

The repeater recently had a yet to be determined malfunction, and it was only putting out a few milliwats of power, instead of its normal 25 watts, meaning RF coverage dropped from its respectable footprint detailed on the page linked above, to only covering a mile or so.

I have started working on repairs, and hope to get it up and running quickly, but I decided to sit down and write this blog post because I’ve been ruminating on a few things related to the repeater, and thought this would be a good way to collect my thoughts, while I work through the mud.

Mission

The mission of my repeater is very near and dear to my heart - it is basically my way of creating a space on the air that has the same values I do - openness, inclusion, and welcoming to every type of individual who is interested in amateur radio. With that said, having a repeater on the air, connecting to nets that align with the repeater’s mission, and being part of the Pride Radio Network, is very important to me. The trouble is, keeping a repeater on the air takes both labor and money. So far I’ve managed to keep the machine on the air using only my own labor and money (I’ve managed to keep it frugal so far, so it’s been mostly an effort of my own labor.)

The repeater currently being offline however, is bumping into the limits of what I’m capable of accomplishing with my labor, and I’m starting to worry that getting it back on the air may end up involving more financial resources than I can muster quickly.

Options for the Most Immediate Need

So Priority 1 right now is getting something back on the air. Right now I’ve got a short list of choices:

  1. Repair the current machine myself
    • This is what I’m currently working on. I’ve only got a few dollars worth of parts in it. I’m waiting for one more to arrive, and crossing my fingers that it will be the magic bullet that gets me back on the air.
  2. Replace the current machine with a new one made of essentially 2 commercial radios and the duplexer from the current machine.
    • I have 2 radios that can be used, but this option will require a little more money for a new controller, bits to make some new harnesses, and misc. hardware- no biggie, it would just have to wait a few weeks because I do keep a pretty small/tight hobby budget so that we can sock away for education and stuff for our kids.
  3. Pay someone else to repair the current machine?
    • I have zero idea what this would cost, or who I would take it to (there is a commercial shop locally that used to service this model when it was in production, so they might still be willing). I suspect it would cost more than my plan B, but I imagine it couldn’t be too bad. It would also be a way to be more confident in getting the current machine back on the air, instead of having it become more e-waste, so I’m inclined to shop around a bit if I can’t get it working myself.
  4. Figure out how to scrounge up a little more money and buy a mostly direct replacement
    • This specific model can sometimes still be had for a fairly reasonable amount, and there are other comparable out of production repeaters from other companies that are similar in features and cost, if you can sort out the programming.
  5. Figure out how to scrounge up a larger amount of money and buy a ‘proper’ replacement -
    • i.e. something either still in production, or in production recently enough that parts, service, programming software, etc., are actually available without having to go through dubious methods to make it happen:-) This could be big $$$, but Yeasu does have that program on their repeaters that makes the price of a new repeater not much more than buying a used one.

The Wheels Have Started Turning

So, while I’m most likely to keep slogging away at some combination of the first 3 items above, (maybe, just maybe, jumping to the 4th) this is where my thoughts start to take a meandering path. If you’re still with me, thanks! If you bow out here, I won’t be offended, because I’m not 100% sure where this thought train is going.

Like many things, all of this would be easier if there were more $$$ available to throw at the problem.

I don’t like asking people for money, but I have considered setting up something to be able to take donations for the support of the repeater. I suspect doing so I’d maybe be able to look harder at option 3, or maybe even 4 eventually, but I’m not sure if I’m comfortable asking for donations, and I don’t know what kind of tax nightmare that might become.

The other things I’ve considered would be reaching out to one of the clubs that I’m a member of that is a proper non-profit, to see if they’d be willing to act as my ‘sponsor’ to apply for an ARDC grant, to enable me to skip right to the 4th option.

With the 2 money ideas, I then spiral into the next rathole of thoughts - if I could scrounge up some resources via a combination of donations/grants, it would be very satisfying to me to acquire and set up machines, and then ship them around to places where I can find people willing to put them up at their homes or club sites, to help add more machines with full time connections to things like the Pride Radio Network.

The thought above, surprise surprise, took me spiraling down yet another side-tunnel in this rat-nest of ideas… If money were not the hurdle, and I was helping to do this on a slightly larger scale, maybe the thing to do would be to stop operating my current repeater and any future repeaters under my own callsign, but instead maybe do it as a volunteer trustee for one of the clubs I participate in, so that the repeater network is ‘theirs’ instead of my own. Only catch there is getting into the volunteer thing can turn into a giant time commitment, which I’m not sure I could actually make (I had to drop some of my volunteer activities already, since I have a large family.)

So anyway, thats my crazy-train of thoughts for the moment. Real world, I’m most likely to focus on getting this machine fixed myself or by hiring it out, and then saving up over the long run for an eventual replacement, but it felt good to get all these thoughts out of the brain and into text.

If you have any input or suggestions I’d love to hear them - hit me up at my email (I’m good on QRZ) or via Mastodon.

Foray Into AREDN

17 April 2024 at 08:00

I’ve been dabbling with AREDN the last several weeks. I’m not really an emcom guy, but I did want to dabble with the mesh stuff, and in my particular use case, it seemed like it might be a fun way to send my Radio Rocket’s data ‘back home’ instead of using a cellular hot spot and paying for data. I figure AREDN is a way I can do my dabbling, but maybe be of some use to the emcom folx by at least filling in a bit of a coverage hole if they need it, since there are no nodes around me, and I do have some limited emergency power at my disposal if needed.

Even though the mesh stuff is mostly line of site, I think I should still be in good shape, because of our 4 primary launch sites, one definitely has a line of site shot back home, one of them probably should, and one of them might. The 4th is probably a no-go for direct line of site, but I do have access to a TV tower on a family member’s property to add a relay node if needed…

Anyway, I haven’t done anything terribly exciting yet to really share, other then just getting my first 2 nodes set up. My only advice is to maybe avoid the TP-Link CPE210 devices. It may have been user error, but I fought with one until I gave up :-). For the 2 nodes that I got running, the GL.iNet AR300M16-ext device I got to be the mobile node was wild easy to set up, and the Mikrotik Basebox that I set up for my home node went pretty much according to directions, after being extremely careful about making sure I had the most recent nightly build of the firmware, and followed the directions exactly. (Imagine that!)

I may share more stuff on the project in the future, but for now I threw up a new static page with info on my nodes that folx can check out if they’re curious.

Thanks for stopping by!

Retevis RT85 antenna SWR

By: M0AWS
4 July 2023 at 09:25

Since purchasing my Retevis RT85 2m/70cm handheld radio I’ve noticed that it seems rather deaf when using the antenna that came with the radio and isn’t as strong into the local repeaters as I imagined it would be.

Considering the local 2m and 70cm repeater isn’t that far from my QTH and there is pretty much a clear line of site view in the direction of the repeater I was somewhat surprised that on 70cm the repeater never breaks the squelch, even if it is set on it’s lowest setting of zero.

M0AWS Retevis RT85 dual band VHF/UHF Handheld Radio

Connecting my home made end fed dual band vertical dipole at 10m above ground the performance of the radio improves drastically as one would expect.

Having recently purchased a JNCRadio VNA 3G antenna analyser I decided to connect the Retevis supplied antenna to the analyser and see what the resonance was like on the two bands.

The antenna is labelled as 136-174Mhz and 400-470Mhz. This is an extremely wide frequency range for such a small antenna and clearly isn’t going to perform that well over such a wide bandwidth.

Connecting the antenna to the VNA and setting the stimulus frequency range to 144-148Mhz I found that the SWR curve of the antenna wasn’t particularly good.

M0AWS Retevis RT85 Antenna SWR Curve 2m

As shown above the SWR curve on the 2m Band is pretty poor. At 144.0Mhz it’s just over 3:1, at 145.496 (closest I could get to the 145.500 calling channel) the SWR is still 2.1:1. The antenna doesn’t really get close to resonance until 148Mhz where the SWR is 1.46:1.

With an SWR this high the radio will almost certainly be reducing the O/P power considerably to protect the PA stage from over heating due to so much power be reflected back into the transmitter. This explains the poor performance when using 2m repeaters locally and the somewhat limited range when using the OEM supplied antenna.

Looking at the SWR curve on the 70cm band, the antenna is much closer to resonance than it is on the 2m band but, it’s still not perfect.

M0AWS Retevis RT85 Antenna SWR Curve 70cm

At 430Mhz the SWR is 1.56:1, at 435Mhz 1.63:1 and 440Mhz 1.72:1. Since the antenna is much closer to resonance on the 70cm band I would expect it to perform better than it does.

Looking at the SWR curves over the entire supported frequency range of 136-174Mhz and 400-470Mhz, there is only one point of resonance on VHF around 148Mhz and on UHF around 400Mhz.

Retevis RT85 VHF Antenna SWR Curve
Retevis RT85 UHF Antenna SWR Curve

With such disappointing performance on both VHF and UHF I’ve decided to investigate making my own 2m/70cm antenna for the handheld to see if I can improve both the SWR on each band and the overall performance of the radio.

More soon …

Repeater Ramblings

3 December 2022 at 00:37

The N3VEM Repeater

It’s dawning on me that I’ve never really written about the fact that for a few months, I’ve officially been a member of the ‘repeater owner’ club. The saga actually began a number of years ago, when one of the offices at my work was getting rid of a repeater. It’s a long story about how that came about, but at the end of the day, they were getting rid of it, so I saved it so it could see a second life on the amateur bands.

The actual repeater in question is a Motorola GR1225 (UHF version), which were fairly common ‘desktop repeaters’ that were in use in quite a few businesses. As cell phones took over the niche they filled, they seemed to become readily available on the used market. Even if you don’t luck out like I did and save one that was bound for the trash, you can usually find them on Ebay for just a few hundred dollars.

Anyway, the repeater sat on the floor of my home office, unused, for a several years, because I wasn’t quite sure how I wanted to press it into service. In our area, 70cm isn’t super popular, and most of the 70cm repeaters sit quiet, so I wasn’t in a hurry to just stick it on the air to add yet another unused 70cm machine.

Within the last year or so however, the Ham Radio Workbench crew started talking about setting up an Allstar hub, which they did (node 55915). It was at that point that I said - heck, I have an unused repeater sitting on my floor - why not put it on the air, add Allstar capabilities to it, and have it hang around connected to their hub?

And so the project began…

Repeater Coordination

Repeater coordination councils are all volunteer, so this takes some time! In my case it took about ~5 months from application, until I was assigned my frequency pair by the council that coordinates my area. While I waited, I did start ‘construction’ but just put the repeater on the air uncoordinated, with a low-to-the ground antenna, on a frequency pair that was unused in the area.

Construction

Since the machine is a desktop repeater, construction wasn’t too involved - just a few steps:

  1. Tuning the duplexer, which I did twice - once while I was uncoordinated, and then once again when I was assigned my final pair. W2AEW has a bunch of great videos on his youtube channel. I don’t have a ton of fancy equipment, but I think I got pretty decently tuned with my nano VNA, following this video specifically, to guide me along the way. As a note, since this is a desktop repeater, it only has the notch-type ‘portable’ duplexer, which works fine running here at my house, since I’m the only source of RF :-)
  2. Audio interface for Allstar - since this is a Motorolla repeater, I was able to use one of the RIM-lite interfaces from repeaterbuilder, which plugs directly into the back of the transciver, and in turn accepts the USB cable. I had to fiddle with some of the settings in the radio software, but it really wasn’t too difficult to get up and running.
  3. Allstar Node - pretty straightforward stuff here too - Raspberry Pi3, running Allstarlink. There seems to be some contention in the Allstar world, between Allstarlink and Hamvoip. At the time I went with Allstarlink because it seemed like the one that was more “open” and it sounds like there is some stuff in Hamvoip that might be slightly borderline as far as software license legality goes (Although I was more concerned about openness that software licenses - In some cases I firmly believe that piracy is the moral thing to do). I didn’t dig deep into it though, so do your own homework:-)
    In hindsight, I’m glad I went with Allstarlink. This is because it runs on Debian, and I was able to fairly easily install node-red along side it. Hamvoip runs on Arch, which seemed way more fiddly when I played around with it recently.
  4. Node-RED - as mentioned, I installed Node-RED alongside Allstarlink, and I’m using that to schedule and fire off announcements etc, instead of the macros and scheduler that are built into both Allstarlink and Hamvoip.
  5. Antenna - Nothing too fancy here - jut a Diamond X50NA, on a mast at the eve of my house, with a fairly direct run of LMR400.

Future thoughts

I’ll dabble with this for a while on a small scale, and if I find I enjoy the whole repeater-ownership thing, I’ll probably start working on upgrading at some point down the road. Some of this would require re-applying for updated coordination, but the things I’d probably want to explore would be:

  • Getting the Antenna higher, once I put up a proper antenna, or find a cheap/free place to move the machine too, instead of my house.
  • Switching to hard line (les loss, etc. etc.)
  • Getting my hands on some proper notch/pass cans for better filtering/isolation
  • An external PA maybe - I have the machine on low power - it’s capable of more, but this model is known for blowing finals when run at any fairly high duty cycle on their high power setting.

Anyway, that’s the story for now, and I’m having fun dabbling around with it!

There is a page specifically with info on the repeater, so make sure to check that out as well!

Fixing the CAT Systems DL-1000 and AD-1000 repeater audio delay boards

By: Unknown
25 November 2021 at 17:47

Figure 1:
The older DL-1000 (top) and the newer
AD-1000, both after modification.
Click on the image for a larger version.

Comment: 

There is a follow-up of this article where an inexpensive PT2399-based reverb board is analyzed and converted into a delay board suitable for repeater use:   Using an inexpensive PT2399 music reverb/effects board as an audio delay - LINK

A few weeks ago I was helping one of the local ham clubs go through their repeaters, the main goal being to equalize audio levels between the input and output to make them as "transparent" as possible - pretty much a matter of adjusting the gain and deviation appropriately, using test equipment.  Another task was to determine the causes of noises in the audio paths and other anomalies which were apparent to a degree at all of the sites.

All of the repeater sites in question use CAT-1000 repeater controllers equipped with audio delay boards to help suppress the "squelch noise" and to ameliorate the delay resulting from the slow response of a subaudible tone decoder.  Between the sites, I ran across the older DL-1000 and the newer AD-1000 - but all of these boards had "strange" issues.

The DL-1000:

This board uses the MX609 CVSD codec chip which turns audio into a single-bit serial stream at 64 kbps using a 4-bit encoding algorithm, which is then fed into a CY7C187-15 64k x 1 bit RAM, the "old" audio data being read from the RAM and converted back to audio just before the "new" data is written..  To adjust the amount of delay in a binary-weighted fashion, a set of DIP switches are used to select how much of this RAM is used by enabling/disabling the higher-order address bits.

The problem:

It was noticed that the audio from the repeater had a bit of an odd background noise - almost a squeal, much like an amplifier stage that is on the verge of oscillation.  For the most part, this odd audio property went unnoticed, but if an "A/B" comparison was done between the audio input and output - or if one inputted a full-quieting, unmodulated carrier and listened carefully on a radio to the output of the repeater, this strange distortion could be heard.

Figure 2:
The location of C5 on the DL-1000.  A 0.56 uF capacitor was
used to replace the original 0.1 (I had more of those than
I had 0.47's)
and either one would probably have been fome
As noted below, I added another to the bottom of the board.
Click on the image for a larger version.

This issue was most apparent when a 1 kHz tone was modulated on a test carrier and strange mixing products could be heard in the form of a definite "warble" or "rumble" in the background, superimposed on the tone. Wielding an oscilloscope, it was apparent that there was a low-frequency "hitchhiker" on the sine wave coming out of the delay board that wasn't present on the input - probably the frequency of the low-level "squeal" mixing with the 1 kHz tone.  Because of the late hour - and because we were standing in a cold building atop a mountain ridge - we didn't really have time to do a full diagnosis, so we simply pulled the board, bypassing the delay audio pins with a jumper.

On the workbench, using a signal tracer, I observed the strange "almost oscillation" on pin 10 of the MX609 - the audio input - but not on pin 7 of U7B, the op-amp driver.  This implied that there was something amiss with the coupling capacitor - a 0.1uF plastic unit, C5, but because these capacitors almost never fail, particularly with low-level audio circuits, I suspected something fishy and checked the MX609's data sheet and noted that it said "The source impedance should be less than 100 ohms.  Output channel noise levels will improve with an even lower impedance."  What struck me was that with a coupling capacitor of just 0.1uF, this 100 ohm impedance recommendation would be violated at frequencies below 16 kHz - hardly adequate for voice frequencies!

Figure 3:
The added 2.2uF tantalum capacitor on the bottom of
the board across C5.  The positive side goes toward
the MX609, which is on the right.
Click on the image for a larger version.

Initially, I bridged C5 with another 0.1uF plastic unit and the audible squealing almost completely disappeared.  I then bridged C5 it with a 0.47uF capacitor which squashed the squealing sound and moved the 100 ohm point to around 4 kHz, so I replaced C5 with a 0.56uF capacitor - mainly because I had more of those than small 0.47uF units.

Not entirely satisfied, I bridged C5 with a 10uF electrolytic capacitor, moving the 100 ohm impedance point down to around 160 Hz - a frequency that is below the nominal frequency response of the audio channel - and it caused a minor, but obvious quieting of the remaining noise, particularly at very low audio frequencies (e.g. the "hiss" sounded distinctly "smoother".)   Because I had plenty of them on-hand, I settled on a 2.2 uF tantalum capacitor (100 ohms at 723 Hz) - the positive side toward U2 and tacked to the bottom of side of the board - which gave a result audibly indistinguishable from 10 uF.  In this location, a good-quality electrolytic of 6.3 volts or higher would probably work as well, but for small-signal applications like this a tantalum is an excellent choice, particularly in harsh temperature environments.

At this point I'll note that any added capacitance should NOT be done with ceramic units.  Typical ceramic capacitors in the 0.1uF range or higher are of the "Z5U" type or similar and their capacitance changes wildly with temperature meaning that extremes may cause the added capacitance to effectively "go away" and the squealing noise may return under those conditions.  Incidentally, these types of ceramic capacitors can also be microphonic, but unless you have strapped your repeater controller to an engine, that's probably not important.

Were I to do this to another board I would simply tack a small tantalum (or electrolytic) capacitor - anything from 1 to 10 uF, rated for 6 volts or more - on the bottom side of the board, across the still-installed, original C5 (as depicted in Figure 3) with the positive side of the capacitor toward U2, the MX609.

Note: 

One of the repeater sites also had a "DL-1000A" delay board - apparently a later revision of the DL-1000.  A very slight amount of the "almost oscillation" was noted on the audio output of this delay board, too, but between its low level and having limited time on site, we didn't investigate further. 
This board appears to be similar to the DL-1000 in that it has many of the same chips - including the CY7187 RAM, but it doesn't have a socketed MX609 on the top of the board, and likely a surface-mount codec on the bottom.  It is unknown if this is a revision of the original DL-1000 or closer to the DL-1000C which has a TP4057 - a codec functionally similar to the MX609.

The question arises as to why this modification might be necessary?   Clearly, the designers of this board didn't pay close enough attention to the data sheet of the MX609 codec otherwise they would have probably fitted C5 with a larger value - 0.47 or 1 uF would have probably been "good enough".  I suspect that there are enough variations of the MX609 - and that the level of this instability - is low enough that it would largely go unnoticed by most, but to my critical ears it was quite apparent when an A/B comparison was done when the repeater was passing a full-quieting, unmodulated carrier and made very apparent when a 1 kHz tone was applied.

* * * * * * * * * * * * * * *

The AD-1000:

This is a newer variant of the delay board that includes audio gating and it uses a PT2399, a chip commonly used for audio echo/delay effects in guitars pedals and other musical instrument accessories as it has an integrated audio delay chip that includes 44 kbits of internal RAM.

The problems:

This delay board had two problems:  An obvious audio "squeal", very similar to that on the older DL-1000, but extremely audible, but there was a less obvious problem - something that sounded like "wow" and flutter of an old record on a broken turntable in that the pitch of the audio through the repeater would warble randomly.  This problem wasn't immediately obvious on speech, but this pitch variation pretty much corrupted any DTMF signalling that one attempted to pass through the system, making the remote control of links and other repeater functions difficult.

RF Susceptibility:

Figure 4:
The top of the modified AD-1000 board where the
added 1k resistor is shown between C11/R13 and
pin 2 of the connector, the board trace being severed.
Near the upper-right is R14, replaced with a 10 ohm resistor,
but simply jumpering this resistor with a blob of solder
would likely have been fine.
Click on the image for a larger version.
This board, too, was pulled from the site and put on the bench.  There, the squealing problem did not occur - but this was not unexpected:  The repeater site is in the near field of a fairly powerful FM broadcast and high-power public safety transmitters and it was noticed that the squealing changed based on wire dressing and by moving one's hand near the circuit board.  This, of course, wasn't easy to recreate on the bench, so I decided to take a look at the board itself to see if there were obvious opportunities to improve the situation.

Tracing the audio input, it passes through C1, a decoupling capacitor, and then R2, a 10k resistor - and this type of series resistance generally provides pretty good resistance to RF ingress, mainly because a 10k resistor like this has several k-ohms of impedance - even at VHF frequencies, which is far higher impedance than any piece of ferrite material could provide!

The audio output was another story:  R13, another 10k resistor, is across the output to discharge any DC that might be there, but the audio then goes through C11, directly to pin 1 of U2, the output of an op-amp.  While this may be common practice under "normal" textbook circumstances, sending the audio out from an op-amp into a "hostile" environment must be done with care:  The coupling capacitor will simply pass any stray RF - such as that from a transmitter - into the op amp's circuitry, where it can cause havoc by interfering/biasing various junctions and upsetting circuit balance.  Additionally, having just a capacitor on the output of an op amp can be a hazard if there also happens to be an external RF decoupling capacitor - or simply a lot of stray capacitance (such as a long audio cable) as this can lead to amplifier instability - all issues that anyone who has ever designed with an op amp should know!

Figure 5:
The added 1000pF cap on the audio gating lead.
A surface-mount capacitor is shown, soldered to the
ground plane on the bottom of the board, but a small disk-
ceramic of between 470 and 1000 pF would likely be fine.
Click on the image for a larger version.
An easy "fix" for this, shown in Figure 4, is simply to insert some resistance on the output lead, so I cut the board trace between the junction of C11/R13 and connector P1 and placed a 1k resistor between these two points:  This will not only add about 1k of impedance at RF, but it will decouple the output of op amp U2 from any destabilizing capacitive loading that might be present elsewhere in the circuit.  Because C11, the audio output coupling capacitor is just 0.1uF, the expected load impedance in the repeater controller is going to be quite high, so the extra 1k series resistance should be transparent.

Although not expected to be a problem, a 1000pF chip cap was also installed between the COS (audio gate) pin (pin 5) and ground - just in case RF was propagating into the audio path via this control line - this modification being depicted in Figure 5.

Of course, it will take another site visit to reinstall the board to determine if it is still being affected by the RF field and take any further action.

And no, the irony of a repeater's audio circuitry being adversely affected by RF is not lost on me!

 The "wow" issue:

On the bench I recreated the "wow" problem by feeding a tone into the board, causing the pitch to "bend" briefly as the level was changed, indicating that the clock oscillator for the delay was unstable as the sample frequency was changing between the time the audio entered and exited the RAM in the delay chip.  Consulting the data sheet for the PT2399 I noted that its operating voltage was nominally 5 volts, with a minimum of 4.5 volts - but the chip was being supplied with about 3.4 volts - and this changed slightly as the audio level changed.  Doing a bit of reverse-engineering, I noted that U4, a 78L05, provided 5 volts to the unit, but the power for U2, the op amp and U3, the PT2399, was supplied via R14 - a 100 ohm series resistor:  With a nominal current consumption of the PT2399 alone being around 15 milliamps, this explained the 1.6 volt drop.

The output at resistor R14 is bypassed with C14, a 33 uF tantalum capacitor, likely to provide a "clean" 5 volt supply to decouple U14's supply from the rest of the circuit - but 100 ohms is clearly too much for 15 mA of current!  While testing, I bridged (shorted) R14 and the audio frequency shifting stopped with no obvious increase in background noise, so simply removing and shorting across R14 is likely to be an effective field repair, but because I had some on hand, I replaced R14 with a 10 ohm resistor as depicted in Figure 4 and the resulting voltage drop is only a bit more than 100 millivolts, but retaining a modicum of power supply decoupling and maintaining stability of the delay line.

Figure 6:
Schematic of the AD-1000, drawn by inspection and with the aid of the PT2399 data sheet.
Click on the image for a larger version.

Figure 6, above, is a schematic drawn by inspection of an AD-1000 board with parts values supplied by the manual for the AD-1000.  As for a circuit description, the implementation of the PT2399 delay chip is straight from the data sheet, adding a dual op-amp (U2) for both input and output audio buffering and  U1, a 4053 MUX, along with Q1 and components, were added to implement an audio gate triggered by the COS line.

As can be seen, all active circuits - the op-amp, the mux chip and delay line - are powered via R14 and suffer the aforementioned voltage drop, explaining why the the supply voltage to U3 varied with audio content, causing instability in audio frequencies and difficulty in decoding DTMF tones passed through this board - and why, if you have one of these boards, you should make the recommended change to R14!


Conclusion:

What about the "wow" issue?  I'm really surprised that the value of R14 was chosen so badly.  Giving the designers the benefit of the doubt, I'll ignore the possibility of inattention and chalk this mistake, instead, to accidentally using a 100 ohm resistor instead of a 10 ohms resistor - something that might have happened at the board assembly house rather than being part of the original design. 

After a bit of digging around online I found the manual for the AD-1000 (found here) which includes a parts list (but not a schematic) that shows a value of 100 ohms for R14, so no, the original designers got it wrong from the beginning!

While the RF susceptibility issue will have to wait until another trip to the site to determine if more mitigation (e.g. addition of ferrite beads on the leads, additional bypass capacitance, etc.) is required, the other major problems - the audio instability on the DL-1000 and the "wow" issue on the AD-1000 have been solved.

* * * * * * * * * * * * * * *

Comments about delay boards in general:

  • Audio delay/effects boards using the PT2399 are common on EvilBay, so it would be trivial to retrofit an existing CAT controller with one of these inexpensive "audio effects" boards to add/replace a delay board - the only changes being a means of mechanically mounting the new board and, possibly, the need to regulate the controller's 12 volt supply down to whatever voltage the "new" board might require.  The AD-1000 has, unlike its predecessor, an audio mute pin which, if needed at all, could be accommodated by simple external circuitry.  Another blog post about using one of these audio delay/effects boards for repeater use will follow.
  • In bench testing, the PT2399 delay board is very quiet compared the MX609 delay board - the former having a rated signal-noise ratio of around 90 dB (I could easily believe 70+ dB after listening) while the latter, being based on a lossy, single-bit codec, has a signal-noise ratio of around 45 dB - about the same as you'd get with a PCM audio signal path where 8 bit A/D and D/A converters were being used.

A signal/noise ratio of around 45 dB is on par with a "full quieting" signal on a typical narrowband FM communications radio link so the lower S/N ratio of the MX609 as compared with the PT2399 would likely go unnoticed.  Were I to implement a repeater system with these delay boards I would preferentially locate the MX609-based delay boards in locations where the noise contribution would be minimized (e.g. the input of the local repeater) while placing the quieter PT2399-based board in signal paths - such as a linked system - where one might end up with multiple, cascaded delay lines on link radios as the audio propagates through the system.  Practically speaking, it's likely that only the person with a combination of a critical ear and OCD is likely to even notice the difference!


This page stolen from ka7oei.blogspot.com


[End]

❌
❌