❌

Normal view

There are new articles available, click to refresh the page.
Before yesterdayMain stream

Project TouCans and the Squizzled PA FETs

Or, how I learned to miss hard resetting RFI.


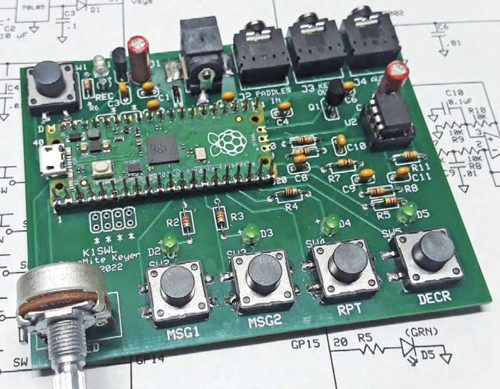
Up until about a week and a half ago, Project TouCans and the Flying Rockmite before it had never blown a final amplifier transistor. Our good fortune with transistors was caused in large part not by any particular genius in the construction or handling of the radio, but almost entirely to radio frequency interference. When too much RF energy was reflected back into the radio on key down, the Rockmite's picokeyer would reset chirping out an only slightly irritated 73 in Morse code. Hence, we couldn't use the rig, hence we changed the antenna or repaired the rig, or turned down the bias voltage on the Tuna Topper final until we could use the rig without resetting that little keyer.

Then! Then we did something that was both cool and, (we'd later find out), somewhat daunting. We removed the last of the wires that attached Project TouCans to the Earth and our RFI just went away. Which has been great for signal quality, and as it tuns out it's occasionally been hell on the amplifier.

At present count, we're three transistors down.

After the rig dropped from about 15 feet up to the ground recently, I did a quick inspection and then, (why!!!!??? why did I do that???), decided I'd measure the rig's output power since I hadn't done that in a while. The power meter reported 3 Watts. The rig nominally outputs 5 Watts. I adjusted the bias voltage on the Tuna Topper and.. still 3 Watts. I increased the voltage two more times, and? The final transistor blew out. (Eventually taking the rechargeable battery with it.) KO6BTY and I completed our debug yesterday, reattached the power meter, (which apparently no longer works since it reported 0 Watts at all bias voltages), and fairly quickly blew out the amp transistor again as I blithely upped the bias voltage.

Turns out I can't do that anymore. our keyer RFI safeguard is gone.

Interestingly, we did discover that when the bias is set to low on the amp, there's a whistling feedback tone that appears in the audio output. When the amp is biased correctly, and before it's biased too high and takes out the transistor, (i.e. in nominal operating mode), the whistling tone goes away. Audio debug lives on to a certain extent.

We'll be dropping in transistor number four tomorrow. I'll keep you posted.


Debouncing switches can be a challenge

By: Dan KB6NU
29 March 2024 at 15:31
A photo of the PicoMite Keyer board.
The PicoMite Keyer hardware has five pushbuttons and uses two I/O pins for the dit and dah paddle contacts.

One of the challenges that I faced when I started my Micropython keyer project was debouncing the switch closures. There are seven in all: five pushbuttons and the dit and dah inputs.

So, I did what everybody does nowadaysβ€”perform an internet search. I searched for β€œswitch debouncing with Micropython” and got about a zillion references.

One of the first references is actually part of the Micropython documentation. The documentation suggests that one read the current value of a given pin, wait for the value to change, and then verify that the new value is stable for at least 20 ms. They give the following example code:

import pyb
def wait_pin_change(pin):
    # wait for pin to change value
    # it needs to be stable for a continuous 20ms
    cur_value = pin.value()
    active = 0
    while active < 20:
        if pin.value() != cur_value:
            active += 1
        else:
            active = 0
        pyb.delay(1)

And, here’s how you would use this function:

import pyb
pin_x1 = pyb.Pin('X1', pyb.Pin.IN, pyb.Pin.PULL_DOWN)
while True:
    wait_pin_change(pin_x1)
    pyb.LED(4).toggle()

pyb, by the way, is a library of functions that support the PyBoard, a small microcontroller board that was designed specifically to run MicroPython. Pin is one of the classes in the pyb library that provides I/O pin functions.

More stuff from the internet

This is a simple solution, and really too simple for my project. So, I kept looking and found a bunch more solutions:

  • Jack Ganssle, a long time embedded systems consultant, has published a couple of pages on debouncing on his blog, A Guide to Debouncing, or, How to Debounce a Contact in Two Easy Pages. Being a hardware guy, Ganssle gives a nice explanation of the problem before he goes on to show us his solution.
  • Hack-a-Day has also tackled this issue with two posts, Embed with Elliot: Debounce Your Noisy Buttons, Part I and Part II.

What I ended up using is the asyncio library that was developed for MicroPython. This allows a programmer to implement a form of multi-tasking called β€œcooperative multi-tasking,” which is widely used in embedded systems. It’s more complicated programming this wayβ€”you have to keep in mind all the various things that can be running at the same timeβ€”but there are definite advantages as well.

For example, I think when I get to the point of implementing accepting commands via the USB port, it will be easier to do this. Commands will be arriving asynchronously, after all.

Another advantage to using this library is that it has drivers for switches, pushbuttons, ADCs, and incremental encoders. The switch drivers, for example, include functions that detect both short and long presses. This is a feature that I’m using in this project.

Hardware solution

There is also hardware solutions to debouncing switches. These range from simply soldering a capacitor across the switch to connecting the switch to a Schmitt trigger. Β For more information on these solutions, and how to make the tradeoff between hardware and software solutions, see Ultimate Guide to Switch Debounce by Max Maxfield.

Remote control IC-7300

28 March 2024 at 15:17

Er zijn diverse commerciΓ«le remote control oplossingen verkrijgbaar voor de ICOM IC-7300 maar deze zijn aardig prijzig en ook redelijk eenvoudig zelf te maken voor aanzienlijk minder kosten. Ik heb dit gedaan met een paar schakelaars (drukkers) en een aantal weerstanden van Tessatronic in Hengelo, een stuk UTP kabel en een oud blikken snoepdoosje.

Een tijdje geleden had ik al een controller gemaakt voor de 4 geheugen kanalen (M1 t/m M4) en sinds vandaag zijn daar twee knoppen aan toegevoegd voor frequentie Up en Down. Ik sluit het geheel aan op de microfoon switch van MFJ de MFJ-1260. Hiermee kan ik schakelen tussen de vaste microfoon of de head set. Bij beide zit een parallelle RJ-45 connector waar ik de remote control op aan kan sluiten.

ICOM IC7300 Remote Control PE2V dicht
ICOM IC7300 Remote Control PE2V open
ICOM IC7300 Remote Control PE2V schema

De belangrijkste reden om de twee knoppen toe te voegen was de lichamelijke houding t.o.v. de IC-7300. De TRX staat eigenlijk iets te ver weg bij mij vandaan waardoor je constant voorover gebogen moet zitten om bij de afstemknop te komen. In het kader van een goede werkhouding dus de afstemknoppen (Up en Down) remote gemaakt.

Nog wel een tip: mocht je dit ook gaan bouwen en een UTP kabel gaan gebruiken; dit gaat niet zomaar werken omdat het microfoonsignaal meegaat in de kabel. Met als resultaat: brom. Dus je ontkomt er niet aan om de connector eraf te knippen en een nieuwe terug te plaatsen met alleen de draden voor PIN 3 en PIN 6 (Massa). Hierdoor kun je natuurlijk ook een dunnere kabel dan een UTP kabel gebruiken. Dit heb ik niet gedaan. Het voelt wel lekker stevig aan zo.

Hieronder een filmpje van de VERON VHF UHF contest van juni 2023 waarin ik de controller gebruik voor de Voice Keyer. Dus het automatisch een tekstbericht af laten spelen die opgeslagen is onder een van de 4 geheugenkanalen. In dit geval CQ Contest:

Het bericht Remote control IC-7300 verscheen eerst op PE2V.

Noise and Reboot Improvements

Β Just a quick note. I mentioned yesterday that the rig has been rebooting when the keyer is run to quickly. This appears to be related to a design choice I didn't mention. I'd moved the headphone plug's ground wire directly onto the USB-C power adapter ground port. Moving the wire back to a ground connection at the keyer relay has solved the reboot issue, at least for the morning. At the same time, I also routed the ground wire across the bottom of the battery pack, keeping it even further away from the USB-C power adapter. Speaking of mornings


❌
❌