Another Hamfest is over… 160 mile round trip for me (ok, plus a diversion where I followed the signs to a service station which were ok until the last junction and I ended up on another motorway!!) but not a bad trip. Except for the roadworks on the A1… Anyway, a 6/4/2/70cm collinear came home with me and it is now installed in the loft replacing the existing 2/70cm one. Same cable etc. I also finished off the boarding over one bedroom – surprisingly the one where the antenna is and no, that’s not the reason for completing the boarding. Honest!
It has, as one may expect very little gain at 6m and 4m but replaces the 4m ground plane that I had and was rather in the way. Plus I never had any form of vertical for 6m.
I also managed to today the antennas up a bit. The 70cm big wheel is now no longer under the 2m big wheel and has its own place farther away. The 2m big wheel has moved so I can actually walk across the loft without needing to crawl under it.
I also recently acquired 2m and a 70cm QFH antennas from ft8.co.uk. These are really well made, being constructed from copper pipe and waterproofed. I will be experimenting with QFH antennas but wanted proper ones due to (a) being too lazy to build right now and (b) even when I do build one I need something to compare it to. Currently only the 70cm one in set up, in the loft again, and replacing a discone which was also in the way. This feeds a Cross Country Wireless HF-UHF antenna splitter and provides the antenna for three LoRa modules, one for TinyGS, one for radiosondes and one is a LoRa APRS iGate (RX only). The satellite reception report via the TinyGS console shows the antenna is working really well. My plan though is to replace this with a parasitic Lindenblad (seeing I am building one) and then actually use the two QFH antennas for satellite work. The only downside there is the need for more coax feeds into the shack from the hole in the ceiling, said hole already being full. But at some stage I need to enlarge it to run the LDF4-50A up for the QO100 dish once I move that from the garage wall. That will be a major tidying-up exercise!
I’ve been toying with the idea of putting together a small radio kit based on my (tr)SDX or something similar, so I’ve been looking at small paddles to go with it. Browsing through eBay recently, I came across several listings for the QU-21C paddles. They were inexpensive, so I thought I’d order them and give them a shot.
These paddles are nothing new; they’ve been around for a few years. (I’m definitely no early adopter.) The QU-21C paddles are made in China and mine are marked with the brand name, Magic Rabbit. From other reviews I have seen, there may be other manufacturers. So, the quality and packaging may vary. I paid about $24 USD from a seller (iDrone) that ships from the U.S., but you can find them listed for less than $20, if you don’t mind waiting for a shipment from China.
Opening the package, I found the paddles are even smaller than I expected. The base is approximately .98 inch by .98 inch (25mm x 25mm) and 1 inch (26mm) tall. The overall length, including the paddles, is 1.9 inches (48.5mm). On my kitchen scale, the paddles weighed in at 1.25 ounces (34 grams). The paddles appear to be 3-D printed, but the quality is pretty good. The base of the paddles is magnetic, which is one feature that first drew my attention.
Magic Rabbit QU-21C paddles with the rubber pad attached to the magnet. The pad looks a little ragged around the edges, because I applied it, removed it, and then decided to put it back on. I messed it up a little in the process.
The package I received included:
Paddles with a magnet attached to the bottom
3-ft cable with 3.5mm stereo plugs on each end
Hex wrench for adjusting contact spacing
Two adhesive metal discs
Adhesive rubber pad
Plastic storage case that holds everything
Some of the accessories that came with it. The cable is inside the clear plastic storage box. The adhesive discs can be applied anywhere, so you can use the attach the paddles magnetically.
My first impression was that the contact spacing seemed a little wider than I like. I used the supplied hex wrench and adjusted the spacing until the contacts were completely closed. Then, I backed off a little.
I prefer a light spring tension on my paddles, but the spring in these paddles seems stiffer than I’m used to. Unfortunately, there’s no adjustment for that. So, I’ll just have to get used to using a little more force than my other paddles.
I’m not sold on the magnetic base, though. The square magnet is fairly strong, but it’s highly polished. So, the paddles sometimes have a tendency to slide when I’m sending. I applied the rubber pad that comes with it, but that seemed to offer only minimal improvement. For now, I just hold them in one hand while sending with the other.
I’ve actually thought about trying to remove the magnet altogether, since it appears to be glued on. At least, it wouldn’t be attracting every ferrous object that comes near it. But, for now, I’m just thinking about it.
The QU-21C paddles during a recent activation, along with my trusty Palm Mini paddles.
I had a chance to use the QU-21C paddles on a recent park activation. It didn’t take long to get used to them, and I had no issues with them at all. The paddles keyed reliably, without missing a single dit or dah.
Even with my spring tension and magnet gripes, I’m pretty happy with these paddles. These cheap paddles look like worthy candidates for field use. We’ll see how well they hold up over time.
As an analog, HDR, discrete component, radical homebrew fundamentalist, obviously I have been concerned about all the hype about SDR. SDR advocates often make it sound as if those of us who build with discrete analog components (crystal filters!) are hopless troglodytes, about to be thrown on the ash heap of radio history. Or something like that. They sort of imply that without the cleansing benefits of SDR, our signals will remain hoplessly dirty.
I find it interesting that Sherwood concluded that the cleanest transmitter he ever owned was a Collins 32S-3! He compared the two tone output of this old rig to that of a modern transceiver. This was in 2019. See above. HDR wins.
Don't get me wrong. I want to clean up the signals from my HDR rigs. But I am encouraged by Sherwood's remarks. I do not think I will have to go SDR in order to have a clean signal. I may just do some two-tone tests on the rigs, make some adjustments, and maybe build a class A Thermatron .1 kW linear.
It’s been a while since I’ve done a cheap speaker wire antenna, so here’s another one for you. Back in the early to mid-2000s, an antenna commonly referred to as the “No Counterpoise Antenna” was making the rounds on the Internet. I thought I might give it another look.
The No Counterpoise Antenna is either a 25-foot or 50-foot length of two conductor wire with half of one conductor removed. Essentially, it’s a radiator fed through a balanced line feeder. The 25-foot version is said to cover 20M through 10M, while the 50-foot version is supposed to cover 40M through 10M. It was usually connected to a balanced tuner of some sort or sometimes fed through a 4:1 balun. It was typically constructed from zip cord or speaker wire. So, this is perfect for another speaker wire project. (Actually, I built the 50-foot version years ago, but I don’t recall ever putting it on the air.)
A picture is worth a thousand words, so here goes:
I’ve seen this antenna sometimes referred to as a Zepp. A true Zepp is basically a half wave radiator with a quarter wave balanced line matching section. Unlike a true Zepp, the No Counterpoise Antenna is non-resonant, so I guess it’s actually “Zepp-ish.” Because it’s non-resonant, a tuner is required for this antenna.
I did some extensive research into the origins of this antenna. (OK… I just did a few Google searches.) Jeff Imel K9ESE came up with this design. I remember Jeff used to sell a high-quality version of the antenna on eBay. The reviews were generally positive.
Pete Millis, M3KXZ, is another name often associated with this antenna. I think that’s how I first came across it. Pete once made a phased array from two 25-foot versions.
In the August 2020 edition of Ozark QRP Banner, the Four State QRP Group’s newsletter, Terry Fletcher, WAØITP, had a nice write-up about it. He discusses his experience with both the 25- and 50-foot versions.
This antenna design has been around the block a time or two. So, there’s no innovation here on my part whatsoever.
Construction
I happened to have a 25-foot roll of #18 awg speaker wire on hand, so this time around, I opted to build…you guessed it… the 25-foot version.
Construction was about as easy as it gets:
I split the speaker wire halfway and cut off one side
Next, I twisted a loop at the end of the single wire and secured it with some Goop® adhesive. As an alternative, you could just tie a loop at the top or crimp a ring lug over the wire’s insulation.
I stripped and tinned the wires at the feedpoint and installed spade lugs. You can just strip and tin the wires, if you like.
To keep the speaker wire from splitting further, I put some heat shrink tubing a couple of inches up from the lugs. I also added a dab of Goop® in the middle of the antenna where one side of the wire was removed. All of this is completely optional.
Construction probably took me all of 15 minutes or so. That doesn’t include allowing the adhesive to cure overnight. However, the antenna was certainly usable without the adhesive and heat-shrink tubing I used. I’m just prone to overkill.
On the Air
To test the No Counterpoise Antenna, I drove down to Ridley Creek State Park (US-1414, KFF-1414). Using my drive-on mount, I supported the antenna from a 28-ft Jackite pole. I used a homebrew 4:1 unun at the feedpoint and ran 15 feet of coax into the cab of my truck to my KX3 (5 watts, CW). I used the long side of the antenna as the radiator.
I used my roll-on mount to support a 28-ft Jackite pole
Before I got started, I checked to see how the tuner in the KX3 would handle the antenna. The KX3 easily found a 1:1 match on all bands from 40M through 10M. Just for the heck of it, I tried 60M and 80M. The KX3 was able to find a good match on those bands, too. (That’s not too surprising, given that I once forgot to attach my coax to an antenna, and the KX3 still found a match.) I doubt this antenna would work well on 60M and 80M—but stranger things have happened. I wasn’t able to try it, but I’m sure the KX3 would be able to match it directly connected to the radio without the 4:1 and coax.
I used a 4:1 unun at the feedpoint
Band conditions weren’t very good, so this wasn’t an ideal test. Despite the mediocre band conditions, I logged 13 contacts during my short activation. Most of my contacts were on 40M. There was considerable fading on 30M and 20M, but I made a contact on each of those bands.
This was hardly a rigorous evaluation, but the 25-foot No Counterpoise Antenna got the job done. I need to give it another try, when conditions are better.
Anyway, if you have some speaker wire and a few minutes to spare, give this one a try and see what you think.
A good friend of mine is visually impaired. We have worked together and he has been successful using a Kenwood TS-590 on HF (it has a strange mix of voice, Morse code, and tone beeps, but you can deal with it), and a desktop VHF rig with channels programmed (he detects channel 1 by a different beep tone, then counts clicks).
I wanted him to have a HT to use. Sadly there are only a few with voice prompts. The ubiquitous BaoFeng UV-5R, is one, but it is VERY easy to accidentally stumble into a mode you can’t recover from if you can’t see. I had heard that the Wouxun KG-UV9D(Plus) was another capable HT, a bit better designed than the UV-5R, and boasting voice prompts.
Since this is a Type 90 Approved Radio, I figured it would be very simple to program some channels, and disable everything else (commercial users aren’t allowed to adjust things from a keypad). That task proved difficult as the radio has no obvious way to disable its very frustrating BAND function (half of the display is set to one band and the other half to another). One can disable the keypad, but you are still left with a VHF on one half and a UHF on the other (or dual VHF if you want), but you can only select channels on one of them (because the band button is disabled). That says anything left on the other “unused” half of the display might open the squelch.
I worked around this by programming channel 100 to be 147.985 MHz, setting the power to low, and the squelch to max 9.
The real reason this became an issue, is that the voice prompts only work for a few things, not all of them. It would be helpful to announce Band A (upper display) or Band B (lower display), or perhaps use a higher beep for A than B, but Wouxun didn’t think that through.
Please, please, please, for the love of everything sacred, radio vendors should spend more than 30 seconds thinking of how a visually impaired user would want to use your radios and realize that no amount of screen prompts will help someone get out of an unwanted situation if they can’t see. Use voice prompts for everything or at least chose your beep frequencies so someone can hear what is going on.
I had a chance to use the inexpensive whip I bought through AliExpress recently. While it performed well enough, I encountered a couple of minor quality issues. That’s certainly not surprising, given its $18 USD price tag.
Extending the whip, I noticed that two of the sections were pretty tight and took some effort to pull them out. Better tight than loose, I guess. Another issue is that the crimp that holds the mounting stud in the bottom section of the antenna was a little loose. When the antenna was fully seated in the mount, I could still rotate the antenna.
My $18 (USD) whip from AliExpress mounted on my homebrew loading coil
Because this whip is longer than a quarter wave on 20M, I didn’t extend the first section from the bottom. Using an antenna analyzer, I was seeing SWR readings similar to my MFJ-1979 whip. The SWR readings seemed stable. So, I guess the suspect crimp is making a good enough connection.
Band conditions seemed so-so this morning. Despite that, I logged 25 contacts on 40M and 20M in an hour, including three park-to-park contacts. I didn’t work any DX stations today, but I worked a station on the west coast in Washington on 20M.
Even with its issues, the whip did a pretty decent job this morning. It won’t replace my MFJ whip, but it will have a place in my antenna arsenal.
A while back, I ordered a 5.6M/18.4 foot. telescopic whip from a seller on AliExpress. I didn’t really need it, but having seen them on the Interwebs, I was curious to see what you get for $18 USD. Heck, at that price, why not take a chance?
You can find these whips all over AliExpress. (I have also seen them on Amazon for about $10 more.) One nice thing about them is they are 7.5 inches shorter than an MFJ-1979 when fully collapsed. So, it might fit in backpacks easier. The shorter collapsed length is due to having 14 telescoping sections compared to the MFJ-1979’s 10 sections. Because of its thinner metal and lack of a reinforced base, the AliExpress whip weighs 4.4 ounces/125g less than the MFJ whip. Of course, the other obvious advantage is the incredibly low cost.
There are some downsides though. The threads are metric (10mm), so you need an adapter to use it with a ⅜-24 mount. Fortunately, adapters are readily available as well. The other downside that I’ve noticed is that the metal they are made of is pretty thin. (More on that in a bit) The MFJ whip has a heavy stainless steel reinforcement at the bottom, while the AliExpress whip does not.
My antenna arrived from China about a week and a half later. It came wrapped in several layers of bubble wrap with a tough plastic outer wrap. I eagerly opened the package, but I was disappointed to see that the bottom section was damaged. It looked like either someone dropped something heavy on it or Big Foot stepped on it. As I mentioned previously, the metal is pretty thin.
While traveling half-way around the globe, this telescopic whip antenna encountered some rough handling.
When I finished uttering every expletive in my vocabulary, I contacted the seller through the AliExpress app and sent pictures of the damage. They promptly shipped out another antenna, and they didn’t want the old one back. So, I set the wounded whip aside, while I awaited its replacement.
The replacement whip arrived 6 days later, which is pretty impressive for a shipment from China. Happily, this shipment arrived intact. I would be remiss if I didn’t give props to the HUI BANG TE Store on AliExpress. Their customer support was top-notch.
When I get a chance, I’ll take the inexpensive whip out to a park to give it a go. I laid the AliExpress whip next to the MFJ-1979, and it looks like collapsing one section from the bottom on the AliExpress whip makes it about the same length as the MFJ.
I also have some ideas on how to straighten and reinforce the damaged whip to make it usable. That might be a winter project.
Mike WU2D put out this nice video (above) about whether or not he should part out his Heath SG-6 signal generator, using the parts in a Paraset construction project. I faced a similar question years ago:
I just solid stated the SG-6. I was influenced by Farhan and the drinking straws that he picked up with his kids at a McDonalds in Hyderabad.
As with the QF-1, I say to Mike: GO FOR IT OM! You need those parts for other projects. Don't feel bad about the SG-6. But keep that switched coil assembly -- it is quite useful.
As I get ready to build the SolderSmoke Shack South, the Radio Gods (well at least YouTube) keep sending me these workshop videos. Today's is also for a shop specializing in the repair of vintage audio gear, but the lessons-learned and observations are also applicable to a ham radio workshop. This fellow's shop is in New York City, where space is very limited. Check it out. Lots of great ideas here.
by Vince (VE6LK) Field Day 2024 started out with the best of plans to be spent with the best of friends and ended up totally different – and, unexpectedly, I had a hoot! With my carefully made plan behind me, my new last-minute plan was to run solo for Field Day in the backcountry of … Continue reading Experimenting during Field Day 2024→
Wow. Really great test gear, and an amazing parts collection. This guy even gets a "nice workshop" comment from Mr. Carlson. Pac1085 seems to be in Rochester N.Y. and he says he specializes in the repair of vintage audio gear. He should have more subscribers. Does anyone have more info on him?
Dean KK4DAS asked me why we have these switches on our 'scopes. I didn't know. Dean asked Alan Wolke W2AEW. Alan knew:
Alan Wolke wrote:
Interesting background on the 20MHz vertical BW selection. This feature has existed on the vast majority of all oscilloscopes since the 50s or 60s (both analog & digital). When I explored the history of this, I spoke to some of the folks at VintageTek.org, and wound up having a chat with THE engineer that did it first! Tt was John Addis, designer at Tektronix.
At the time, Tektronix was located in Portland Oregon. While working on a wideband vertical preamp for a new scope (the 7A11 vertical plugin for the 7000 series scope), John Addis was plagued with interference from the local television broadcast station in the 50MHz band. So, he popped in a 20MHz low pass filter that he could switch in/out so that he could complete the work on the preamp. Since it was deemed useful, it was left in the design.
And, since Tektronix added a switchable 20MHz low pass filter in their scope, and Tek was the leader in oscilloscope technology, other manufacturers followed suit, and this feature has "stuck" as a staple in vertical setting controls.
The main reasons you'd use this filter would be to improve the signal to noise ratio (SNR) for signals when their frequency content is below 20MHz. You've probably noticed that, even without any signal connected, the thickness of the trace is thinner when you engage the 20MHz filter.
---------------------
Alan sent a link to a Wiki page about the 7A11 that John Addis was designing. Alan says this places the initial inclusion of the 20 MHz BW Limit filter to the mid 1960s:
The entire weekend was about picture perfect. The sun was out. There was a nice breeze. It was warm but not hot. We did have a little work to do with some plumbing on Saturday, but it got done and that made time for Other Things. And you know that means POTA!
Too. Many. Variables.
I decided that I’d go to my most local park which is the Cooperrider-Kent Bog State Nature Preserve – US-9401. It’s just down the street and seemed like a great idea since I had some Dad Taxi duties floating around with unknown timelines. The truth is that this park is a boardwalk look around a bog. There are no picnic tables and no space to sit, really. Thus I was consigned to the Jeep. I’ve shared many times that this is not my favorite setup. This was the first variable in play.
The second was the Penntek TR-35. I’ve been itching to get this little guy into the field, so I tossed it in my bag. I don’t know this transceiver very well, but the only way I learn is by doing.
The third variable was the one that might have wrecked things but I’m not really sure just yet. I recenly received an ATU-10 automatic antenna tuner as designed by N7DDC and built by a reputable seller to whom I shall not link until I have determined if I have a problematic unit or the dreaded Operator Error. I was planning to use this little guy to give the AX-1 that little bump that it needs to work with the TR-35. I’d measured the SWR on the AX-1 a few times in experiments earlier in the week and it just needed a touch of tuning. So little, in fact, that getting it right on the z-match tuner was a total pain. Why not try the ATU-10?
Lots of new stuff in a new place in an operating position I don’t love. What could go wrong?
This Looks OK…
ATU-10 on the dashboard, the TR-35 resting on a speaker held in a phone holder in the Jeep. A complete mess.
I got everything set up. The AX-1 was clamped to my Jeep’s cargo bar. The tuner was set up on the dash. The TR-35 was hanging out on my speaker in the phone holder (not at all precariously!). Everything looked good. I hit the tuning cycle on the ATU-10 and things settled in at about 1.1:1. Cool! So I started calling CQ.
And I kept calling.
I spotted myself.
And kept calling.
The RBN heard me! That was good! But it was a very long time before I got a call. It came in at 599 for sure. The signal indicator on the TR-35 was lit up nice and bright. It was a perfect signal from Maine. No fading, no nonsense. It was impressive!
And then nothing. Some static. A few crashes on 20-meters. No other calls.
It was time to pack it in.
I wasn’t too phased by not getting the activation. It was a Saturday at about 3 PM and the weather was amazing. It was nice to sit there in the sun (in the Jeep) and play with my new toys. I had the nagging feeling that I get with a new rig that I did something wrong, but I don’t believe that there was anything to do wrong. Sometimes, the magic simply doesn’t happen. And that’s OK! Besides, as soon as I pulled out of the parking lot, my daughter requested pick up and food for her and her friends. Dad Life!
QSO Map
Here is what my QSO with Maine looked like:
QSO Map of the single contact by KC8JC on the attemped activation of US-9401 on 13-Apr-2024.
Sunday Will Be Better
It is well known that my wife and I love to bike out to the Cuyahoga Valley National Park – US-0020. We do that most weekends in the summer and I always take my radio along to do a little POTA while we eat lunch. I figured this would be an easy win! Once again, I set up the TR-35 and the ATU-10 with the AX-1 and got to calling CQ. This time, I even used the message memory in the TR-35. Good stuff!
Lots of crashing on 40-meters. I got one contact with Michigan and then moved to 20-meters. More crashing. Maybe our local star was trying to wreck my flow, but it could also be that, again, I was using new stuff. This time, I was prepared. I reached into the bag and pulled out the IC-705.
And I got nothing.
It was almost 20 minutes until I got a contact. It was a Park To Park with an operator in Kansas. The crashing on the bands didn’t let up. There was a lot of fading. After about an hour and a half, I had 7 total contacts and a lot of band noise. I’m not going to give any side-eye to the new gear as I really do believe the bands were hot garbage. I also noticed that the POTA site didn’t pick me up on the RBN though I was getting picked up by the RBN. In fact, all of the activators only had spots from hunters. I wonder if there was a technical difficulty there. Not that it would have helped. You can only work what you can hear and there’s no hearing anything over that kind of noise.
QSO Map
Here’s what the map looked like for Sunday in the park.
The QSO Map for the attempted activation of US-0020 by KC8JC on 14-Apr-2024.
Final
What’s does all of this mean?
Nothing. Playing with new toys is learning what they’re good at and where you have to give to take. I plan to take the TR-35 out with a resonant wire antenna in the near future and give it a chance to shine in some backyard portable. I also plan to take this week and mess around with the ATU-10. It seems to want to kick into tuning cycles at odd intervals. Maybe I just need to tune it and turn it off. I was pretty sure that I consumed all available documentation on the device and given that it only has 3 button press commands, it’s hard to imagine that there is a lot of user error here. I will report back with findings.
Also, it’s important to note that there’s no getting skunked in POTA. Sitting outside in the sun with a nice breeze on a Sunday afternoon is fantastic with or without contacts. It’s about playing with a radio outdoors. And that, my friends, is hard to screw up.
P.S.
I didn’t take pictures while I was out on these activations for no really good reason. So you get a picture of Bella the Rottie after a very, very muddy hike where she rolled in everything that she could. You’re welcome!
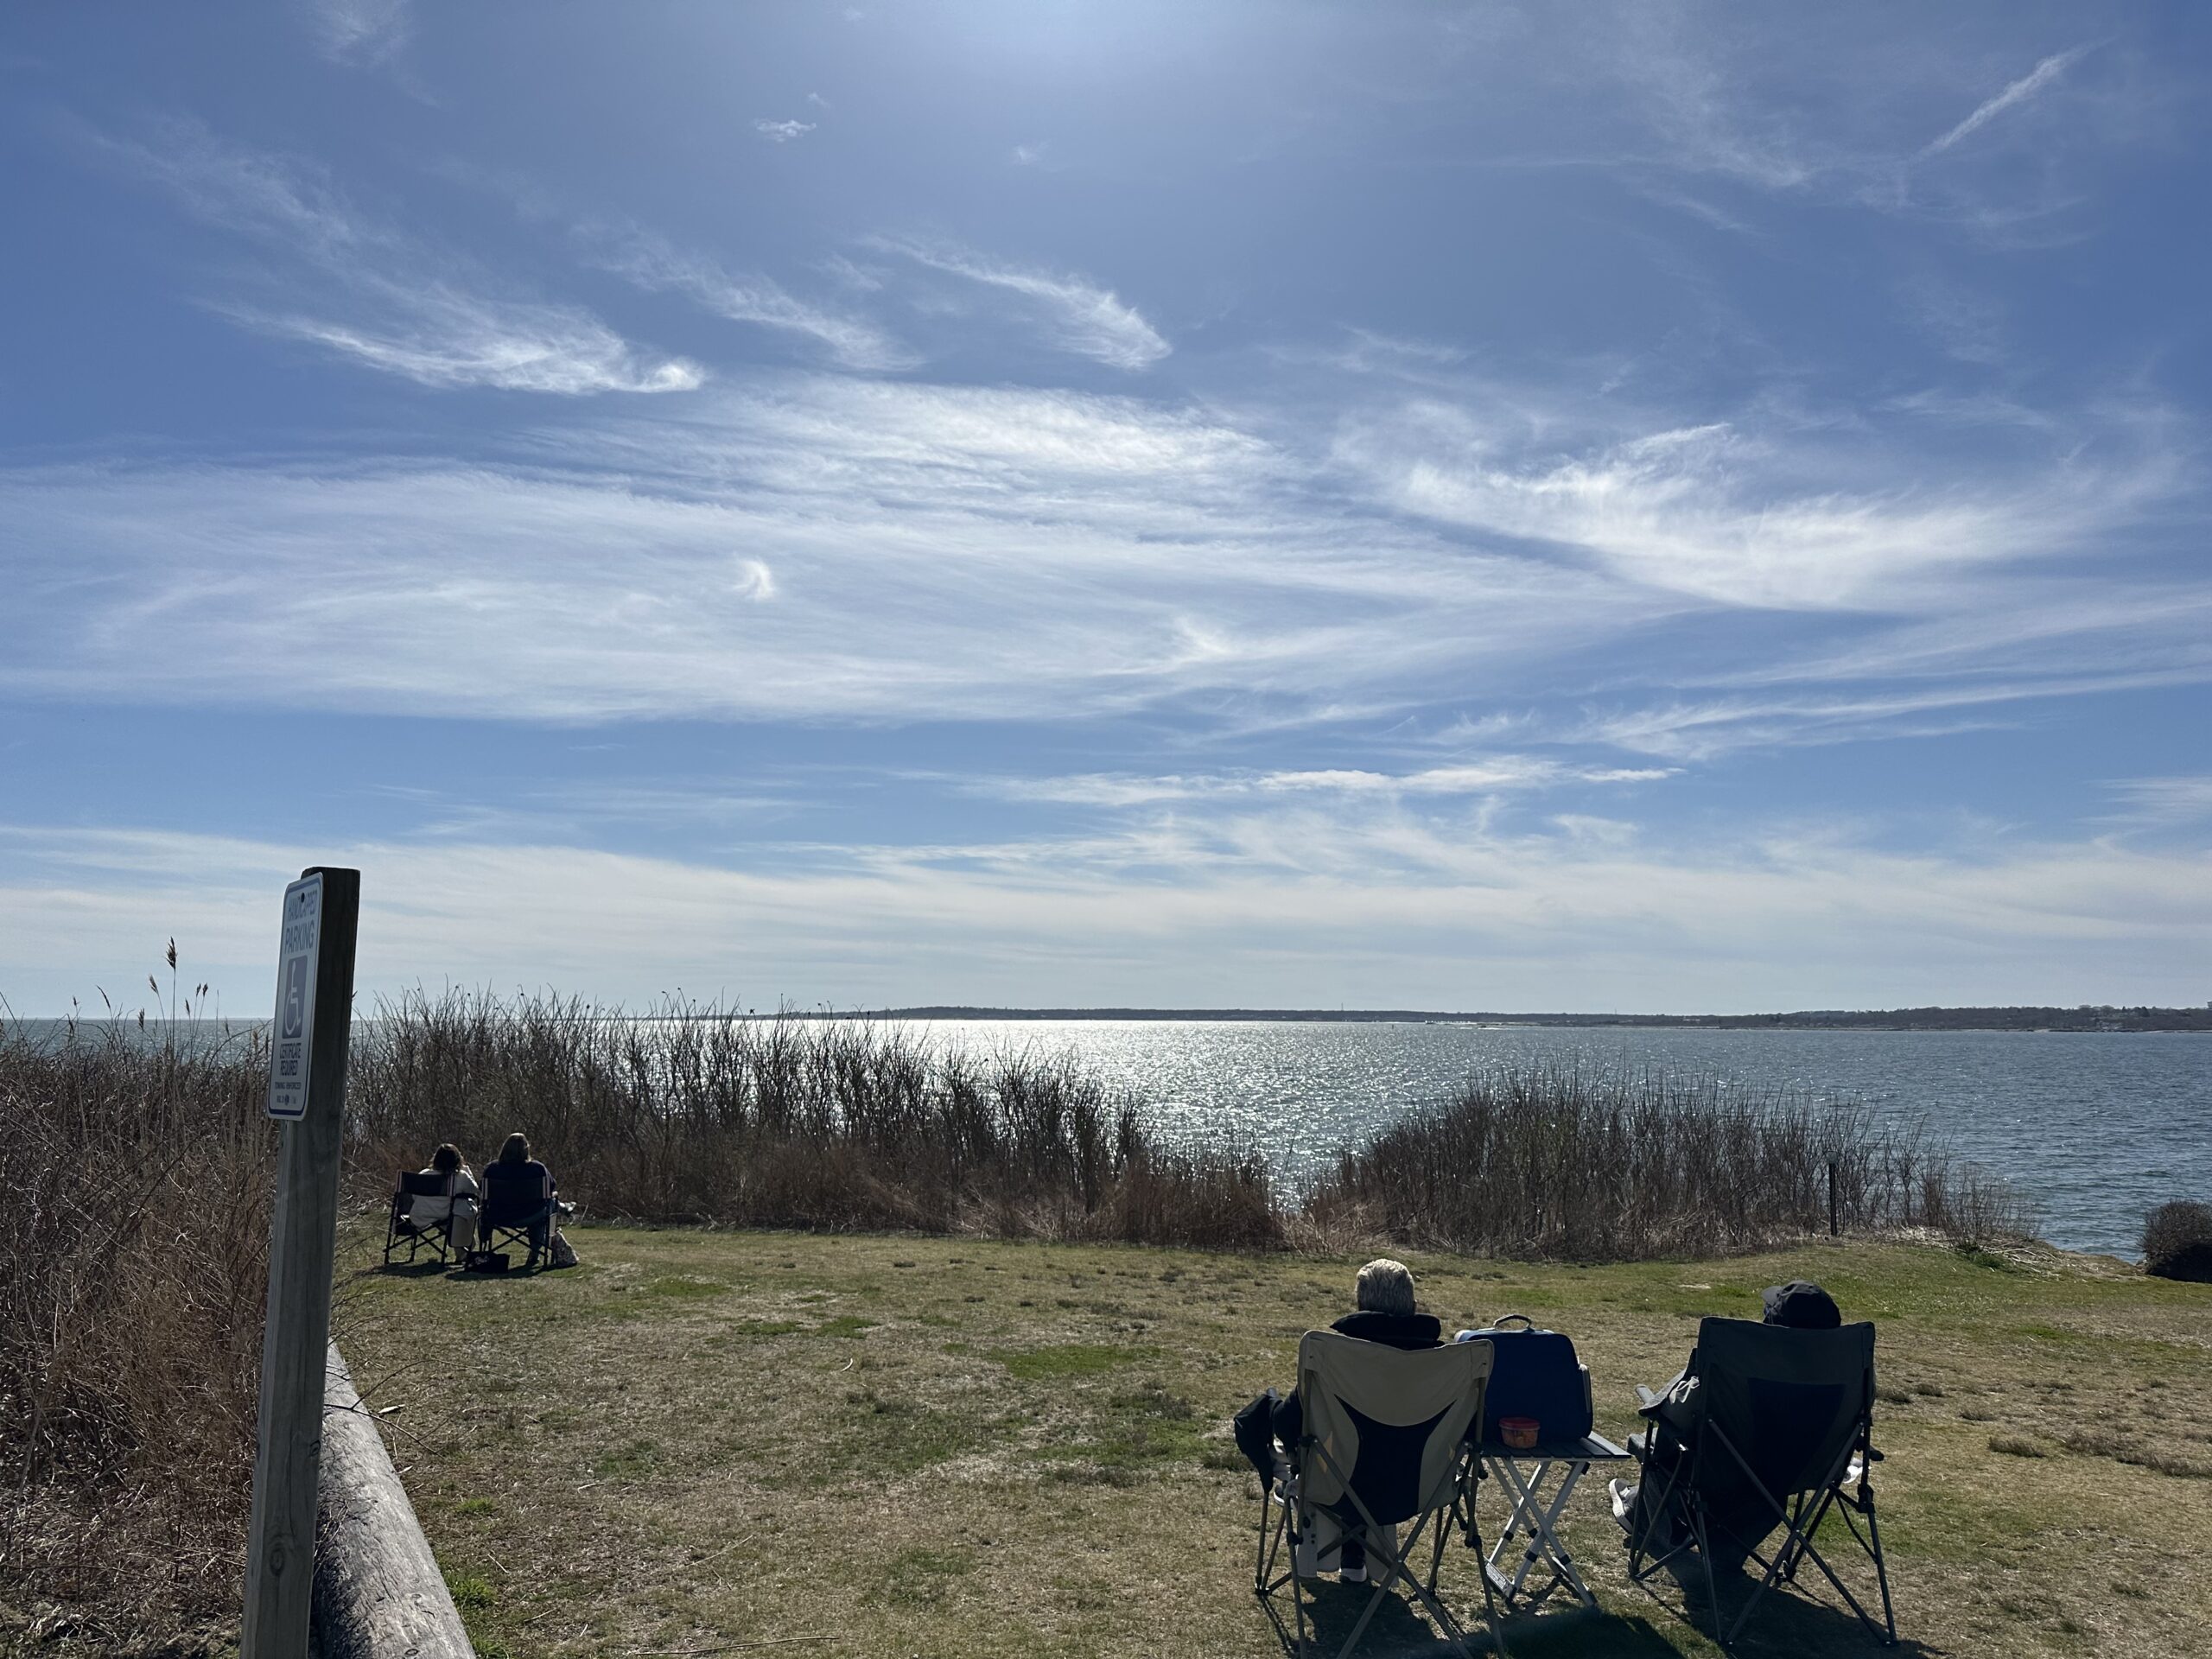
My wife and I headed to our favorite park, Beavertail (US-2868) on Conanicut Island, RI, to watch the Eclipse this afternoon. We were too far to the east to enjoy totality, but we figured it would be fun to see 91% of the sun occluded. The weather sort of cooperated, with thin high wispy clouds and a temperature in the low 50s. But I didn’t quite plan on the stiff breeze blowing right off the water into our faces – I was shivering, especially my hands.
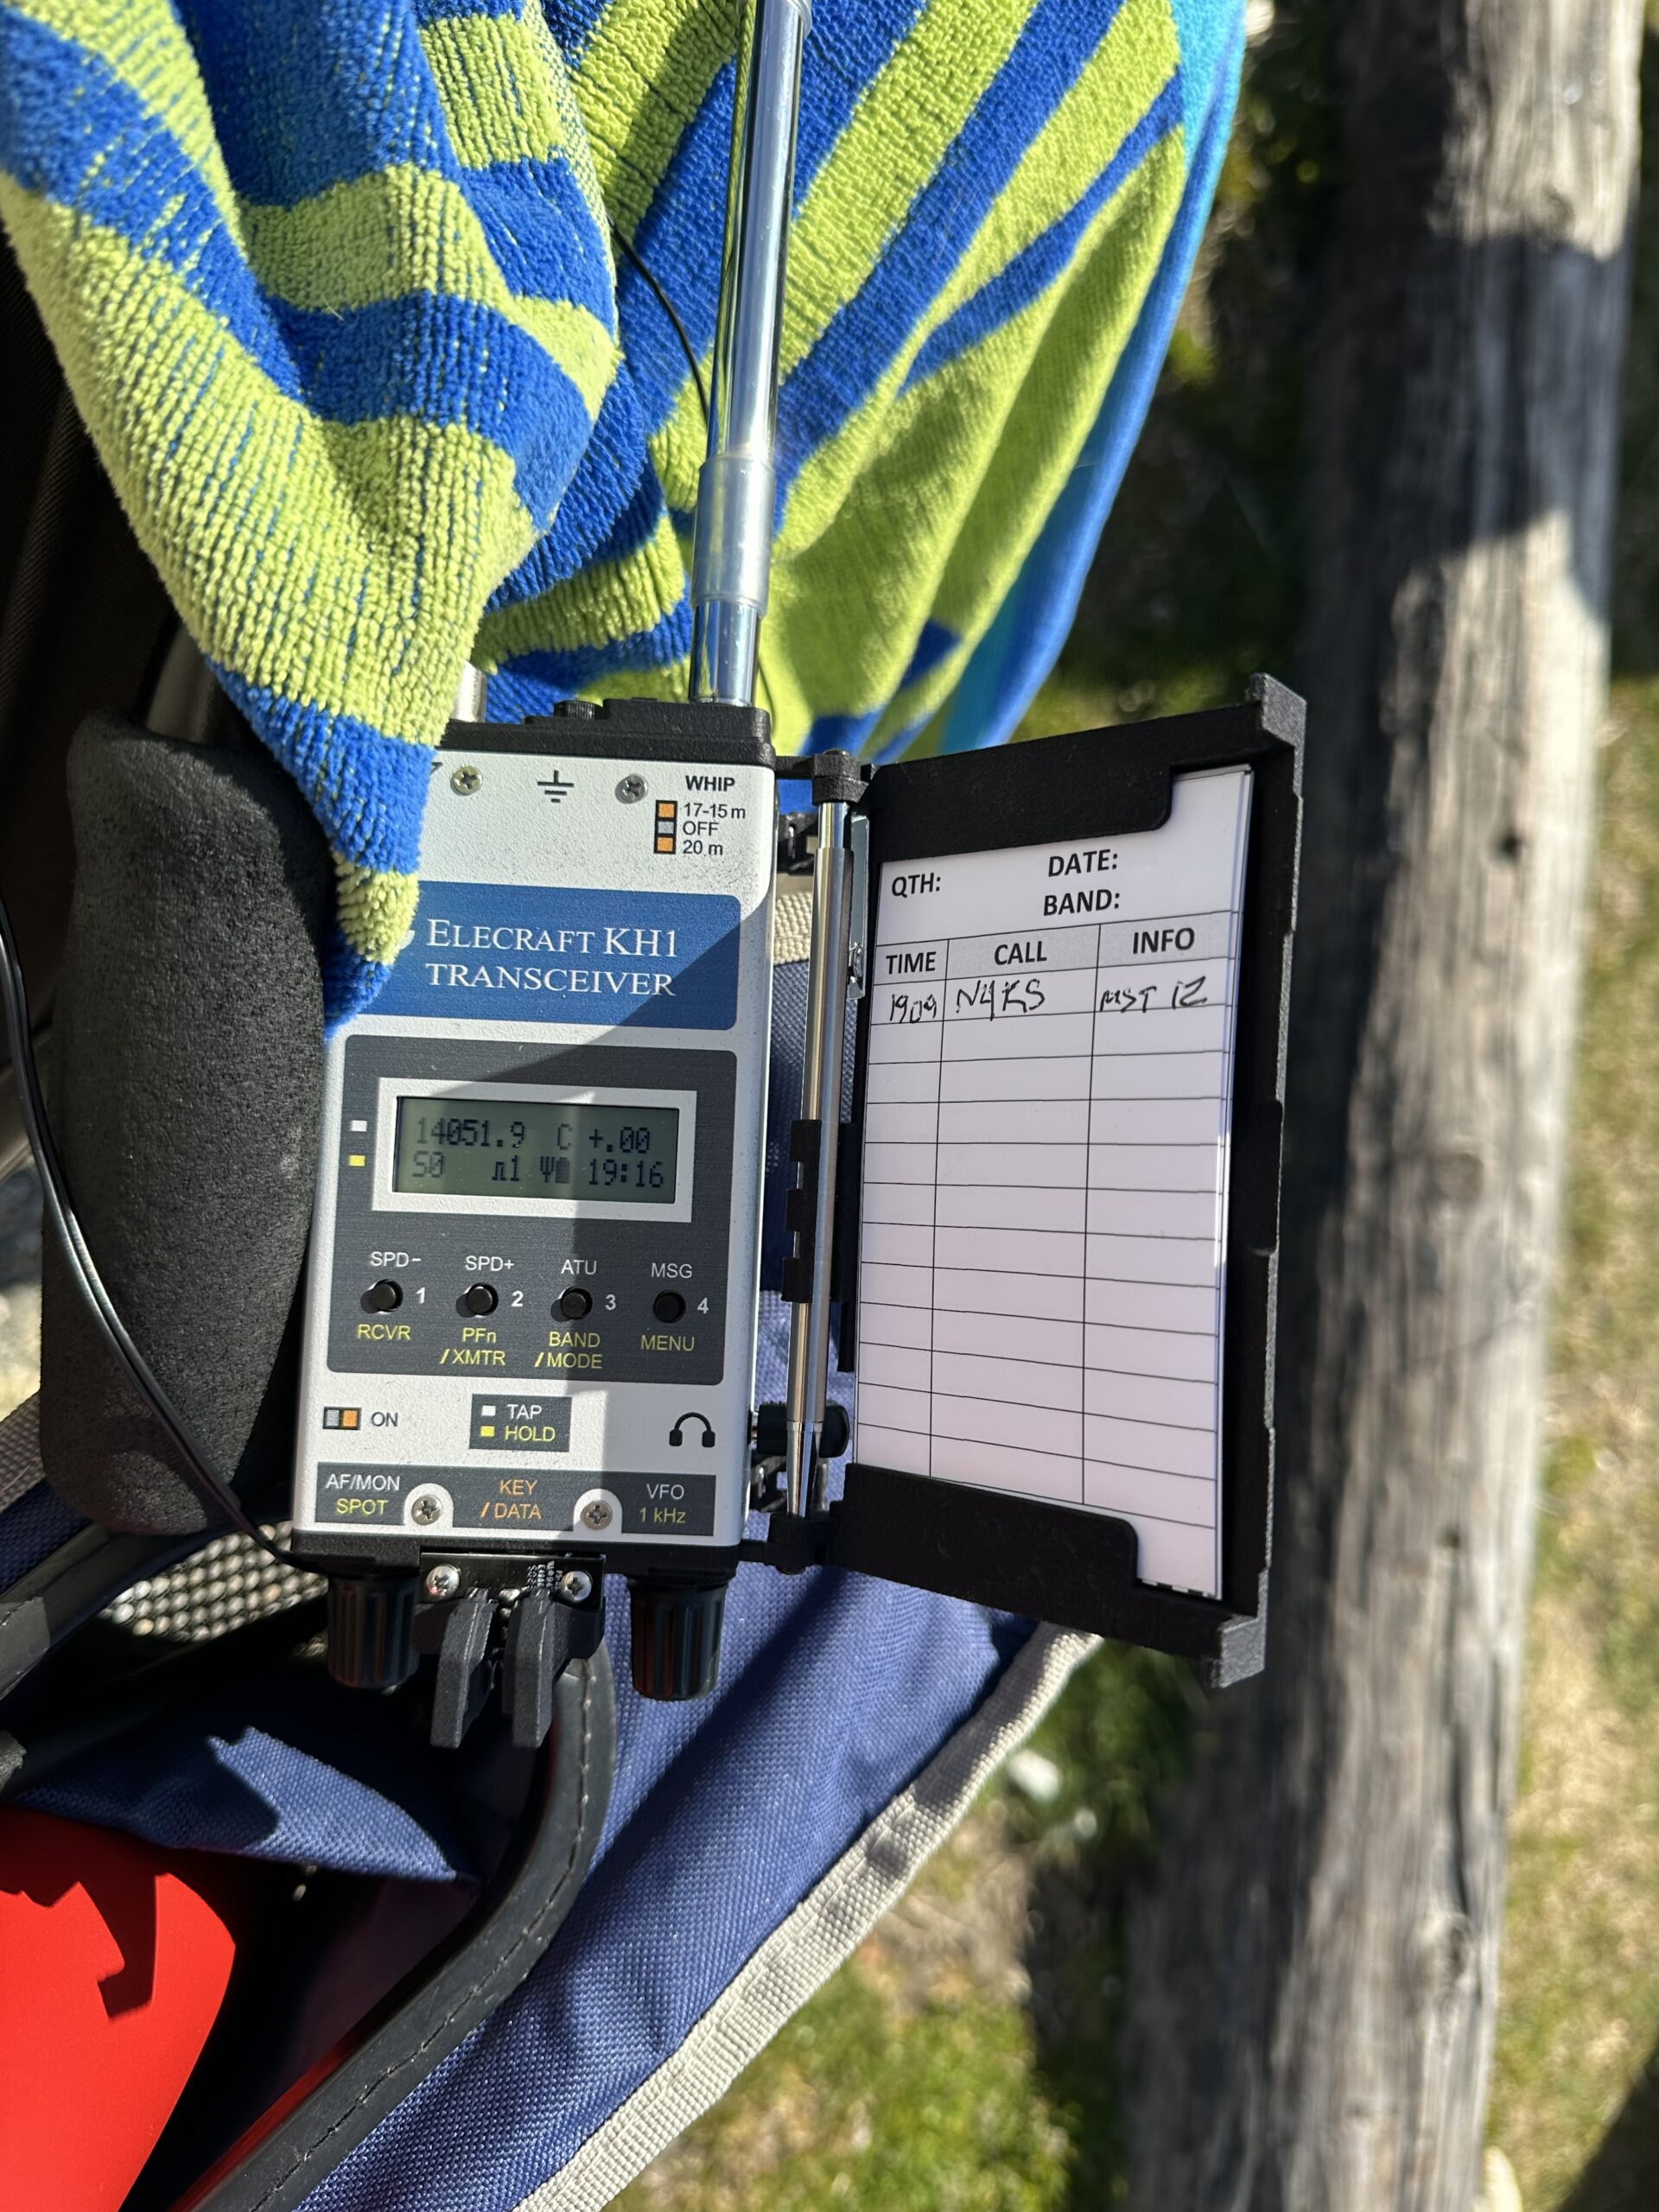
I figured that I could use this as an opportunity to try out my Elecraft KH1 and it’s built-in 41-inch whip antenna at a park. Despite my trembling fingers, I managed to make ten QSOs between 2:15 and 3:09 PM, all of which were during part of the eclipse. I was actually pleasantly surprised that folks could even hear me, but they did with a few fills required and signal reports ranging from 539 to 599. That completes another of my goals for 2024, by the way.
My view looking SSW from Beavertail – it was a nice early spring day but WINDY.
My Elecraft KH1 laying down on my chair. It was fairly easy to work 10 stations with the attached 41″ whip (and 13 foot counterpoise wire laying on the ground)
This blog exists for me to catalog sucesses and failures. The other thing it does is provide me with a place to put things so that I can get to them no matter where I am assuming – an internet connection. The topic for today is a refresher on my setup for my portable digital operations.
The Gear and Software
This discussion centers around the use of the IC-705 and the Microsoft Surface GO 2. I have no reason to believe that changing the computer will make any difference as I have gotten this working on other laptops, but the operating system will require some attention.
I’m running Ubuntu as my Linux distro on this device. There is pre-reading required to make this all work and we’ll get to that in a second.
Software includes the following from the Ubuntu repository:
wfview
fldigi
WSJT-X
Pat
I am currently using the fork of ardop known as – ardopcf from pflarue on GitHub. New and exciting things are happening here in the world of ardop.
The Pre-Work – wfview
There is a great set of instructions on how to get ALSA loopback devices set up appropriately for wfview in their well-written user manual. Start here:
With all of that done and in place, there are a few things to look at in wfview for rig control to make life a little easier. At the bottom of this page of the wfview manual there is some good information on setting up wfview to do what flrig would do. That’s what I do. Why? Because it’s working and keeps things simple. The important thing, in my experience, is to set the port number to something other than 4532 which is the flrig default. I set it to 4533 because that’s a safe port number.
Here is what my wfview External Control tab looks like:
The screen for External Control in the wfview application.
It should be noted that I’m using the Virtual Serial Port. This is a mapping to /dev/pty/NUMBER and it takes care of itself once set up.
fldigi
With wfview up and running, setting up fldigi is relatively simple. The following configurations for audio and rig control are currently working.
fldigi audio settings with the PortAudio section selected, Loopback PCM (hw:10,1) set for Capture and Loopback PCM (hw:11,1) set for Playback.
The rig control settings are set on the HamLib segment of the Rig Control section in the configuration dialogue.
Use hamlib is selected. Rig is set to Hamlib NET rigctl (stable) Device is set to 127.0.0.1:4553 (as found in wfview) Baud rate is set to 115200
All other settings are defaults.
The fldigi rig control settings configured with the values defined above.
With this complete, save and initialize the connection and then go to the main fldigi window to tune or send a station ID. Rig control and audio should function as expected.
WSJT-X
WSJT-X is the odd duck. My dad and I have the rig control configured differently, but it still works for both of us. What does that mean? There might be more than one successful configuration so maybe find what works and don’t touch it after that. What I use is listed here.
The Radio settings tab is configured as follows.
Rig: Icom IC-705 Serial Port: /home/jcw/rig-pty-1 Baud Rate: 115200 PTT Method: CAT Data Bits: Default Stop Bits: Default Handshake: Default Mode: Data/Pkt Split Operation: None
The WSJT-X Radio configuration window with the values set as detailed above.
The Audio setup matches the devices that are set in wfview but in reverse.
Note: I find the labeling in wfview to be counterintuitive. It’s probably just my broken brain, but I have to remind myself to flip things around and think about it as source/destination pairs. It’s probably just me.
The WSJT-X Audio configuration window with the values set as detailed above.
With this configuration in place, one can test the rig control on the Radio tab or by going to the main window and changing frequencies. Running a tuning cycle briefly will test audio output.
ARDOP – ardopcf
ardopcf is available on GitHub as a binary. Simply download it and put it in /usr/local/bin, run a quick chmod+x on it, and it should be good to go. That’s all that it required of me.
With ardopcf in place, lauching ardop is fairly simple. I put it in a little script so that I don’t have to type out the arguments each time. I named the script “startardop.sh” and dumped it in my home directory. Creative, huh? Here’s what it looks like:
When you start ardopcf, you should start to see pairs of numbers in the terminal showing you audio input levels. If you’re getting a lot of 0,0 then you might have a problem or wfview might not be running. Maybe your rig is off? Check your signal chain. If, on the other hand, you’re seeing numbers pop up every 4 seconds or so, then you’re in good shape.
Wow. That’s a lot of stuff. That is the configuration that is currently working for me for sending Winlink email using ARDOP or telnet.
What a lot of people seem to miss is that Pat has a web gui that will run on localhost:8080. It makes using Pat a lot easier and gives a fresh, modern GUI to Winlink email. And yes, it handles forms and everything. It’s pretty darned cool!
To get that up and running, I use yet another creatively named script: startpat.sh. The contents of that are:
pat-winlink --listen "ardop,ax25,telnet" http
What does that do? It starts up Pat listening for connections on ardop, ax25, or telnet. I didn’t detail ax25 here because, well, I’m not done playing with that just yet. And telnet should always be there so that you can use Pat if you have a good internet connection and NEED to check your Winlink email. The http argument starts the application listening on 8080 for the web UI. With Pat running, all you have to do is go to https://localhost:8080/ui and you’ll see the web UI. You’re now free to explore Pat and send/receive Winlink email.
Final
This is the setup that is currently working for me. I will update this as I add other modes, etc.
Embark on a thrilling journey into the world of SDR receivers with the Malahit DSP2! Discover its versatility, advanced features, and user-friendly interface as you dive into the realm of radio communication excellence. Join us on M0 FXB Ham Tech for expert insights, tutorials, and tips to elevate your radio experience.
This tutorial explains how to modify Retevis Ailunce HD2's band for different IARU regions and outlines the advantages of DMR in ham radio, including text messaging.