I left you last time with my entry box installed and the mast for the Gap was installed. All that was done the week before Field Day and I wasn't too eager to try putting the antenna up myself so I let things sit for a bit until I got back. (more on FD in another post?)
So the Tuesday after I got back from Field Day, I went out and looked at the mast and the antenna for a bit trying to devise how I'd get the antenna up myself. My proposed help was still on the way back from FD and wouldn't be back in the area until Thursday and gosh darn, I just can't wait that long!
I was trying to think of a way to lever it up but that wouldn't work, then I got a ladder out and I thought I'd be able to set it in the mount from the ladder but that much leverage at that height was way too disconcerting so I put that idea to bed. Finally I thought of the best way to do it: lower the bracket to the ground, mount the antenna to the bracket, then slide the whole thing up to the top. This worked just fine!
Bad picture...
I got the antenna analyzer out and got pretty lucky, everything was pretty well tuned at first blush. I ran the coax back to the shack and the matches were not all that great on 40 and 20. 20 was at about 2:1 with a resonant point somewhere up at 14.5 MHz. 40m was OK just not in the CW portion of the band. The big loop on the bottom (the "TITAN") is supposed to tune 40 but I couldn't get it to make any difference so I just clipped a bit of wire on the end of that loop and that brought the resonant point down to where it was <2:1 on the cw band.
Nevertheless, the antenna is resonant on all bands pretty well now. The SWR curve on 17 looks really weird so I wonder if there's a loose connection or something but I'm not too worried about it as most of my operation will probably be 20m and lower during the solar minimum.
I let WSPR run on 5w for a day on 20mr and I can't say I'm upset with the results:
So yeah, I'm ON THE AIR in a serious way! I also jumped in the CWT on Wednesday night and made a handful of contacts including one with France on 40 which is cool because I've never really had an antenna on 40 that was any good for DX, as this one appears to be.
I started the installation of my antenna at the new house this weekend. A kind member of the DFW Contest group gave me a GAP Titan DX vertical for the great price of free. (as payment, I gave away my fiberglass mast kit to another local ham!) The antenna isn't in the best of shape, at least one of the elements is in serious need of repair and the coax was pretty roached at the connector end. Oh well, free is free!
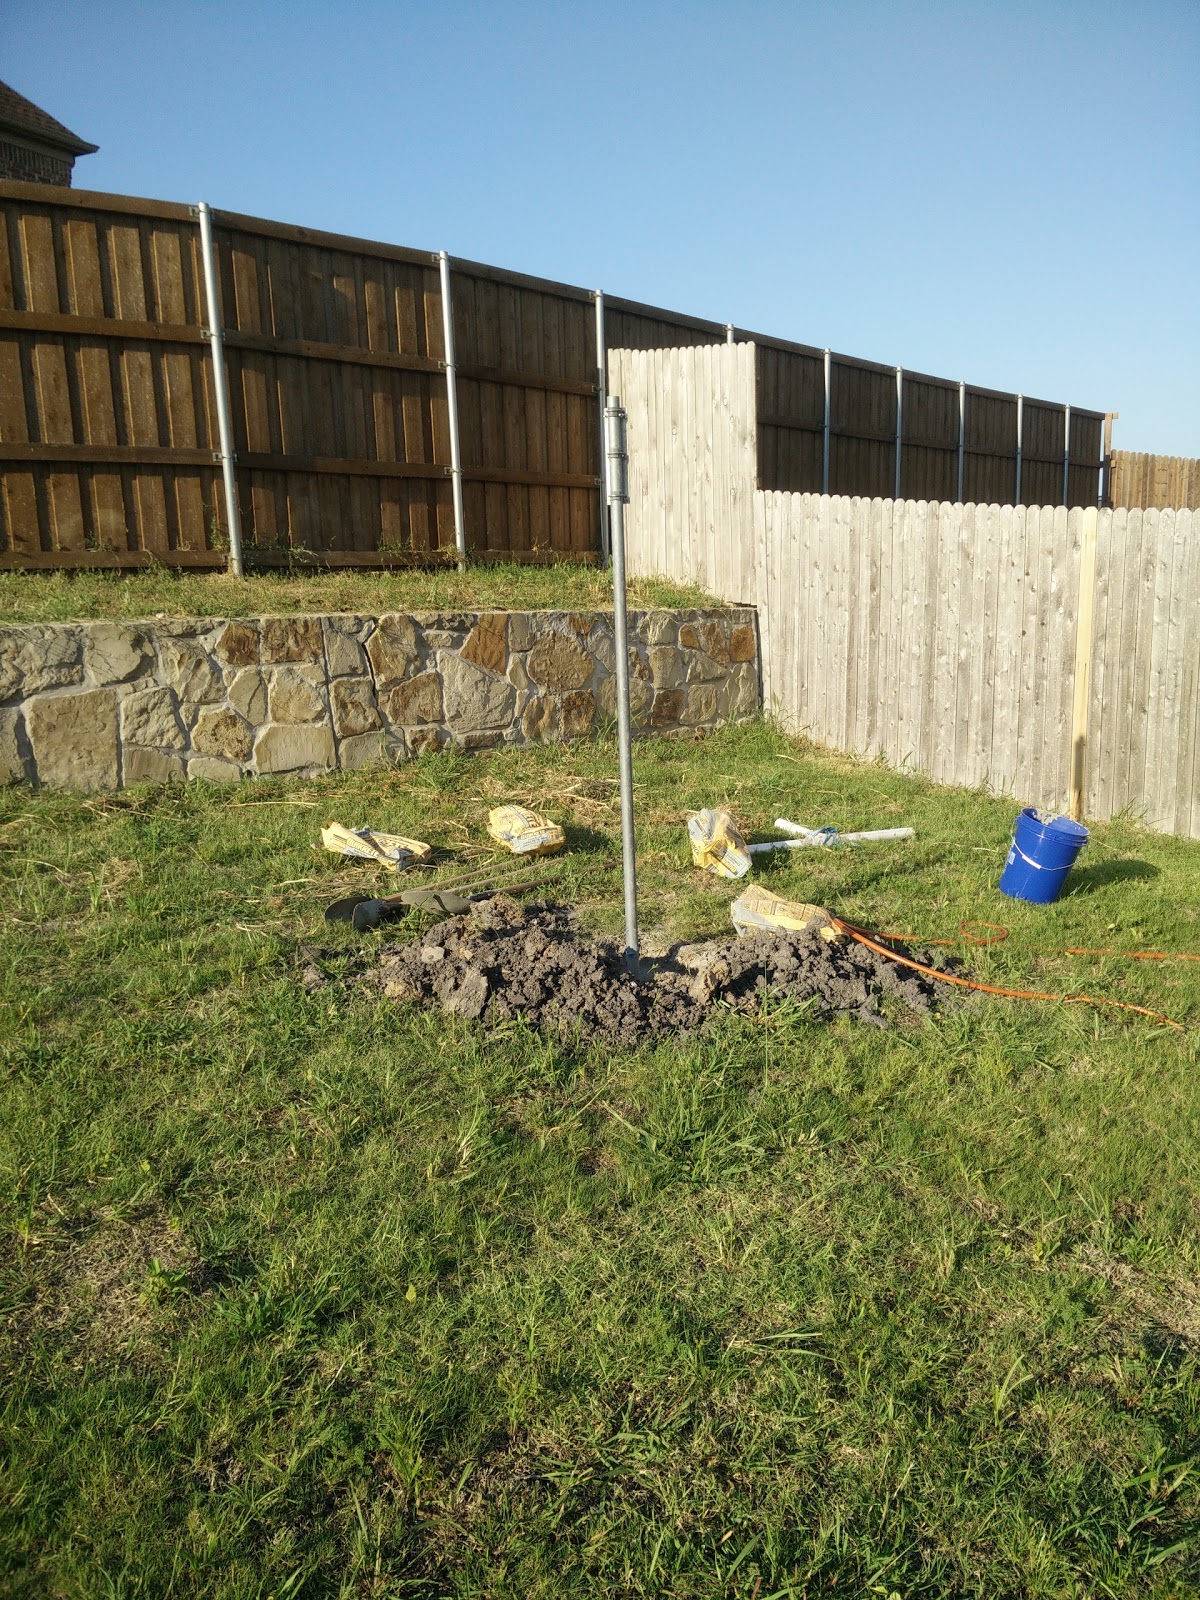
I started out by digging the hole for the mast, and quickly learned what this "Texas soil" was all about. I knew it was full of clay, but I did not expect this! Basically 4 inches down, the earth turns unto black tar. The clay is thick, heavy and it sticks to everything. I spent as much time digging as I did cleaning my tools. None the less, I got a hole big enough and deep enough to plant the mast in, albeit a little shallower than the instructions call for. Filled it up with 4 bags of concrete and that's curing at the moment. The initial idea was to bury a section of pipe that the mast could slide into but I couldn't find anything the appropriate inner diameter so I just said to hell with it and used the mast as is. This will put the bottom of the antenna at about 6.5'. It'll be interesting to see how difficult it will be to put the antenna on it. At 25' long and 25 lbs heavy, it can be a bit unwieldy once its vertical.
While that was curing, I put the antenna together from the pieces I had and luckily everything seemed to go together OK, but it is a pretty simple antenna structurally. We'll see if I got all the connections right once its on the mast. I'm not sure of a better way to test it beforehand.
Sunday, I decided, would be the day of no return; I would cut a hole in the wall of the house. I'm sure we've all been there, trying to decide exactly how we'd go about getting coax into our homes. I decided this time I'd "do it right." I got a really nice aluminum NEMA enclosure on eBay for a song and I was very surprised to see it when it got in, it was way bigger than expected! Yes, there were measurements but you don't know what 12" really looks like until you see it in person.
First thing I did was find the studs in the wall beside my operating desk. I picked a spot in between and slightly higher than where the outlets sit, hoping to miss any wiring. My stud finder has a wire detection mode and I didn't see any indications so I just dove in head first and cut the 2" hole through the drywall straight away. Then the radiant barrier. Then I saw that I was going to have a problem.
If you don't know, many of the homes in Texas are built with brick exteriors. I don't know about in the past, but these newer homes are actually built with a brick facade. That is to say that there is an air gap between the outside of the structure and the inside of the brick, and the brick merely floats out on its own, cosmetically. What this means practically, is that the wall from interior to exterior face, is nearly 8 inches thick! Naturally my 2" masonry hole saw was not going to be long enough, by about the thickness of a brick. I had to figure out where I was inside and translate that to the outside, so I could drill from there. It took a bit of trial and error trying to break through from the inside with a very long screw driver until I figured out a way to get pretty close by measuring from my window frame to my hole. I could see I was drilling into a T intersection in the brick about 27" from the window, so all I had to do was find that area, poke a hole from outside to see and sure enough, I hit it dead on center.
All was not as well as it could have been though. The hole saw I bought was not really doing much good with my standard rotary drill so I quickly gave up on that idea and went the brute force direction: drill a bunch of small holes and chisel away until you have a hole big enough to fit the 1.5" PVC pipe. This made quick (and quiet) work of the job and I was through the brick in no time. I quickly drilled out the holes for the mounting screws for the NEMA box and bam, I was pretty much done with that. A little expanding foam stuff and some caulk was all I needed to finish up the job.
I'll have to add a little paint to the opening on the inside and you won't even notice the hole probably. I'll also have to fashion a piece of foam that'll plug the hole up nicely. I'm ready to get back on HF though, I can tell you that!