Reading view

There are new articles available, click to refresh the page.

W6/WH-009 Mexican Mine Peak

This peak was the final White Mountain peak we did on our peakbagging weekend. It is probably the easiest to get to, as there is a paved road to the trailhead. After driving so long on dirt roads, the pavement was a very welcome change. We parked at a large pullout just south of the turnoff for the visitors center. After re-inflating the tires, we grabbed our bags and headed up the trail.
Old mine building and tailings pile.

The trail was pretty flat, and well maintained. At the first old mine building we turned left and went straight up the hill. It felt like a slog. It was closer to noon, and we were lower, so it was hotter. Even so, it didn't take too long to get up. Going this way you will cross the trail, so it is possible to get much higher before stepping off.
I assume this is Mexican Mine, which the peak is named after.

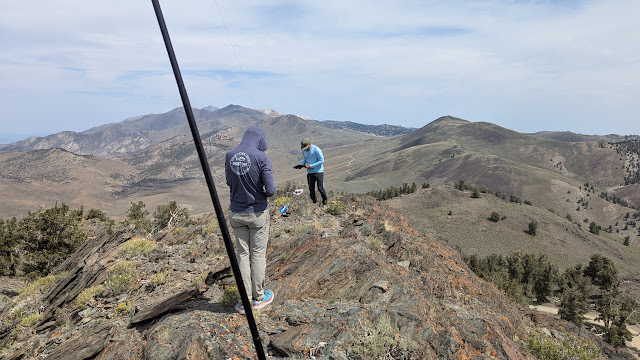
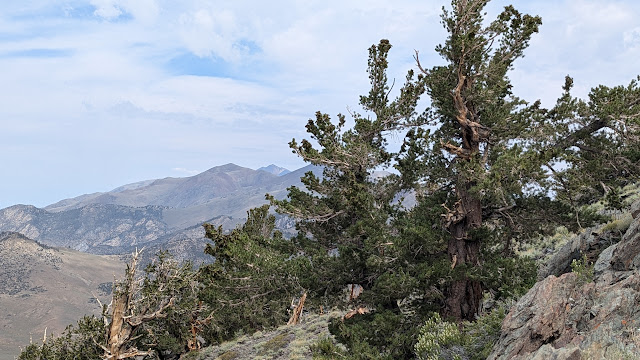
We didn't want to take too long on the summit, so we set up two stations. I started on 2m, but didn't get many contacts. Luckily HF was open and we all made enough contacts. It was pretty warm in the sun, so the bristlecone pines were providing welcome shade. 
Great view of White Mountain Peak framed by Piute and Sheep.

My vote was to go straight down, but everyone else wanted to take the trail back, so we took the trail. In the end, I was glad I did since there were some interesting ruins and mines to see, and a few informational boards. I can't imagine being a miner in this area.
History of the peak.

Back at the car we put on some clean clothes then headed down the hill to Bishop to meet up with Jamie N6JFD for lunch. It was great to see him again, as it had been a few years. We then stocked up on cookies, then hit the road for the long drive back to the Bay Area. We didn't make it very far, however, before deciding a quick drive up to Dry Creek Knoll was in order.


Trailhead: Visitor center, or pullout just south.
Website: SOTA Site.
Route: Take the trail to the ruin west of the summit, then go straight up. Or take the trail to the col north of the summit, then go cross country.
Red Tape: None.
Video: Coming Soon!

W6/WH-004 Campito Mountain

 A few miles down the road from the Sheep Mountain trailhead is the Campito Mountain trailhead. The best place to park is at the col to the northeast of the summit. There is a pullout so you can get off the road. From here, the hike is pretty straightforward.

Looking at the summit from the car.

From the col, there is a cliff which blocks the view of the high point, and to the left a dead tree on the ridge. Start walking towards the tree. It was not a hard walk, especially before the small grove of trees. 
Talus on the way up.

Higher up the slopes there is a lot of talus and some scree. It was pretty easy to avoid the scree which made the hike up a lot more pleasant. If you want a spicier hike, aim for the cliff. It is some class three excitement, but is completely bypassable. On the summit we set up and did our usual thing. The cell service  was good enough to send out some spots.

Looking at County Line Peak and Blanco.

On the way down the scree that was so carefully avoided was gleefully followed. It made it much quicker. Overall, this was a fairly easy summit, and I'd do it again.

Trailhead: White Mountain Road, col to the north east of the peak.
Website: SOTA Site.
Route: Walk straight up the hill to the summit.
Red Tape: None.
Video: Coming Soon!

W6/ND-378 Sheep Mountain

Our second night in the Whites was a lot nicer than the first. The weather in the afternoon and evening was sunny, and there was no rain. From our campsite at the trailhead we had excellent views of the area. We could see White Mountain Peak, the bristlecone pine forest was below us, and the lower peaks were spread out to the south.
Sunrise over the trailhead.

We woke up early again, and started up the hill at dawn. It was chilly, but not too windy. On the way up we just went straight up the hill to the top of the summit by the road. From there it was obvious we could just walk along the wide ridge connecting the two peaks. 
Looking at the summit.

It was a quick walk. The talus was large and easy to traverse, and we were fresh from a good night's sleep. As we got to the summit we were treated to the sun rising on the Sierra across the valley. We could even see the giant triangular shadow of our mountain. It was worth the early start.
Sierra Sunrise

We put up the antenna and got on the air. There was cell service, and good views to Bishop. We did HF and VHF, getting contacts on all the bands we tried. Once we were done, Rex and Saurabh went down the hill, and chased me on 2m CW. Always fun to get weak signal VHF contacts, and doubly fun with the Quansheng.
Looking back at the subpeak.

On the way back we decided to go around the left (north) side of the peak we had gone over on the way up. This saved us some climbing. It was a good route, that side of the hill is not very steep, at least at the elevation of the col. The final descent was steep, but there was no way to avoid that. 

 Trailhead: White Mountain Road, east of the summit. There is a large pullout marked with some rocks here.
Website: SOTA Site.
Route: Go up towards the sub-peak, then sidehill around the north side to the col. Straight up from there.
Red Tape: None.
Video: Coming Soon!

W6/WH-003 Piute Mountain

 After getting down from White Mountain Peak we packed up our tents which we had left set up so they could dry out after the previous night's rain. A quick lunch was eaten, then we headed up the hill towards Piute Mountain.

Looking up at the small col.

We hiked up the hill to the ridge, then turned right. There are two small peaks with a low col between them, and we aimed for the col. From the col, the peak is in front of you. Its not very visible before then. It had been cloudy and windy all morning, but the afternoon weather was great. Calm, warm, sunny, everything you'd want for hiking.

Looking back at White Mountain Peak.

The upper parts of the peak are mostly talus, but is was a size that was pretty easy to walk on. The wind picked up as we approached the summit, but it was easy to set up on the lee side of the hill. There was cell service, at least enough to get some spots out. The bands didn't seem as hot as they had the day before, but all three of us made enough contacts without struggling.
Such a beautiful area.

We took the same route down, more or less. We decided, near the bottom, to go down the hill and walk through the meadow near the parking lot. It was a nice choice, the whole area is very pretty. And there's cell service in the meadow, so we could send any last texts before losing it on the drive to the next peak.

Trailhead: End of White Mountain Road.
Website: SOTA Site.
Route: Head up to the ridge, the follow the ridge to the col between the two small peaks. From there, straight to the summit.
Red Tape: None.
Video: Coming Soon!

W6/CD-001 White Mountain Peak

 White Mountain Peak is a 14er and the third highest mountain in California. We had driven up the day before, and camped at the end of the road. Despite afternoon and evening showers, including some overnight, it was mostly clear when we woke up before sunrise. 

Sunrise in the White Mountains.

At dawn we mounted our bikes and started up the trail. It was steep, and we quickly went to pushing our bikes up. Turns out its really hard to bike at 12,000 feet. By the time we made it the two miles to Bancroft station, the sun had come up, and it was turning into a nice day. The summit was still shrouded in clouds, but they still had time to clear before we got up there.

The trail up White Mountain Peak is long. The downhill sections were quick on bikes, but the ups were slower than if we had just be hiking. Nevertheless we made steady progress up the trail. The switchback section seemed never ending, pushing a bike up it, but we did it. At around 14,000' we left the bikes by the side of the trail and went straight up. Then we were on the summit. The clouds had mostly lifted, and we got decent views.

Happy to get my first 14er.

There were already a number of people up there. After quickly layering up, we took some photos then got on the air. There was decent cell service, and we had no trouble spotting. It was pretty chilly though, so we didn't linger too long. The walk back to the bikes was quick, then even quicker riding down the hill.

Looking back at the summit.

It took a few switchbacks for me to get the hang of riding down the steep, rocky trail, but I got it. Everything was going well until Rex's back brake cable broke. That made the ride more interesting for him. But we all made it back to the car safely. 

The bike I had was old, and not very fun. Turns out you really do want shock absorbers and working gear shifters when riding in the mountains. Who could have guessed. Next time I think I'll just hike to the summit, or do it as a trail run. 


Trailhead: End of White Mountain Road
Website: SOTA Site.
Route: Follow the road all the way to the summit. There are no junctions.
Red Tape: None.
Video: Coming Soon!

W6/WH-010 Station Peak

Station Peak is one of the more remote peaks of the White Mountains. With Rex's SUV we were hoping to get all the way to the base, but we had bikes if the road turned out to be too rough. From the main road we turned right towards the Crooked Creek Station (road 5S01). Past the station the road got much rougher. We made it a few miles down before it was too much for the Pilot. 

On the way.

A short distance after starting my bike decided it had had enough, and the rear wheel came loose. Luckily, we had the tools and strength to get it back where it belonged. Thankfully it was the last real problem I had with my (very old and cheap) bike that weekend. After riding downhill a few miles, we turned off and headed up (road 5S01B). Around the place this spur road ended, there was a small station with two guys working. They were doing something with the cattle grazing in the area.

Station Peak.

From here there was no road or trail, and it was too steep for the bikes, so we left them by a rock and walked the rest of the way. On the way up we went straight. It was a decent route, however our return route was better. On the way down we hiked to the col to the east of the summit then followed the reentrant back to the bikes. I think I would take this route up next time.

Large meadow where we left the bikes.

The summit was covered with flying ants or something like that. It was pretty bad when the breeze didn't blow. There was marginal cell service, and we were able to get a few spots out. Sadly, the bands were in terrible shape, and I barely got my contacts. We could see rain moving in, so we packed up quickly and got out. Back at the bikes we rode back to the road, then up the hill to the car. It is hard to bike at elevation. So hard.


Trailhead: Road 5S01
Website: SOTA Site.
Route: Take the road past Crooked Creek Station as far as you can or will drive. The bike or hike to the small station, the cross country up to the summit.
Red Tape: None.
Video: Coming Soon!

W6/WH-008 Peak 10942

 This peak is the easiest in the White Mountains, by far. The main road goes around the peak just below the summit. However, the only nearby parking is to the south, at the last switchback below the peak. We parked here.

Radio set up at the summit.

From the pullout, it was about a five minute walk up to the top. I was pretty out of breath despite spending the night at 8000 feet. I guess it takes more that eight hours to acclimate.

Pointing at tomorrow's goal, White Mountain Peak.

There was good cell service on top, and the bands were open. We shared a KX2 so we could eavesdrop on all the QSOs. It was a quick and easy activation.

Bristlecone Pines.

We didn't spend too long on top since we wanted to get another peak or two before heading to the end of the road. We were feeling good and hopeful, so we decided to try and get Station Peak next.

Trailhead: Last switchback south of the peak.
Website: SOTA Site.
Route: Head straight up the hill to the summit.
Red Tape: None.
Video: Coming Soon!

W6/ND-037 Lookout Mountain

 KE6MT, N6RUN, and had decided to go to the White Mountains for some peakbagging and SOTA. In order to acclimate a little, we left after work on Thursday and drove through Yosemite to spend the night on top of Lookout Mountain. I was around 11:30pm when we arrived at the turn off from 395, and with Rex's SUV we quickly made it to the top. 

Trying a midnight activation.

It was a bit hard to see, but my guess is a sedan would've had a lot of trouble getting up to the summit. There were a few rough or sandy sections. We put up our tents, then quickly put up an antenna. Saurabh called CQ for a while, but only got two contacts. Since it was late, we went to bed after deciding to just get our contacts in the morning.

Sierra in the background.

In the morning I woke up first and got on the air. Since it was light across North America, it was easy to get contacts and I quickly got a dozen or so. As the other took their turns, I packed up and made breakfast. Once we all had our contacts and had finished packing up, we headed back down the hill and on to Bishop.

Despite a few trees, the views were excellent.

At the Great Basin Bakery, we met up with Adam K6ARK who was in town for his own trip. Properly fueled with tasty sandwiches, we headed into the White Mountains and our next summit, Peak 10920.


Trailhead: None, just drive to the summit. Turnoff is across from the Mammoth Scenic Drive north entrance.
Website: SOTA Site.
Route: Pick your favorite spot and set up!
Red Tape: None.
Video: Coming Soon!

W6/SS-269

 This is one of three SOTA peaks in the Kaiser Wilderness above Huntington Lake. After some staring at a map, I decided the easiest approach was to drive up to Kaiser Pass, then follow the ridge. This is broadly what we did.

About to enter the wilderness.

The road gets pretty narrow and windy on the way up to the pass, so be prepared for that. There was plenty of parking at the pass, and even some bathrooms. Much cushier than I expected. Heading up the hill we passed a few campfire rings, then the sign marking the wilderness boundary. The slope here is pretty gentle, and it was a pleasant walk through a Sierra forest. On top of the first sub peak we headed down to the col.

Enjoying the view from the open areas.

On the way there we stayed high enough to avoid the marshy meadows. It was probably slightly longer, but having dry shoes made it worth it. The original plan was to get on the ridge and follow it to the summit, but the ridge looked pretty rough. We decided to stay a little below where we only had to walk through calf-high brush. Going was pretty easy, and there weren't any areas we had to fight through.

Huntington Lake.

After you pass around the last sub-peak, you can see the summit above you. This climb was the steepest of the day, but nothing terrible. From below it looks like there are some cliff bands, but the rocks are broken and it was easy to just walk to the summit. From the top the views to the north were excellent, there being a cliff on that side of the mountain. My Verizon phone had ok service, enough to put out some spots. AT&T had some, but not as good.

Making contacts with the new KH1.

The bands were not in good shape, but I managed to get enough on HF with only the KH1 whip. We called on 2m for a while, but there was a station hogging the calling frequency, so we didn't make many there. 

We retraced our steps, more or less, to get back to the car. We stayed a little lower on the ridge during the traverse, and it was just as easy as higher. It did mean, however, we had to cross the wet meadow. Luckily we were able to find enough solid ground to keep our feet dry. Back at the car we coasted down the hill to the general store at the marina to get some snacks and beverages, then back to the campground to relax by the lake.

Trailhead: Kaiser Pass.
Website: SOTA Site.
Route: Head west into the wilderness and follow the ridge around and up to the summit.
Red Tape: None. Permit needed if you want to camp in the wilderness.

Hilltopper Redux

Got a note from the Four State QRP Group that they are kitting another run of the popular Hilltopper QRP Transceiver kits. Designed by Dave Benson, K1SWL, and kitted by the 4SQRPers, it’s been a popular kit that I’ve built in every flavor. So far. I hear they are testing a 15M version this time around so maybe I’m not yet done building Hilltoppers…

Keep an eye on the web site for additional details. There’s also a group list supporting this kit project.

The Hilltopper is a high performance, single-band CW transceiver. It is the perfect solution to your portable operation needs - small, lightweight, with wide frequency coverage and low current drain, extending the life of your portable power source. The receiver is adapted from K1SWL’s SW+ Series with minor modifications. The front-end circuitry was revised to replace the now-vanished 10.7 MHz IF transformers. The receiver output is suitable for headphone use.

The transmitter strip is a proven design using three BS170 transistors for the PA. The frequency source for both transmitting and receiving is a DDS VFO employing a Si5351 PLL module. Control for the rig is provided by an Atmel ATmega328P. This runs both the frequency control and the full-featured CW keyer.

A custom silk-screened PCB enclosure is included with the kit. No drilling or cutting required!

There are two pre-installed SMT ICs on the board, but the remainder are ALL THROUGH HOLE parts, and all jacks and connectors are board mounted, the combination making this kit very easy to assemble with no external wiring needed.

Raspberry Pi is Now a Public Company

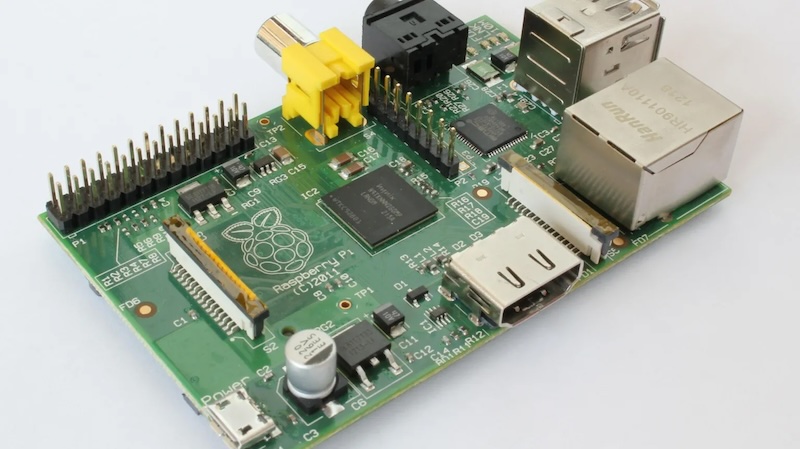
Raspberry Pi, the precocious little single-board computer that is universally adored and used for practically everything these days, is all grown up.

Today, we’re proud to announce that Raspberry Pi has listed on the London Stock Exchange, as Raspberry Pi Holdings plc. This is a watershed moment for Raspberry Pi, and the start of a new phase in our evolution: access to the public market will enable us to build more of the products you love, faster. And the money raised by the Raspberry Pi Foundation in the IPO will support its ambitions for global impact in its second decade; for more on what the IPO means for the Foundation, check out Philip’s blog post here.

Raspberry Pi priced its IPO on the London Stock Exchange on Tuesday morning at £2.80 per share, valuing it at £542 million, or $690 million at the current exchange rate. Shortly after that, the company’s shares jumped 32% to £3.70 - the company could end up raising more than $200 million during its IPO process.

But if you have thoughts about jumping onboard the fruity train, you might have to wait a few days. Retail investors can’t buy Raspberry Pi shares just yet, as only certain institutional shareholders can trade the company’s shares right now. Retail investors will be able to buy and sell shares starting on Friday.

Raspberry Pi shares soar on stock market debut

The Cambridge-based business is known for creating affordable credit card-sized computers designed to boost coding skills among children. Shares hit 392p in early trading on Tuesday, above the initial public offering (IPO) price of 280p. Raspberry Pi chief executive Eben Upton said: “The reaction that we have received is a reflection of the world-class team that we have assembled.” He said it was also because of “the strength of the loyal community with whom we have grown.”

The single-board computer has been particularly popular in the amateur radio and maker communities where it provides a small, energy efficient computer for specific purposes in projects that may have previously been handled by a full-blown PC. This cost-effective solution is often the first choice for a plethora of hobbyists adventures.

Track the progress of the IPO here.

AMSAT Mail Alias Service to End

In case you missed the news, the AMSAT mail alias service will be terminated on August 1st, 2024. The popular feature permitted mail directed to yourcallsign@amsat.org to be forwarded to any email address you chose. This feature has been a staple of satellite enthusiasts around the world for decades.

A recent AMSAT news bulletin announced the decision to end the service citing nefarious activity as the reason for termination:

Unfortunately, the unchecked rise in domain name hacking and email account high-jacking has made it impossible to sustain this service at a cost-effective level. The number of callsign@amsat.org email accounts that had been hijacked and converted to zombie spam account over the years had led many internet service providers and gateway centers to ban all @amsat.org email addresses, including those business accounts of AMSAT officers and officials. The tireless efforts of AMSAT’s all volunteer IT staff has worked for years to repair much of the damage, but AMSAT still get complaints from members who are not getting their personal emails, ANS bulletins or AMSAT-BB posts because of persistent delivery problems.

Mail aliases were once a popular way of supporting an organization while providing a relatively short, and easy to remember email address. Birthed in an era where aliasing was simple and few problems encountered, it flourished. Bad actors eventually took note of this large collection of addresses and problems followed. In the eternal war on spoofing and spamming, service providers build complex filters to trap and eliminate the most troublesome of these and one tool has been to simply ban email from entire domains. When that happens, you stop receiving email and eventually, contact AMSAT to complain about something over which they have little control.

Imagine the task of reaching out to every Internet Service Provider, big and small, globally, to explain that “amsat.org” was a legitimate concern and requesting the spam ban be lifted.

It has come to the point where the AMSAT volunteer IT staff can no longer keep up with the maintenance requirements to keep the alias mail list clean and to work with email gateways to remove blocks. And, after considerable investigation into alternative paid email services, AMSAT leadership decided that the money required to keep an email alias system alive would be better spent on building and flying satellites for its members.

This is why we can’t have nice things. The AMSAT email service has been a ham radio staple for more than two decades and it’s too bad it must be discontinued.

Persons using the Mail Alias Service should begin to migrate to different email accounts so they do not lose receipt of personal emails, AMSAT News Service Weekly Bulletins, AMSAT-BB posts, or official messages from AMSAT itself. Members are especially asked to make sure they are NOT using a callsign@amsat.org as their registered email address in the AMSAT membership portal. Members can easily change their registered member email address by logging into the portal and updating their profile.

The forwarding will end on August 1, 2024 and plans need to be made now to migrate from those addresses or risk losing email.

HAM RADIO International Amateur Radio Exhibition

HAM RADIO 2024: From June 28 to 30, everything will revolve around amateur radio in Friedrichshafen on Lake Constance. In cooperation with the organizers, the DARC, as the collaborative partner of Europe’s largest amateur radio trade fair, this meeting will open the doors to a world of almost unlimited possibilities. This big, wide world plays a significant role in the motto of HAM RADIO 2024: We celebrate 60 years of IOTA – Islands On The Air!

That’s why the motto of the 47th HAM RADIO is “60 years of Islands on the Air: technology meets adventure!”

Friedrichshafen is a city on the northern shoreline of Lake Constance (the Bodensee) in Southern Germany, near the borders of both Switzerland and Austria. Messe Friedrichshafen is one of the most modern exhibition centers in Europe. With 12 halls, 87,500 sqm exhibition space, conference rooms that can be flexibly varied to suit requirements, two central open-air grounds and its own lake. Over 27,000 sqm meters will be used from June 28-30 to host the largest amateur radio trade show in Europe. More than 11,000 visitors from 59 countries are expected to attend along with nearly 400 vendors from 30 nations.

Note it’s an “exhibition” and not a hamfest/rummage sale. The venue is a bit more upscale than typical ham radio ‘fests’ in the US and I don’t believe there’s a similarly-sized amateur radio show in the US operating under one roof.

Considered the “birth place of Germany’s aviation” where Graf Zeppelin built his world-famous Zeppelin airships and Dornier also worked on his unique aircraft. Other engineering companies located in the area and these are a mainstay of the high-tech region surrounding Lake Constance today.

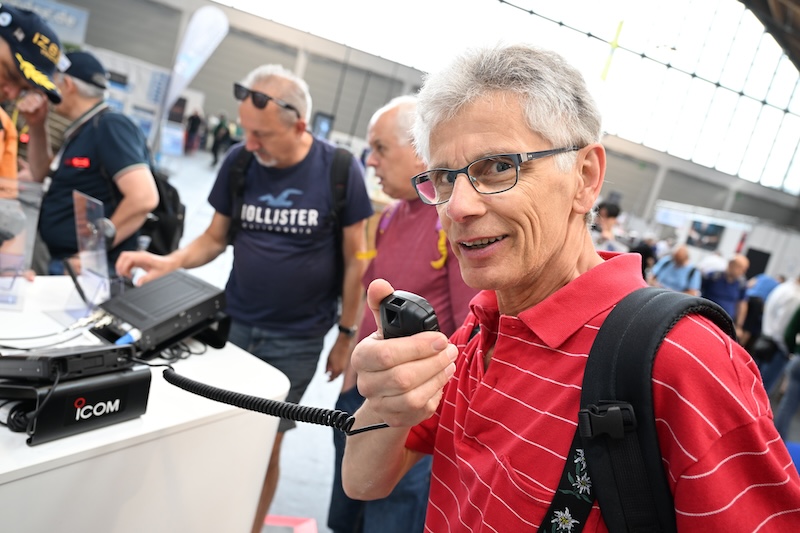
Where Hamvention provided a view of what US vendors have in store for the community during the coming year, Friedrichshafen provides a look at what European vendors have in the pipeline. The exhibition is always attended by ICOM and Yaesu, but many US firms and organizations also appear year-after-year. A quick scan of the vendor list reveals ARRL, Elecraft, Orlando Hamcation and several others will be exhibiting at Ham Radio 2024.

The event also includes dozens of program tracks. Use the translation tool in your web browser if you need a little language help. Just a few of these include:

Keep an eye on YouTube soon after the event to see what all you missed. I know I will. Previous years include these videos.

Though I’ve never attended, this ham radio event certainly deserves a spot on the bucket list, maybe next year?

Wayne Green. Spirit Guide.

Wayne Green was a radio amateur and entrepreneur born in the halcyon days of hobby radio. A veteran of the Second World War, he saw first hand the impact a glut of war surplus equipment had on the amateur service. Mechanical behemoth’s from the War Department soon filled basement radio shacks and RTTY became the hot new thing in hamdom. Wayne took an interest and soon began publishing a ‘newsletter’ directed at the growing crowd of new enthusiasts.
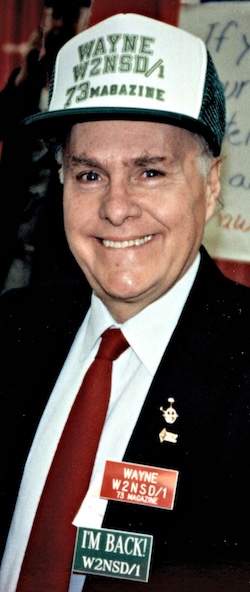
The success of his venture didn’t escape the attention of the publisher at CQ Magazine, an enterprise that had launched just before the ban on ham radio was lifted in the United States at the end of the war in 1945. And before long, Green found himself writing an RTTY column and moving up the ranks at the new publishing enterprise.

He learned the periodical business while at CQ, and by 1960, decided the time was right to launch his own publication, 73 magazine. 73 quickly became popular, as did ‘Uncle Wayne’ and for a season, 73 was the cutting edge ham radio journal of record. It promoted homebuilding, ham radio in space, FM and repeaters, and later, computers in the ham shack – long before the ancients running the other publications would even admit that ham radio was evolving.

Of course, the story doesn’t end there. His was a life filled with successes and failures - a frequent juxtaposition for most entrepreneurs. I entered the ham radio world during the mid-70’s when Wayne’s ham radio empire was beginning a slow decline. As forward thinking as he was during the previous decades, he seemed to have become frozen in 1975. The magazine continued to prosper, mostly because scandals at ARRL provided the yin to his yang and gave him reason to continue printing it.

Eventually, it morphed into the publication for ARRL antagonists and 73 became the anti-QST magazine. And as it turns out, you can almost make a successful business out of that.

Uncle Wayne’s editorials became epic in rant, length, and subject matter. ‘Never Say Die’, a backronym on his call sign, W2NSD, often exhausted 5,000 or more words in a single editorial - enough to fill a novel every twelve months. His monthly screed covered the amateur radio scene well enough, at least in the beginning, but later these were peppered with his personal views on race relations, conspiracy theories, politics, the economy, health and education - to name just a few.

Readers were of two minds on Wayne’s penchant for sharing his opinions. They loved it or they hated it, there was no middle ground. The effect was polarizing and I happily admit, I loved it.

You didn’t read a 73 editorial in a single session. It needed to be carried around all week and imbibed slowly, five paragraphs at a session. It caused me to actually think about the views espoused and was an order of magnitude deeper than the typical ham radio editorial detritus…

Another generation and W2NSD would have been a blogger. I often try to imagine how his views would be received in this century and I’ve not managed to imagine a scenario where he would have been well-liked in that effort. After all, we have dumbed things down considerably, especially our written discourses in order to accommodate the duration of an average bowel movement.

We tweet 140 characters as though bits were expensive commodities. Blog posts exist in 200 words, preferably less. Photos and videos are much more highly prized than thoughtful commentary - unless it can be consumed in a minute or less.

21st century humans suffer from attention disorders and deeply flawed attention spans. We don’t talk on the phone anymore, we send text messages. We don’t have conversations via ham radio anymore, we exchange signal reports and grid locators. I could go on, but if you haven’t got my point by now, you won’t.

I miss Uncle Wayne’s long editorials and I’d like to someday pontificate the way he did, though no one need call me El Supremo. I don’t possess his gravitas…

Wayne Green, W2NSD became a Silent Key on September 13, 2013. He was 91.

Daylight’s Computer Tablet

I ordered a new tablet a few days ago, and it’s not an iPad. Surprised? Daylight Computer is a new manufacturer with hopes of shaking up the tablet market. I like their tagline, “The computer, de-invented”. They say the new DC-1 tablet is a “new kind of computer designed for deep focus and well-being”. What attracted me the most was the 10.5-inch e-ink display that refreshes at 60 fps. Easily visible in daylight, amber backlighting at night. Runs a custom version of Android, ships with a stylus, and looks great.

Om Malik wrote about the new device:

This is one of the most talked about devices in Silicon Valley. It was created by Daylight Computer, a company started by Anjan Katta to solve his problem — he suffers from ADHD and wanted something that allowed him few distractions and allowed him to work with intent. The reason I am excited about that new tablet is because it is optimized around reading, writing, and productivity. This is very different from the tablets we have had so far.

What the company has created is a beautiful tablet — about the size of a normal iPad Air. It is just a “little less than white,” white, with a gorgeous screen. It is very simple, elegant, and lovely. It has an e-ink like screen, and the matte monochrome paper-like display is optimized for reading, writing, and note-taking. It refreshes at 60 frames per second, a pretty big deal for these kind of displays.

This is the direction I thought Amazon was going to take the Kindle, until they basically abandoned it. It includes Bluetooth and Wifi, but there is no cellular option. Less distraction. There’s no camera. Less distraction. I like less distraction and am always on the lookout for things that will simplify life and minimize my interaction with technology.

Related:

  • Founder of Daylight Computer explains the new screen tech on Hacker News
  • Arun Venkatesan, founder of Carrot Fertility reviews the new tablet on his blog

HL/SL-006 Guryongsan

 It was getting close to the end of our time in Korea, but there was still time for one more SOTA activation. We were back in Seoul, so I picked a summit that was easy to get to from the subway. This peak is south of the Gangnam neighborhood, made famous by the song.

The trails were well signed, and seemed pretty popular.

From the Yangjae Citizens Forest station exit 3 I walked south along the road. There is a busy road to cross, then a few buildings, then I stepped into the woods. Based on the maps I was expecting a well marked trail. But instead I found an unmarked, not well used path. It was going the right direction, and in the spot I expected, so I followed it. After a quarter mile or so it intersected with a much nicer path.
Occasional glimpses of the city.

This trail was obviously what I wanted, and what I had been expecting, so I followed it up the ridge. There were a fair number of people out for a hike. Like the other hikes I had done here, it was much more humid than I was expecting. I'm really spoiled living in California. It did feel like it was going to rain, but I never felt more than a few drops.  
Weather station on the ridge.

At one of the intersections there was a big sign telling about the Seoul Trail that circumnavigates the city. It seemed like it could be an interesting thing to do if you lived there. Shortly before the summit is an excellent view point. I stopped for a few pictures before continuing on to the high point. The summit was unremarkable. Just below, near a tower, was a bench I decided to sit at. It was slightly difficult putting up the antenna through the trees, but I managed well enough. On the air I worked Korean and Japanese stations.  
Seoul: Namsan on the left, Lotte Tower, Bukhansan

Once HF was packed up, I walked back to the viewpoint to see if I could get anyone on 2m. I got two more stations, then headed back down. This time I took the nice trail all the way to the bottom, where it came out between a few buildings. It would've been hard to find that trailhead without knowing about it. 
Trailhead: Yangjae Citizens Park subway station, exit 3.
Website: SOTA Site.
Route: Head south along the road, crossing the expressway. In between the buildings there is a trailhead, or the one along the main road. Follow the trail to the summit.
Red Tape: None.
Video: 

HL/BS-026 Jangsanbong

 During our Korea trip we spent a few days in Busan. This lovely city is nestled among the hills on the southeast coast of the peninsula, and as you'd expect for a hilly city, has some good SOTA opportunities. Naina was in need of a nap, but I had plenty of energy, so I headed out one afternoon for a walk up a local peak. I chose Jangsanbong because it was reasonable close to a subway stop on the 2 line, and our hotel was also on the 2 line.

From Haeundae Beach, I think thats the summit I went to.

We only got one SIM card for the trip, and it was in Naina's phone, so I had to navigate the "old fashioned" way, with just the maps downloaded to my phone. It was not hard, since the phone maps will show you where you are using GPS. I got off the subway at the Kyungsung Univ.-Pukyong Nat'l Univ. stop, then went out exit 3. A u-turn at the top of the stairs then left turn had me heading down the right road.
The summit hiding behind the buildings.

I walked past Pukyong National University, following the main road. At a three way intersection I didn't have to cross, and beared left. Shortly after this there was a busy expressway crossing, so I had to wait for the walk signal. The area on the ocean side of the expressway was much less busy, and felt less built up. The road kept getting smaller and smaller, until it was two lanes with no median. I crossed at a crosswalk shortly before the sidewalk ended.
Helpful(?) map of the park and mountain. I followed the green path, more or less.

As you pass the last buildings, the road gets much steeper. Some meters of climbing later I passed a nice looking building, then a parking lot. There are bathrooms in the building, which was nice, and at the far corner of the parking lot was a trailhead. It was late Sunday afternoon, but the lot was nearly full, and I saw many people out in the park. After a quick glance at a map board, I decided it would be easier to just follow my phone. 
Paved trail on the way up.

The trails in the park had impeccable maintenance. The steep parts were paved or had steps, and the trails were wide. It was nice to be off the city streets. At the top of the first climb, where I got onto the ridge, there was a free outdoor gym. People were using it. This was to become a theme. I followed the main trail up the ridge. Every once in a while there would be a small gap in the trees and a view of Busan, but don't come here if you're expecting views. 
Marker at the summit. I'm not sure what its marking though.

Just below the summit there is a turn off to the high point. I walked through another gym, also in use, to the summit which was an open field. There was a big X in the field, with a path around the perimeter. There are some benches next to the main trail at the junction, in the activation zone, but I decided it would be easier to put up a wire in the open field on top. I used the bushes to hold the pole, and was soon on the air. I thought I'd get a lot of Japanese stations on 40m, but I only got two. I was getting worried as I switched to 20m, but it turns out 20m was probably a better band for getting Japan. I also managed to get a chaser in New Zealand. 
Views of Suyeongman Bay and Busan. Haeundae Beach is on the right, below the three towers.

Once I had packed up I took the same route back down. I passed a viewpoint I had missed on the way up, and that small detour was worth it. The trees had been cleared enough to see the harbor, Hauendae Beach, and parts of downtown. The soft evening light made the scene beautiful. I managed to get through the city, ride the subway, and get back to the hotel just before dark. Though I wasn't too worried once I got to the streets since I knew they'd be lit.
Post-activation soju.

Trailhead: I started at the Kyungsung University stop on subway line 2, but if you have a car you can get much closer.
Website: SOTA Site.
Route: From the Kyungsung University stop on subway line 2, follow the main road towards Pukyong University, across the expressway, and up past the church to the parking lot. Then take the main trail up to the summit.
Red Tape: None.
Video: Coming soon.

HL/SL-009 Namsan

 We were in Korea for vacation, so naturally I wanted to do some SOTA. Korea is a mountainous place, and it looked like there were plenty of choices. The first summit we did is in the middle of Seoul, literally. The geographic center of the city is on the side of the plaza on top.

The tower is visible from a lot of places in the city, including this traffic island in Myeongdong.

Our hotel was in the Myeongdong neighborhood, near the Hoehyeon subway station. From exit 1, head uphill through the neighborhood. There was a flight of stairs just below a busy road, which we crossed to enter Baekboem Plaza. The tower on top was visible from here, and it was easy to follow the path to the bottom of the staircase. 

From the plaza. Still some blossoms on the trees!

Since the summit is easy to get to in a big city, there were a lot of people out. The stairs up to the top were wide and paved. There are plenty of benches, and even a few viewing platforms on the way. It was hazy as we ascended, but we could still see Bukhansan a few kilometers away to the north. We were glad it was cool out, it probably would have been a miserable hike in the summer.
Base of the stairs.

You know you are close when you see the cable car terminal. This is also where it goes from busy to crowded. Once you make it up the last few stairs, there are plenty of benches around the plaza and under the structure. We sat for a few minutes taking in the scene. On one side the fence is filled with locks that couples have attached. There was even a vending machine to buy your own to add.
High point of Namsan.

We found a bench out of the way, and I got on 2m. I had been warned that Korean hams are chatty, and they were. It took a couple of minutes calling CQ, but I soon had a long conversation with someone who couldn't quite get my Korean callsign (HL1/AA6XA). The slash seemed to trip him up. After a long chat I got two more stations in the log. Some more CQ calls didn't get anyone else, and we were getting bored and hungry, so I packed up. I thought about trying HF, but there really isn't anywhere to put up a wire without getting in people's way.

At the geographic center of Seoul.

We took the stairs back down, then turned onto a different road to get to the bibimbap restaurant near the base. It was a tasty and well earned lunch. 

Trailhead: We started from Hoehyeon Station exit 1, but there are myriad routes one could take
Website: SOTA Site.
Route: Make your way through the streets to the base of the stairs, then up the stairs to the summit. Or take the cable car.
Red Tape: None.
Video: https://youtu.be/PhfTnJKnz4U

W7I/SI-217

 This little peak is across the road from Lava Hot Springs. Since it was the winter, and there was snow on the ground, I parked in the empty lot at the corner of Center and River streets. From here it was a short walk up River Street to Highway 30. After making it across, I walked up the dirt road to what seemed like a good spot to go up the railroad embankment. I crossed the tracks and was on my way.

Looking up, across the tracks.

The hike up the hill is steep. It was not, however, steep enough to need traction in the snow. Most of the hill just across the tracks is either State or BLM land, so no problems with access. And the scary cliffs you can see from the highway are easy to bypass. Near the top of the ridge I crossed a road, leading to a hut. It wasn't really the direction I wanted to go, so I continued up to the ridge, then across towards the summit. 

Nice views to the west on the way up.

It was a lot easier hiking on the ridge, since it was much less steep. The highest area had more snow, but not enough to make walking difficult. I tagged what appeared to be the high point in some rocks, then went over to find a spot to put up my antenna. On the air I made plenty of contacts, and had great cell service on top. 

Antenna on the summit.

Going down was easy, I just followed my footprints. The steep section was a lot more fun, since I could slide a little on each step to get down faster. At the bottom I carefully crossed the tracks and highway again, and walked back down the road to my car. Overall, it was a fun hike and a great day to be out in the mountains.


Trailhead: Big parking lot at the corner of Center St and River St. In the summer you can probably park on the dirt pullout by the tracks, across the highway.
Website: SOTA Site.
Route: Walk up River St, cross the highway and train tracks, then head straight up the hill. On the ridge, follow it over to the high point.
Red Tape: I didn't see any signs, so you're probably ok.
Video: Coming soon!

❌