Reading view

There are new articles available, click to refresh the page.

RTTY Contest Operation and Messages

In 1985, I built a home-brew decoder and experimented with RTTY, but I never got it to work. I've since decided that I didn't know how to tune RTTY properly. Things changed in 2005 when I downloaded CocoaModem made my first RTTY contacts. 

Since I was involved in contesting, I naturally turned to RTTY contesting. Today, it is unusual to hear RTTY signals on the bands except during contests. Thirty or more years ago, RTTY was commonly heard on 80 and 20m. 

Characteristics

Several characteristics of RTTY must be understood in order to communicate effectively: 
  • RTTY has no error correction or detection -- unlike AMTOR, Packet, FT4 or FT8. This means whatever that prints might be wrong. And if it is wrong, you will not know. 
  • RTTY prints garbage. Without a signal, random characters print. This further complicates determining what is correct and what is not. 
  • RTTY does not handle multiple signals well. When two or more stations call at the same time, RTTY will not print reliably. Certain decoders may print the strongest signal, if you are lucky.
  • RTTY text comes in a continuous stream. Long lines wrap to the next, or one can force a new line by sending a carriage return / line feed combination. Wrapped lines are often difficult to read.
  • RTTY has two shift states, LETTERS and FIGURES in the Baudot encoding. RTTY rests in the LETTERS state. An unprinted FIGURES character is transmitted to shift to the FIGURES state. A similar LETTERS unprinted character can be sent to shift back, or one can automatically unshift on a space character. 

Principles

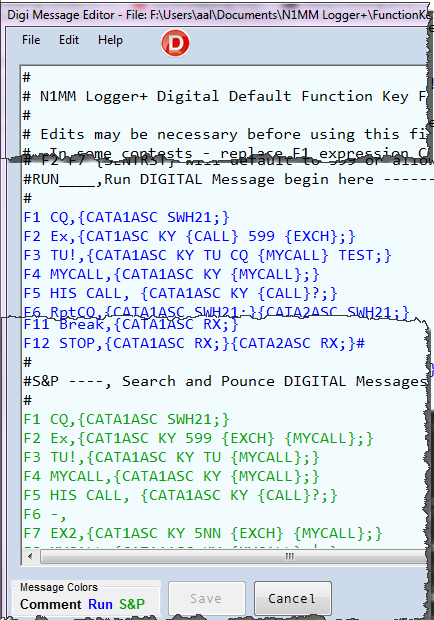
For effective RTTY contest communication, several principles apply. 

  • Brevity - every character sent must have a purpose. There should be no wasted characters.
  • Duplication - every important element should be sent twice. This contradicts the brevity principle. Because RTTY prints incorrect characters, sending important elements twice helps ensure correct reception.
  • Scrolling - each message starts a new line, but ends with a space. This technique keeps lines from wrapping, and avoids the end of message being confused by garbage characters when the signal drops. 
  • Shifts - avoid needless shifts. Any sequence involving the unprinted FIGURES or LETTERS characters takes longer to send. 

Messages

(I'm using N1MM messages for my examples. Other software may have different macro names and techniques, but the same principles apply)

Every message starts with a {TX} and ends with {RX}. This transitions the software to transmit and back to receive. 

S & P

Let's say you want to answer someone's CQ. This means you need to send your call. For that, you'd use a macro like this:

{TX}{ENTERLF}{MYCALL} {MYCALL} {RX}

or

{TX}{ENTERLF}* * {RX}

(For N1MM, the asterisk and {MYCALL} macros are the same)

Notice the message starts with {TX}, performs a carriage return / line feed with {ENTERLF}, sends the call twice, ends with a space and then {RX} to go back to receive. Sending the call twice helps to ensure the recipient receives it correctly.

If you are lucky enough to get a response, you'll have to send the exchange. The exchange will vary by contest, but it could be a message like this:

{TX}{ENTERLF}! 599 GA GA DE {MYCALL} {RX}

This is what I send in the RTTY Roundup. First is the recipient's call (!). Then 599 -- don't use 5NN, because that actually takes longer to send in RTTY -- and send it only once, because it isn't important. Then the exchange is sent twice, followed by the prosign DE and my call, followed by a space. 

N1MM's authors recommend you use the ! character rather than the {CALL} macro. The reason is that {CALL} isn't subject to correction -- it sends the contents of the Call field at the start of the message. The ! character will send the Call field as it is being corrected in real time. As a practical matter, most RTTY contest contacts involve pointing and clicking on callsigns, so there's less typing, and therefore fewer corrections involved.

A couple of things here. Notice I did not use the {EXCH} macro above. When there are multiple elements to the exchange, I put the repetitions together. So, I tend put the exchange information into the macro directly. For example, here's an S & P exchange for CQWW RTTY:

{TX}{ENTERLF}! 599 GA GA 5 5 DE {MYCALL} {RX}

GA for Georgia, and 5 for zone 5. For NAQP RTTY, it would be:

{TX}{ENTERLF}! 599 BILL BILL GA GA DE {MYCALL} {RX}

Some might balk at the use of the DE prosign, particularly for exchanges that involve a state or section, since DE might be confused with Delaware. However, I think this prosign is useful, as it establishes the callsign is of the answering station, and not the CQing station.

CQing

Calling CQ in a contest is the most-used message:

{TX}{ENTERLF}CQ RU {MYCALL} {MYCALL} CQ {RX}

Note that the important information -- the callsign -- is repeated. The other curious thing is the "CQ" at the end. This indicates I finished a CQ message. This is important because one cannot tell when potential callers tune in to your signal. If they do so during the first callsign, the can't tell if you are calling or answering a CQ. Putting "CQ" at the end establishes you are calling CQ. And it is shorter than "QRZ?".

Naturally, one indicates the contest in the CQ message. Here it is "RU" for Round Up. Use whatever is appropriate for the contest, or simply "TEST".

When someone answers your call, you send an exchange message:

{TX}{ENTERLF}! 599 GA GA ! {RX}

Note that the exchange is sent twice, and if there were more than one element to the exchange, I'd send those twice as well:

{TX}{ENTERLF}! 599 BILL BILL GA GA ! {RX}

Another item to notice is there is no {MYCALL} macro in this message. Instead, the caller's callsign (!) is sent twice, once at the beginning and once at the end. There are two reasons for this. First, it follows the principle of sending important information twice. It could be the caller's callsign printed incorrectly to me, or perhaps it will print incorrectly when I send the message back. If I only send the callsign once, the caller might or might not correct it if is wrong, or they may correct it if it printed incorrectly to them. 

Unnecessary corrections are a waste of time, but necessary corrections are desired. 

Second, it may be that during the response with the exchange, other stations may also be calling. This, creates a good chance that the initial callsign in the response will print incorrectly. If you don't send the callsign again at the end, it could be unclear who you responded to. 

Once you've received the exchange from the caller, one sends an acknowledgement:

{TX}{ENTERLF}! TU DE {MYCALL} CQ {RX}

Short and simple. Two features here. One is the DE prosign, to indicate this is the transmitting station's call, and ending with "CQ" to invite new callers.

Turnaround

Occasionally, multiple callsigns will print in response to a CQ. You can only respond to one at time.  Since you can only respond to one at a time, this leaves someone waiting. Rather than have them call again, you can use a turnaround message which acknowledges a completed contact and starts a new one:

{TX}{ENTERLF}! TU {LOGTHENGRAB}NOW..{ENTERLF}{F5} 599 GA GA {F5} {RX}

This message omits {MYCALL}, and uses the {LOGTHENGRAB} macro to first log, then grab the callsign off the automatic decode stack, then it follows with the normal exchange. If you use Single Operator Call Stacking, you can use {LOGTHENPOP} instead. See the N1MM manual.

Note that instead of using the exclamation point (!), we use the {F5} macro. Both the exclamation point and the {CALL} macro won't be updated by the {LOGTHENGRAB} macro, but {F5} will.

Short

When signals are strong, and the bands are quiet, perhaps the principle of sending information twice doesn't apply. Most RTTY contests allows contacts on multiple bands, and the exchange doesn't change. In these cases, you may want to have short messages handy. Here are some examples:

{TX}{ENTERLF}! 599 BILL GA DE {MYCALL} {RX} -- short S & P exchange

{TX}{ENTERLF}! 599 BILL GA {RX} -- short exchange for S & P or CQing

{TX}{ENTERLF}599 BILL BILL GA GA {RX} -- repeat of just the exchange 

{TX}{ENTERLF}CQ RU {MYCALL} CQ {RX} -- short CQ

{TX}{ENTERLF}TU DE {MYCALL} CQ {RX} -- short acknowledgement

All these should be used when you have solid copy, want to get back to other callers quickly, or you are fairly certain the other operator already has your exchange information from a previous contact.

Tips

Some tips I've picked up over the last decade that are helpful.
  • Use Slow AGC - Fast AGC can confuse decoders and introduce print errors
  • Use TX Filtering on AFSK - If you are using MMTTY or similar software, use the 512 tap TX Filter. It helps transmit a cleaner signal.
  • Listen with Headphones - sometimes you can hear signals that don't always print, if you listen with headphones, you can hear the stations calling you. It also helps you improve your timing in a pile.
On that last tip, turn the volume on the headphones way down. You just have to sense when signals are there, you aren't decoding them. (I believe it was the late Irv Hoff, W6FFC (SK) -- a RTTY pioneer -- who suffered hearing loss at 2125 and 2295 Hz from listening to RTTY signals)

Practical Messages 

There are a handful of other messages you may wish to have handy. Here's one I use often, when you didn't copy anything sent:

{TX}{ENTERLF}AGN AGN {RX}

Or perhaps you need a fill of one element:

{TX}{ENTERLF}STATE? STATE? {RX}

{TX}{ENTERLF}NR? NR? {RX}

{TX}{ENTERLF}NAME? NAME? {RX} 

 Before you open up with a CQ on a frequency,  this is good one:

{TX}{ENTERLF}QRL? DE {MYCALL} {RX}

 Maybe if you are not sure someone is calling you:

{TX}{ENTERLF}QRZ DE {MYCALL} {MYCALL} {RX}

Or the short version:

{TX}{ENTERLF}QRZ DE {MYCALL} {RX}

Every once and a while, directed call is useful, especially when two stations are calling CQ on top of each other:

{TX}{ENTERLF}! DE {MYCALL} {MYCALL} {RX} 

Conclusion

RTTY contests are a ton of fun. Program a set of messages and try it. You'll like it.

German Teletype (RTTY) Weather on HF (Shortwave) Radio

This is a video of the German Weather Broadcast from DWD, Hamburg, on shortwave (HF), using teletype (RTTY). I demonstrate two decoding software options: JWcomm32 (older), and, FLdigi. Note the in FLdigi, the “Reverse” feather is selected to properly decode the signal (in either USB or LSB, you still need to select, “Reverse”). The radio […]

DX Century Club – RTTY

Some years ago, the ARRL decided to stop issuing a DXCC certificate for just RTTY and merged the various digital modes all together for a single ‘digital’ certificate. I obtained the ‘digital’ certificate back in 2012 with just RTTY QSOs and was always a little sad that my certificate said ‘digital’. Last year, I heard […]

The post DX Century Club – RTTY first appeared on QSO365.

Review of 2022

QSOs made: 2,022DXCC entities worked: 141New DXCC entities worked: 4Total DXCC worked and confirmed: 286 Solar cycle 25 is really starting to ramp up now and this is demonstrated clearly by the fact that for the first time in many years, the country I’ve worked the most is the USA with 436 QSOs. Unsurprisingly, 15m is […]

The post Review of 2022 first appeared on QSO365.

QSO365 #3 is complete – Ten QSOs per day in 2021

I’ll kick off with the statistics for the whole of 2021 and then go into the details. QSOs made: 8,265Unique QSOs made: 5,776Average QSOs per day: 22.6Days missed: 0 <- This is the most important statistic, it means that QSO365 #3 was a success. DXCC entities worked: 168New DXCC entities worked: 1Total DXCC worked and […]

The post QSO365 #3 is complete – Ten QSOs per day in 2021 first appeared on QSO365.

tag:blogger.com,1999:blog-3306097083362758983.post-331108867283206159

Using Elecraft KX3/K3 KY Codes to Allow N1MM & RTTY-FSK


A Step-by-step Guide (assuming no previous experience)
Anthony Luscre- K8ZT
Introduction
This guide has been written assuming you have had little or no experience with using KX3 USB Interface or N1MM operations. For those with previous knowledge fill free to skip ahead to needed configuration and sample Macros. There maybe other settings that work, but these worked for me.This setup should also work with K3 or K3S


Why?
  1. I wanted to use the KX3’s excellent FSK (not  AFSK) and KX3’s RTTY to Text Decoding
  2. I did not want to use a Signalink or other digi interface or use my computer’s sound card
  3. I was only interested in using RTTY for casual operation in a contest that required serial numbers and wanted to be able easily send reply with incrementing serial numbers
  4. A bonus is ability to also use this setup for SSB or CW (If you are interested in non-macro driven, direct keying CW see appendix)


What you need-
  1. ACC-1 USB Interface Cable that ships with KX3 (the same one you use for Firmware updates)
  2. KX3 Utility Software (latest version- www.elecraft.com/KX3/KX3_software.htm )
  3. Computer running Windows XP, 7, 8 or 10 (“N1MM Logger+ incorporates the latest multi-threading technology, and will take full advantage of multi-core CPUs.. A single-core 1.6 GHz processor is probably the minimum required, but the CPU requirements depend quite heavily on which program options, modes, etc. are selected, so this may not be adequate depending on how you use the program. The program itself does not require a large amount of memory, but the more memory you have, the more smoothly Windows multitasking works.”)
  4. N1MM Logger+; a Free Contesting/Logging software (http://n1mm.hamdocs.com/tiki-index.php)


Setup-
  1. Install KX3 Utility Software
  2. Plug USB cable into radio & computer
  3. Turn on KX3
  4. Determine USB Port # being used by KX3
    1. Start KX3 Utility Software and click “Test Communications” button
    2. Note the resulting port # (this will vary depending on other device connected to your computer.)
    3. Exit (File...Exit) KX3 Utility Software
  5. Install N1MM Software
  6. Configure N1MM Software
    1. On top menu choose “Configure” then “Configure Ports, Mode Control….”
    2. “Configure Ports, Mode Control….” dialog box will open
    3. You will need to use two tabs at the top
      1. “Hardware”
      2. “Digital Modes
  7. Configure Hardware Tab
    1. Choose the Port # that you noted above (with KX3 Utility Software). If the port is not listed, change one of the ports to the number you need
    2. Choose KX3 as the Radio
    3. Check “CW/Other” box
    4. Click “Set” to configure connection settings as show in screenshot D
    5. Check “Digi” box for any port number that is not being used by KX3 or other USB devices connected to your computer. (If not sure choose clicking on the drop down box will show available ports).
    1. Click “Set” on the port you have chosen for “Digi” and set as in the screenshot F
  1. Configure “Digital Modes” tab
    1. Choose “Digital Interface TU Type”. Then chose “Soundcard”.
    2. Click OK to close


    1. Close “Configure” then “Configure Ports, Mode Control….” dialog box
    2. Click on “Windows” Top Menu bar then choose “Digital Interface” a pair of windows should open.
    3. On the “Soundcard” dialog box, choose “Interface” menu.
    4. Select “MMTTY” (It should not, but if it does say you have to install “MMTTY”, it is free software- http://hamsoft.ca/pages/mmtty.php).
    5. You can minimize them and/or move them out of the way as they will not function in this configuration.
    6. You will be using the KX3 Decoded Text Display
  1. Load N1MM Macros
    1. On the top menu choose “Configure” then “Configure Ports, Mode Control….”
    2. Click “Change CW/SSB/Digital Key Definitions”
    3. Click “Change Digital Function Key…”
    4. Paste the sample “Run” & “Search & Pounce” messages (see sample list below) into box.
    5. Edit to match your preferences.
    6. Save, with a new name (KX3-Macros-CW) or anything to distinguish it from N1MM default messages file.
    7. Please note: macro in F12 is designed to stop transmit if does not terminate on its own.


Sample set of Macros for RTTY Contesting


#Simple RTTY K3/KX3 EXAMPLE
#The space between the KY and the first character in the actual message
#is required by the K3/KX3 command syntax, as is the semicolon at the end
#of the message.
##REM ———-, Special instructions begin at end-of-file —————————–
#
#
#RUN____,Run DIGITAL Message begin here —————————–
#
F1 CQ,{CATA1ASC SWH21;}
F2 Ex,{CAT1ASC KY {CALL} 599 {EXCH};}
F3 TU!,{CATA1ASC KY TU CQ {MYCALL} TEST;}
F4 MYCALL,{CATA1ASC KY {MYCALL};}
F5 HIS CALL, {CATA1ASC KY {CALL}?;}
F6 RptCQ,{CATA1ASC SWH21;}{CATA2ASC SWH21;}
F7 EX2,{CAT1ASC KY 5NN {EXCH} {MYCALL};}
F8 AGN?,{CAT1ASC KY AGN?;}
F9 Nr?, {CAT1ASC KY NR?;}
F10 SEC?, {CAT1ASC KY SEC?;}
F11 Wipe,{WIPE}
F12 STOP,{CATA1ASC RX;}{CATA2ASC RX;}
#
#S&P ———-, Search and Pounce DIGITAL Messages begin here —————————–
#
F1 CQ,{CATA1ASC SWH21;}
F2 Ex,{CAT1ASC KY 599 {EXCH} {MYCALL};}
F3 TU!,{CATA1ASC KY TU {MYCALL};}
F4 MYCALL,{CATA1ASC KY {MYCALL};}
F5 HIS CALL, {CATA1ASC KY {CALL}?;}
F6 -,
F7 EX2,{CAT1ASC KY 5NN {EXCH} {MYCALL};}
F8 AGN?,{CAT1ASC KY AGN?;}
F9 Nr?, {CAT1ASC KY NR?;}
F10 SEC?, {CAT1ASC KY SEC?;}
F11 Wipe,{WIPE}
F12 STOP,{CATA1ASC RX;}{CATA2ASC RX;}
#
#REM ———-, Special instructions begin at end-of-file —————————


Sample set of Macros for CW Contesting


#RUN____,Run CW Message begin here —————————–
#
F1 CQ,{CATA1ASC SWH21;}
F2 Ex,{CAT1ASC KY {CALL} 5NN {EXCH};}
F3 TU!,{CATA1ASC KY TU CQ {MYCALL} TEST;}
F4 MYCALL,{CATA1ASC KY {MYCALL};}
F5 HIS CALL, {CATA1ASC KY {CALL}?;}
F6 RptCQ,{CATA1ASC SWH21;}{CATA2ASC SWH21;}
F7 EX2,{CAT1ASC KY 5NN {EXCH} {MYCALL};}
F8 AGN?,{CAT1ASC KY AGN?;}
F9 Nr?, {CAT1ASC KY NR?;}
F10 SEC?, {CAT1ASC KY SEC?;}
F11 Wipe,{WIPE}
F12 STOP,{CATA1ASC RX;}{CATA2ASC RX;}
#
#S&P ———-, Search and Pounce CW Messages begin here —————————–
#
F1 CQ,{CATA1ASC SWH21;}
F2 Ex,{CAT1ASC KY 5NN {EXCH} {MYCALL};}
F3 TU!,{CATA1ASC KY TU {MYCALL};}
F4 MYCALL,{CATA1ASC KY {MYCALL};}
F5 HIS CALL, {CATA1ASC KY {CALL}?;}
F6 -,
F7 EX2,{CAT1ASC KY 5NN {EXCH} {MYCALL};}
F8 AGN?,{CAT1ASC KY AGN?;}
F9 Nr?, {CAT1ASC KY NR?;}
F10 SEC?, {CAT1ASC KY SEC?;}
F11 Wipe,{WIPE}
F12 STOP,{CATA1ASC RX;}{CATA2ASC RX;}
#
#REM ———-, Special instructions begin at end-of-file —————————–
#On K3/KX3 use straight Key to end tranmission at anytime
#


Sample set of Macros for SSB Contesting


#RUN ———-, Run SSB Messages begin here —————————–
#
F1 pulls message from Memories, test to verify assignments in your radio
F1 CQ,{CATA1ASC SWT21;}{CATA2ASC SWT21;}
F2 Exch,{CATA1ASC SWT31;}{CATA2ASC SWT31;}
F3 Thanks!,{CATA1ASC SWT35;}{CATA2ASC SWT35;}
F4 {MYCALL},{CATA1ASC SWT39;}{CATA2ASC SWT39;}
F5 -,
F6 RptCQ,{CATA1ASC SWH21;}{CATA2ASC SWH21;}
F7 REC,{CATA1ASC SWT37;}{CATA2ASC SWT37;}
F8 -,
F9 -,
F10 -,
F11 -,
F12 STOP,{CATA1ASC RX;}{CATA2ASC RX;}
#
#S&P ———-, Search and Pounce SSB Messages begin here —————————–
#
F1 CQ,{CATA1ASC SWT21;}{CATA2ASC SWT21;}
F2 TU QRZ,{CATA1ASC SWT31;}{CATA2ASC SWT31;}
F3 NA1DX,{CATA1ASC SWT35;}{CATA2ASC SWT35;}
F4 {MYCALL},{CATA1ASC SWT39;}{CATA2ASC SWT39;}
F5 -,
F6 RptCQ,{CATA1ASC SWH21;}{CATA2ASC SWH21;}
F7 REC,{CATA1ASC SWT37;}{CATA2ASC SWT37;}
F8 -,
F9 -,
F10 -,
F11 -,
F12 STOP,{CATA1ASC RX;}{CATA2ASC RX;}
#

Forty Years of Personal Computing - RTTY Receiving Program

September 1985, I purchased a Kenwood TS-430S and became more active in amateur radio. In the apartment where I was living, I snuck wires out of a second floor window and began to make contacts. 

In October, I got the notion to try some Radio Teletype (RTTY). I built a demodulator using a circuit I've forgotten. Perhaps it used a couple of NE567 chips. Having a demodulator, I needed to translate the five-level Baudot characters into ASCII that I could display on the terminal.

(I purchased a Wyse 85 VT-220 emulator terminal in August of 1985, so I was no longer constrained by the 64x16 screen and 1200 bps limitations of the CT-64)

RTTY Decoder

I wrote a program for Flex09 to decode 45 Baud RTTY by bit-banging a PIA pin. I couldn't use the MC6850 ACIA, because it does not support 5 bit characters.

A delay loop established character timing: 

LOOP    LEAX -1,X
              BNE LOOP

Each pass through the loop consumes 8 clock cycles. With the right value loaded in X, fairly precise timings could be accomplished. A value close to 250 would be 1 ms on a 2 MHz machine. By calling this loop repeatedly, timings of 11 and 22 ms are measured. 

I connected the demodulator output to PIA Port B, pin 0. The program looks at this pin, waiting for a zero. Finding one, it calls the delay loop for 1 ms and checks again. If the pin is still zero, it waits 10 ms and checks Port B pin 0. A continued zero at this point indicates a start bit. The 11 ms total delay places us right in the middle of the start bit.

The next sequence waits 22 ms and then samples of value of Port B, pin 0. It does this five times. These samples are shifted into a byte value, which used to look up an ASCII character in one of two tables -- one for letters, and one for figures -- according to the shift mode. This character is then sent to the terminal, and we go back to waiting for a start bit.

The resulting program is about 300 bytes long. Despite the simplicity,  I had little success decoding RTTY signals. 

In hindsight, there are several reasons for this. 

  • Decoding signals off the air that might have been noisy.
  • Demodulator circuit was completely untested and might not have worked.
  • No experience with RTTY, so signals might not have been properly tuned.
  • Precise value of the 1 ms time delay not known. I used values of 230 and 240, allowing cycles for other program logic. 

At some point, I distinctly copied "RY RY RY RY RY RY RY" from someone, but not much else. Later, I figured out this meant my program, at least, was working. 

Hardware Solution

In November 1986, I decided to use serial chip that could do five-level Baudot. The MC6850 only allows 7 and 8 bit characters, so I needed a different chip. The NS8250 could do 5, 6, 7 and 8 bit characters, and sports a programmable bit rate generator for all the common RTTY rates. Hence, I added an NS8250 UART to the baud-rate generator board. 

Funny, though -- I never wrote software to use the NS8250. In February 1989, I removed the NS8250 and its associated circuitry. 

I didn't become active in RTTY on the air until 2005, using Cocoamodem.


❌