Reading view

There are new articles available, click to refresh the page.

Ham Radio Contesting for Techs? Yes, You Can!

Feeling left out? It’s a fact that most contests take place on the HF bands, but even as a Technician you can participate.

For starters, you only need your Technician license and a VHF and/or UHF FM handi-talkie—two things you already have. An HF transceiver covering 80-6 meters will give you even more opportunities

Contesting on the VHF/UHF Bands

The problem with the VHF bands is that they are often underutilized. But you can be sure someone will be on the air during a VHF contest weekend. Events like these increase activity and bring people out of the woodwork. A VHF contest is more like a friendly reunion of VHF enthusiasts—some you’ll know, others you’ll get to know.

If you only have FM gear, you will be at somewhat of a disadvantage. But you may still be able to work a bunch of stations. Hams have actually won their state in the ARRL VHF/UHF contest FM category with an HT and a good antenna. There are many more operators, with basic setups, that have fun and use the experience to become better operators.

In 2016, the ARRL contests allowed the use of the 2M FM calling frequency, 146.52 MHz. Note that the CQ Worldwide VHF Contest prohibits the use of 146.52 MHz. If the calling frequency gets busy, move off to any of the other standard simplex frequencies. The FM calling frequencies for the other VHF/UHF bands are 52.525 MHz and 446.000 MHz.

Perhaps you have one of those HF rigs that also does VHF, such as the ICOM IC-705, IC-706, Yaesu FT-818, FT-857, FT-991A, or FT-100D (otherwise known as a “shack in the box”). Most of the operation will be on 6 meters and 2 meters (mostly on the SSB portion of the band), with less activity on higher bands. Standard SSB calling frequencies are 50.125 MHz and 144.200 MHz.

In recent years, FT8 has been used extensively during VHF contests, mostly on 6 meters. This requires a bit more setup and configuration than operating voice, but the weak signal performance of FT8 is worth the effort. If you have experience with FT8, you should try it out on the 6M band during a contest. You may also encounter some FT4 activity as well.

Worldwide DX is not very common. But with good conditions, stations hundreds of miles away can be worked via tropospheric ducting, E-skip, and perhaps even meteor scatter. But weird things do happen. During 6-meter openings, multiple-hop sporadic E propagation has produced contact distances of up to 6,200 miles. Witnessing such an event is fascinating and mind-boggling, not to mention the adrenaline rush.

Get in the car and drive to increase your effective range. A rover is a mobile station that travels during a contest to activate locations, usually grid squares, during a contest. Rover stations are common in VHF contests, and often involve setups that can activate multiple bands from high places. Remember that VHF/UHF are usually line-of-sight modes, so you’ll want to go for high elevations with the fewest obstacles between you and your intended contacts. Mobile stations must indicate each location they are operating from on their log sheets.

Whether you’re roving or at home, most SSB/CW/Digi operation on VHF uses horizontal antenna polarization. A Yagi or dipole antenna with radiating elements parallel to the ground produces a horizontally polarized signal.

Technician Privileges on the HF Bands

Many hams forget that Technicians have HF privileges on CW. As the solar cycle reaches its peak, you’re likely to find more and more opportunities for nationwide and DX contacts on 80, 40, 15, and 10 meters. There’s a lot of activity on those bands, especially during domestic contests like the ARRL November Sweepstakes or the North American QSO Party.

Not a CW fan? You can operate SSB on 28.300-28.500, and other modes like digital, on this large chunk of ham real estate. With the peak of the solar cycle just ahead, this is an excellent time to explore the band. It’s primarily active from daytime to dusk.

Another way to participate is to be one of the operators in a multi-operator setup. As long as one of the operators with a General Class or Extra Class license acts as the control operator, you can operate in those portions of the bands where you don’t have privileges. Field Day can also allow you to try the HF bands. One local club uses State QSO Parties several times a year as an on-the-air practice at its club station. 

These events are open to U.S. amateurs of all license classes and are a great way for Technician Class hams to compete in contests.

Contests

Here’s a small sampling of contests available on bands which Techs have privileges.

VHF/UHF Events for Technicians

VHF/UHF contests are often held during the summer and fall when propagation is best, but you’ll find some during other seasons as well.

  • EOTA (Everyone On The Air) is sponsored by the Cuyahoga Falls, Ohio, Amateur Radio Club. Held in September (it’s over for this year), EOTA is a local mini-version of POTA (Parks On The Air). Bands and modes—FM: 2M, 70cm, 6M; SSB: 6M and 10M. Look for local clubs that are sponsoring similar Tech-friendly events in your area.
  • ARRL September VHF Contest is held the second full weekend in September. All amateur frequencies and modes above 50 MHz may be used.
  • The ARRL January VHF Contest is held the third or fourth full weekend in January, as announced (January 18-20, 2025), for U.S. and Canadian stations.
  • The CQ World Wide VHF Contest is held the third weekend of July. It promotes VHF activity on the 6- and 2-meter bands, and participants come from many countries around the world.
  • Maine 2 Meter FM Simplex Challenge, held in March, is a ham radio contest primarily designed to give 2-meter operators a chance to compete on an even basis and have fun doing it.
  • Central States VHF Society Spring Sprints are held in April and May. They’re band-specific with separate days/times for 50 MHz, 144 MHz, 222 MHz, 432 MHz, and Microwave.

HF Events for Technicians

HF contests, especially QSO parties, are a good training ground for general operation and Field Day. Remember, you have privileges on the following:

  • 80, 40, 15 meters – CW only
  • 6 meters – SSB/CW/Digital/AM/FM
  • 10 meters – SSB/CW/Digital/RTTY
  • North American QSO Parties are favorites of beginners and seasoned operators alike. The NAQPs are low-power only (100W or less), giving everyone less interference on the bands. CW is the second full weekend of January and the first full weekend of August.  SSB is the third full weekend of January and the third full weekend of August.
  • ARRL November Sweepstakes involvesstations in the United States and Canada (including territories and possessions) exchanging information with as many other U.S. and Canadian stations as possible on the 160, 80, 40, 20, 15, and 10M bands.
    • CW: First full weekend in November (November 2-4, 2024)
    • Phone: Third full weekend in November (November 16-18, 2024)
  • State/Province QSO Parties can be a good way for new participants to get involved in the hobby. They can also be a break from the longer, more intense major contests. WA7BNM provides a comprehensive list with dates, times, and information links.
  • ARRL 10-Meter Contest: With the contest going, you should hear lots of stations from late morning until about sundown. CW and Phone are the second full weekend of December (December 14-15, 2024).
  • ARRL Field Day is the most popular on-the-air event held annually in the U.S. and Canada. On the last full weekend in June, more than 35,000 radio amateurs gather with their clubs, groups, or friends to operate remotely. Is it a contest, PR event, or emergency exercise? You can make a case for all three.

It Isn’t All About Winning

It’s not whether you win or lose, it’s about getting involved. You may never win the top place in a contest, but you’ll enjoy the competition, the camaraderie, and the experience you’ll gain as an amateur radio operator. Give it a try. A reference, ARRL’s Amateur Radio Contesting for Beginners, can help you on your way.
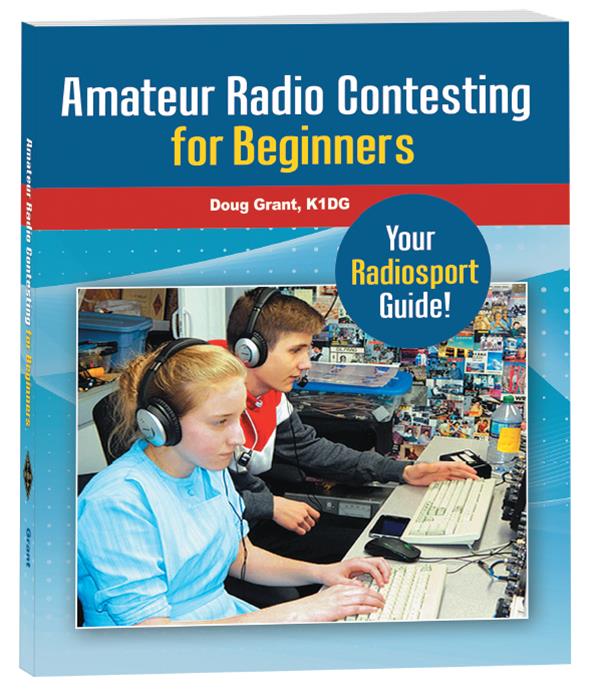
ARRL's Amateur Radio Contesting for Beginners book
(Image/DX Engineering)

The post Ham Radio Contesting for Techs? Yes, You Can! appeared first on OnAllBands.

Buying Your First Amateur Radio Handheld Transceiver (Video)

With many solid options available, choosing your first amateur radio handheld transceiver (HT) can be a challenge. DX Engineering’s Michael Murphy, KI8R, breaks down the questions you need to consider when searching for the handheld that’s right for you, from how much you’re willing to spend to how many bands you require. He also discusses HT accessories, radio programming software, and the importance of researching what others say about HTs on the market.

Watch the video and then click on the links below to begin your search for the perfect handheld transceiver at DXEngineering.com.

The post Buying Your First Amateur Radio Handheld Transceiver (Video) appeared first on OnAllBands.
Ham Radio 101: Everything You Wanted to Know About Coax But Were Afraid to Ask

Coax cable has its roots dating back to the mid-1800s, when engineers developed transatlantic cable communication. These early telegraph cables were made up of a center conductor encased in a cylindrically shaped rubber-like insulator. They had no outer shield—the seawater surrounding them completed the circuit.

The coax cable we now use was based on a design developed by Lloyd Espenschied and Herman Affel at Bell Telephone Laboratories in 1916. In the 1930s, coaxial cable was used to connect radio networks, television networks, and long-distance telephone networks.

When World War II came along, military contractors cranked out coax for the war effort. The development of polyethylene made it possible to produce cheap, flexible coaxial cables for easy and quick deployment. After 1945, military surplus coax cable could be obtained cheaply, making it popular among hams in the postwar years. It became an easy-to-use alternative to open wire feed lines.

You’ve Got Coax Questions? We Have Answers

Let us help you unravel the mysteries and myths behind the cable that helps connect you to the rest of the world.

***

What Are RG, M17, and LMR Numbers?

RG stands for Radio Guide, which was the original military specification for coax cable. The number that follows the RG was just a page in the radio guide book. In reality, these are just general descriptions of the cables available.

M17 refers to the military specifications set by the U.S. Department of Defense. Mil-DTL-17, or M17, is their current standard for coaxial cable. This mil-spec has replaced the old RG numbers and ensures that the new M17 coaxial cables will stand up to tough military requirements.

LMR stands for Land Mobile Radio, which indicates its original intended use for mobile radio systems. The 400 in LMR 400 refers to the cable’s nominal diameter, which is 0.405 inches.

Every manufacturer has their own variations, including differences in shielding material, insulation, outer jackets, and other traits. Transmission loss, power handling, and other specs will vary somewhat from one brand to another. So an RG-8 cable from one manufacturer may be slightly different from that of another.

For example, the Belden 8214 version of RG-8/U has an 11 AWG stranded center with bare copper braid and an outside diameter of .403 inches. DX Engineering RG-8/U has an 11 AWG stranded center, bare copper braid, and an outer diameter of .405 inches. Loss figures and power ratings are similar, within a few tenths of a dB.

***

What Does “Velocity Factor” Mean?

The velocity factor is the speed at which an RF signal travels through a material compared to the speed this same signal travels through a vacuum. It’s expressed as a percentage. Cables with a lower velocity factor are more lossy, but that’s because they use solid insulation instead of a low-density foam or air with small spacers to keep the center conductor roughly centered inside the outer conductor. Velocity factor is also used in calculating a particular cable’s wavelengths for matching or phasing antennas.

***

Can You Bury Coaxial Cable Without Using a Conduit?

Some coax cable is meant to be buried directly in the ground and other cables are not. If you look at the cable and find the words “direct bury” on the cable then you can bury it without a conduit. Cables that are not designed to be buried will deteriorate with exposure to soil and moisture.

***

Why is Coax 50 ohms?

The best coaxial cable impedances were experimentally determined at Bell Laboratories in 1929 to be 77 Ω for low-attenuation, 60 Ω for high voltage, and 30 Ω for high power.

The arithmetic mean between 30 Ω and 77 Ω is 53.5 Ω; the geometric mean is 48 Ω. The selection of 50 Ω is a compromise between power-handling capability and attenuation. Also, 50 Ω works out well because it’s close to the feed point impedance of a 72 Ω half-wave dipole, mounted approximately a half-wave above normal ground.

***

Can I Coil Up Extra Coax?

For HF frequencies, it’s not a problem if you need to coil up small amounts of excess cable. Wrap loosely to avoid cable damage. For VHF/UHF, higher losses come into play—longer cable, more loss. The best option is to cut the coax to fit or at least buy the shortest cable you can that still fits.

***

Why Do I Get Better SWR by Adding Coax Cable?

The shield of the coax line can actually become part of the antenna. If you’re feeding a dipole that doesn’t have a balun or choke, then adding a short piece of cable will add to the antenna length, affecting the SWR reading.

Another reason is the coax can act as an impedance transformer. The impedance changes along the transmission line with standing waves. By adding some cable, you’ve changed the impedance to something your tuner can more easily match.

***

I’ve Got Leftover 75 Ω TV Coax Cable. Can I Use It with My Ham Antennas?

Sure, you can use 75 Ω coax instead of 50 Ω. If you’re feeding a dipole, 75 Ω coax is a better match since dipole impedance is about 72 Ω. In other cases, like feeding a typical 1/4 wave vertical (36 Ω depending on radials), it would be a worse match.

***

Can You Mix Different Types of 50 Ω Coax Cable to Extend a Feed Line?

For example, you have 25 feet of RG-8/U and need to extend it 50 feet to your antenna. You have 50 feet of LMR-400 available. No problem.

The only downside would be losses caused by linking the cables and differences in the cable. If you used RG-8X instead of the LMR-400, you’d likely experience a small loss of signal to the antenna.

***

With CB Radio, I Was Told to Feed My Antenna with Multiples of a Half-Wavelength—18 feet for CB. Does This Also Apply to Ham Radio?

The 18 feet length is a myth. It might be about half wavelength in free space at CB frequencies but that does not take the velocity factor of the coax into consideration. If an antenna has a perfect match at the feed point, a half wavelength in coax will repeat that match but with velocity factors running between about .66 and .85 for most modern coax, a half wavelength in coax would be between 11.88 and 15.3 feet, not 18 feet.

The proper length of coaxial cable is just long enough to connect the radio and antenna together. There’s no special length needed, no magic measurement so your radio will work better.

***

The post Ham Radio 101: Everything You Wanted to Know About Coax But Were Afraid to Ask appeared first on OnAllBands.

Ham Radio 101: A Few Basic Tips on Building Wire Dipoles

Single-band wire dipoles are one of the easiest antennas to make.

But just because they are easy to make doesn’t mean they do not work well. In fact, single-band wire dipoles outperform many antennas in many circumstances.

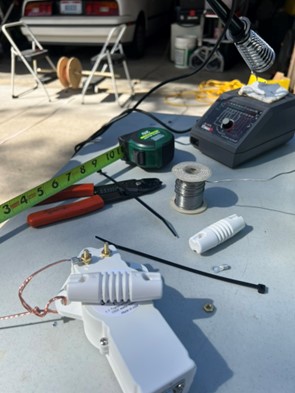
workbench with soldering iron & antenna parts
(Image/Elizabeth Klinc, KE8FMJ)

You will need these supplies to build your dipole:

  • Roll of wire
  • Measuring tape(s)
  • Wire cutters
  • Balun
  • Insulators
  • Solder (optional)
  • Antenna analyzer
  • Cable ties

You can use many different kinds of wire. Some people have used string soaked in saltwater! However, copper or copper-clad steel wire is generally considered the best. Stranded wire is generally better since solid wire can stretch under tension.

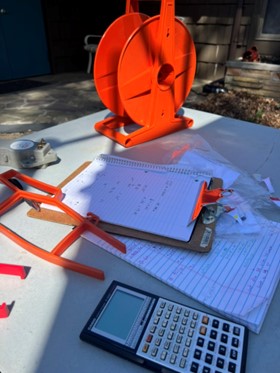
workbench with notepad and calculator
(Image/Elizabeth Klinc, KE8FMJ)

So how long do you need the wire to be?

From the OnAllBands article, “How High Should My Dipole Be”:

“The half-wave dipole is two equal lengths of wire with the feedpoint in the center. Each wire, or element, is a quarter wavelength of the frequency you want to transmit on. The basic formula for dipole construction is dividing 468 by the desired resonant frequency, in MHz. As an example, a dipole cut for 14.225 MHz SSB is 468/14.225 = 32.9 feet total length. Divide 32.9 in half, and we see each element of this dipole needs to be 16.45 feet long.”

There are other factors to consider when determining dipole length, such as proximity of the ground and other nearby objects. Because it’s difficult to find the ideal length before actually hanging the wire, it is always best to start any wire antenna slightly longer than the calculations might indicate and then shorten the antenna, measuring its performance each time.

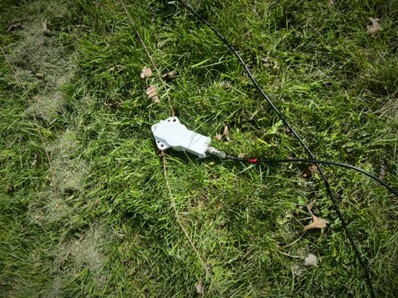
homemade dipole antenna resting on grass
(Image/Elizabeth Klinc, KE8FMJ)

Now you have calculated this number. This is the length of wire you need on BOTH sides of the balun. Some of these wires are really long! How on earth do you measure and cut a wire that long?

Find a long, straight area. Roll out a heavy-duty measuring tape that will mark how long you need the wire to be. When my Elmer and I did this, we stuck a broomstick in the roll of wire and set both ends of the stick on different chairs. Next, as one held it steady, the other walked the wire out to the length of the rolled-out measuring tape.

Tie, solder, crimp, or any combination of these to each side of the balun. Short for “balanced to unbalanced,” a balun is a device used to convert a balanced signal to an unbalanced one.

For a good explanation of what that means, visit this OnAllBands article,“Baluns vs. Impedance Transformers.” Also check out this article from Moonraker, “What Is a Balun? Why You Need One and When to Use It.”

Attach your feedline to the balun. Attach insulators at the non-balun ends of the wire. This will help you hang your wire dipole without worrying if something is touching the ends of the antenna, causing your readings to be off.

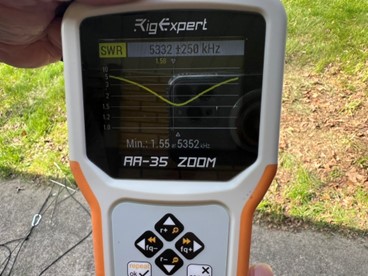
rigexpert antenna analyzer display screen in use
(Image/Elizabeth Klinc, KE8FMJ)

Measure the SWR of the antenna. It is easiest to do this with an antenna analyzer with a graph display of SWR and frequency like those from RigExpert. If the SWR dip in the graph is at a lower frequency than the one you wanted, then your antenna is too long and you need to remove some of the wire. Clip very small amounts of wire from each side and take a lot of SWR readings. If the lowest SWR reading is at a higher frequency than your intended frequency, your wire is now too short.

Editor’s note: For more information on dipoles, read these OnAllBands articles:

Also, if you’re not inclined to collecting all the pieces and parts to build your own dipole, DX Engineering has taken care of it for you with their Single-Band Dipole Kits, which include:

Questions? Share them in the comments below or email me at KE8FMJ@gmail.com.

The post Ham Radio 101: A Few Basic Tips on Building Wire Dipoles appeared first on OnAllBands.

Get with the Program & Get More Out of Amateur Radio Club Meetings

We’ve been fortunate to have a hard-working program chair in charge of arranging our club presentations. Even when he’s wintering in Florida, he makes sure everything is ready for the next meeting and joins in via Zoom.

It’s not just about filling a time slot for the monthly meeting. Without good programs, no club can succeed or survive for very long. The program chair’s most challenging job is providing programs that will appeal to club members—not put them to sleep.

Sometimes clubs take member surveys to get ideas, seek club officer input, or ask members during casual conversations what programs they’d like to see. Unfortunately, the answer is often “I don’t know” or “Something about ham radio.” So program planners must constantly think of new ideas and strive to make every program interesting and timely.

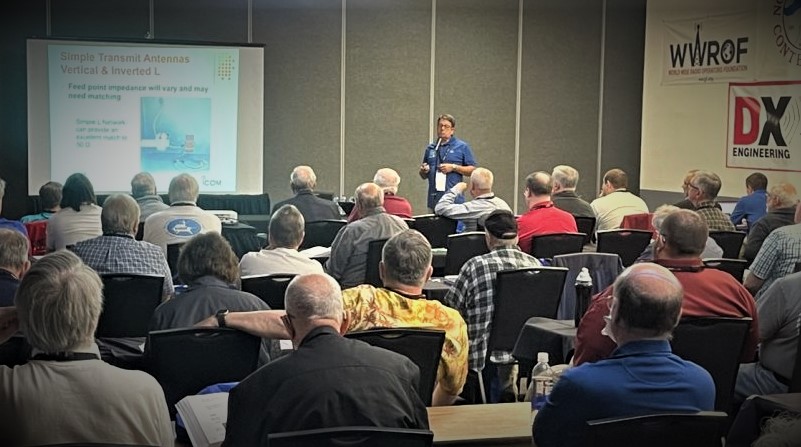
ham radio presentation to a club
(Image/OnAllBands – Katie Rockman)

Ideas

You don’t need to reinvent the wheel. There are many potential speakers out there, including ones who have already done programs for other radio clubs. They may have a list of topics they’ll do or may even have some videos of previous presentations you can download and show to your group.

Club Members: Your group may have some individuals who have some expertise in specific ham radio topics that could be turned into an interesting presentation. Elmers are a logical choice—people who are good at explaining technical topics so they are easily understood.

Being a good storyteller also helps. One of our members did a presentation about electromagnetic pulses (EMP) and their effect on radio equipment. But he also wove in a story about our area and the Cold War.

Hamfests: Hamfests are a great place to learn more about the hobby through forums, presentations, and vendors. Many of these presentations have been recorded as PowerPoints or videos and are available online or by request.

Vendors will sometimes have presentations available or be willing to speak live to your club via video conferencing. This is a win-win situation. Your club gets a program and the vendor gets to introduce products and how they work. Our club recently had a presentation from a California-based company that sells products that suppress RFI/EMI and noise, as well as a line of baluns and antennas. We got some tips on dealing with RFI and some questions answered as well.

Ready-to-Go: Ready-made PowerPoints and videos? They’re available. See the list of links at the end of the article.

High-Profile Hams: If you’re lucky, you may be able to schedule a well-known ham to do a program. A number of years ago, our ARES group had the opportunity to hook up with H. Ward Silver, N0AX, for a video conference. John Portune, W6NBC, is one of our favorite Zoom speakers when it comes to building antennas, along with Al Christman, K3LC, who lives locally.

Contest stations K3LR and W3LPL have online video tours where you can see their well-equipped contest stations. You can also see their extensive antenna farms, complete with some bird’s-eye drone views.

Borrowed Ideas

During my travels, I’ve visited several radio clubs and seen some great presentations. An interesting one I saw in Arizona was about the pico balloon, an ultra-lightweight plastic balloon suspending a tiny, lightweight amateur radio transmitter. They’re capable of sailing around the globe—sometimes many times. Unlike other balloons, they use hydrogen because it leaks less than helium.

Be sure to get the presenter’s contact information and ask if they’d be willing to do a presentation for your club—most likely it will be done by Zoom.

Project Sessions

These don’t always have to be on a regular meeting night. Schedule them when it works best for your group—maybe a Saturday. If you choose to make it the meeting activity, keep it simple and doable within a reasonable amount of time. Things like making coax jumpers, 2-meter J-pole antennas, or a simple choke/1:1 balun can be completed during the meeting time. Individuals can be responsible for materials or the club can make a group order. (Suggestion—get the money upfront for group orders.)

A variation of this would be the show-and-tell. Members bring in projects they have completed and share with the group. They can answer questions about parts needed, how it works, and building tips.

Courtesies: Always be a class act.

Here are some things you should remember:

Before:

  • Invite the speaker at least two months in advance of the meeting.
  • Give the date, place, theme, and any other information pertinent to the meeting.
  • Specify the amount of time allotted and whether a question-and-answer session will be expected.

After Accepting:

  • When the speaker accepts, acknowledge the acceptance promptly. Provide further information about the meeting and location and agree on the presentation time.
  • Inform the speaker immediately if there is any change in the scheduled meeting time and place.
  • Send a reminder e-mail or phone call before the meeting date.

During the Meeting:

  • Start the meeting on time. The presenter’s schedule comes first—don’t make them wait for your business meeting to end.
  • Introduce the speaker with a brief bio.
  • Members who insist on chattering or being a distraction should take the conversation outside.

After the Meeting:

  • Write a thank-you to the speaker within 48 hours of the meeting. Comments complimenting the speaker on specific points in the speech are always appropriate.

When You Need to Punt

Poet Robert Burns once said, “The best laid plans of mice and men often go awry.” No one can prevent the unexpected. Everything from illness to snowstorms, floods, and technical difficulties can prevent your speaker from showing up for your program. You can plan for such emergencies by setting up a reserve of programs in case a speaker cancels—or your Zoom connection fails.

Start Here 

These links should help you find a suitable program for your meeting. This is not an exhaustive list, but it should give you some ideas.

***

DX Engineering

Various Ham Radio Topics

Educational Topics

ARRL Sections–Speaker’s Bureau 

DARA Hamvention Videos (YouTube)

The post Get with the Program & Get More Out of Amateur Radio Club Meetings appeared first on OnAllBands.

So You Got Your Ham License? Here’s How to Start Enjoying Amateur Radio. (Video)

It’s a sad truth: Many people in the ham radio community never explore the opportunities afforded to them by their Technician license. You pored over the ham radio study guide, learned the basic math, asked your Elmer a million questions, and passed the test with flying colors.

But that’s as far as things progressed. It’s a common story: Life gets in the way.

While there are many reasons why new hams don’t make use of their first license, one of them isn’t a lack of opportunity to have a blast on the air. A Tech license opens up a vista of privileges, some of which are the coolest and most valuable among the long list of ham radio activities.

In today’s OnAllBands video, Michael Murphy, KI8R, DX Engineering customer/technical support specialist, shows some of the ways you can take advantage of punching your amateur radio ticket, along with encouraging words and practical advice on making your operating goals a reality.

But the question, “I just got my license. What’s next?” doesn’t just apply to new operators, as KI8R explains. Moving up the ham radio licensing ladder to General and Amateur Extra brings new opportunities but also may elicit more questions about how you may want to move into other areas of interest.

Enjoy the video below. And if you’re new to the hobby, welcome aboard! We can’t wait to hear you on the air!

We also recommend this excellent article by blogger Sean, KX9X, “Beyond Your Local Repeater: 15 Things to Do with a Technician License.

Need help getting your first station together? DX Engineering offers handheld, mobile, base station, Go Box, and POTA ham radio getting started packages that take the worry out of choosing the right transceivers, antennas, and station components for your goals and budget.

The post So You Got Your Ham License? Here’s How to Start Enjoying Amateur Radio. (Video) appeared first on OnAllBands.

Ham Radio 101: The Basics of Sun and Signal—A Few Useful Resources

As a service to new hams, we’ve compiled a few resources to give you a better basic understanding of the sun and the role it plays in enabling you to fill your logbooks.

The ElectronicsNotes website provides a good explanation in the article “The Sun: Its Structure & Impact on Radio Propagation.” It notes that in terms of radio communication, the sun “is the source of radiation that gives rise to the ionosphere” and is “of great importance for HF ionospheric radio propagation.”

The article explains that solar radiation travels to the Earth, causing the upper portions of the atmosphere to become ionized. The absorption of the radiation provides protection from harmful elements of this radiation while also forming the ionosphere. The ionosphere refracts radio signals, particularly in the MF and HF portions of the radio spectrum, making global radio communications possible. As the levels of radiation change throughout a day, so do different regions in the ionosphere change.

We recommend reading this ARRL article from the ARRL Lab Staff. Mike Gruber, WA1SVF, assisted by Dean Straw, N6BV, answer some questions about how the sun influences the propagation of radio signals. The article provides explanations of the 11-year sunspot cycle, solar flares, coronal holes, A-Index and K-Index numbers, and much more.

Also, check out K7RA Solar Updates from the ARRL website under “Latest News.”

Have you ever heard of Dr. Tamitha Skov? She is amazing. Visit her website, spaceweatherwoman.com, for the latest space weather forecasts, details on how space weather affects us, recent issues of Space Weather Forecast News, and more. You can watch DX Engineering CEO, Tim Duffy, K3LR, interview Dr. Skov in the video below:

***

Questions? Share them in the comments below or email me at KE8FMJ@gmail.com.

The post Ham Radio 101: The Basics of Sun and Signal—A Few Useful Resources appeared first on OnAllBands.

Ham Radio 101: Understanding Repeater Speak

New hams often wonder what they’ll do or say over the radio after they get their license. All that jargon that hams use can seem like a foreign language to those who’ve had little exposure to amateur radio. But there is no need to be self-conscious. After reading this, you’ll become fluent in repeater speak in no time.

Common Amateur Radio Repeater Terms

Chances are your first QSO (communication) will happen on a local VHF or UHF repeater using a handheld transceiver (HT). Repeaters have their own terminology, like courtesy beep, DTMF, and split. However, this split doesn’t involve bananas and courtesy beeps shouldn’t be confused with roger beeps used by CBers. You’ve probably used DTMF before, but in a different context—on your phone.

Here are some repeater terms you may encounter while you’re on the radio.

A Glossary of Ham Radio Repeater Terms

***

  • Break: A word used to interrupt a conversation on a repeater to indicate there’s an emergency. You should say “break, break, break” to be sure you’re heard. It’s not used to join a conversation.
  • Deviation: This refers to the change in the carrier frequency of an FM transmitter produced by the modulating signal. If you’re told your transceiver is over-deviating, talk farther away from the microphone to avoid distortion.
  • Double: Two or more stations transmitting simultaneously on the same frequency, often without knowing it. The one with the strongest signal wins, but if it’s a tie, neither is heard.
  • Full Quieting: This term usually signifies a good quality signal on a repeater or FM transmission. It means that your signal is clear, free of static, and easily readable.
  • Half-Duplex: Radio communication using two frequencies, one for receive and one for transmit—one radio at a time.
  • Hang Time: This is a cure for the double. Waiting briefly between transmissions allows smooth transitions. It also gives others a chance to join in the conversation.
  • Kerchunking: You have an HT, but will it reach the local repeater? Turning it on, you briefly hit the transmit button and hear a tone in response. Satisfied, you try it again—and again. That’s kerchunking—keying up a repeater just because you can. It can really become annoying to anyone monitoring the frequency. The proper way is to say your call sign when you transmit, or something like “KE8XYZ, testing.” I even heard of one repeater that reportedly responds with “kerchunk” if it is keyed and no audio is detected.
  • Machine: This refers to the repeater system itself. You might hear something like, “The 37/97 machine has the best coverage in the county.”
  • Offset/Split: If the repeater output is 146.840 MHz, the input or the frequency the repeater receiver listens on is 146.240 MHz (600 kHz below 146.840 MHz). The offset prevents transmit and receive signals interfering with each other at the repeater.
    • If you’re tuned to 146.840 MHz, when you push the mic button your radio automatically transmits on 146.240 MHz, 600 kHz down from 146.840. When you release the mic button, your radio switches back to 146.840 MHz to listen on the repeater’s output frequency. Confused? No worries—virtually all ham radios sold today set the offset automatically.
  • Open Repeater: A repeater that may be used by any licensed ham radio operator is considered open. Closed repeaters are restricted to exclusive groups, such as members of a club.
  • PL Tone: PL (private line) tones or CTCSS (continuous tone-coded squelch system) tones are sub-audible tones of 300 Hz and below that are transmitted and detected by radios and repeaters. The tone is transmitted when you talk, and the repeater lets you through if you’re using the correct tone. It’s used to prevent people accidentally keying up on a repeater frequency or a repeater interfering with another repeater during a band opening.
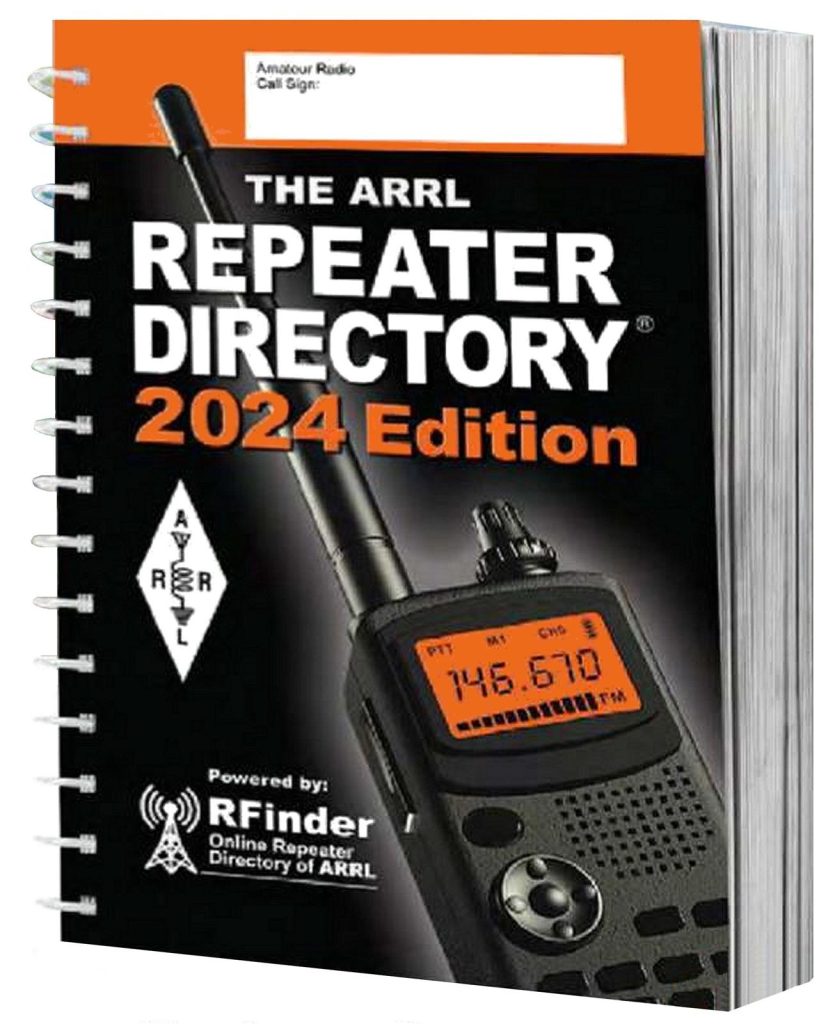
  • Repeater Directory: It’s a publication that lists repeaters in the U.S., Canada, and other areas. A popular repeater directory is published annually by the ARRL (below). You can also find directories on the Internet from many sources. Do a repeater directory search to locate them.
  • Simplex: This is communication where hams receive and transmit on the same frequency without using the repeater. It’s also called talk around. You can do this to avoid tying up the repeater, especially if you’re not far apart.
  • Time Out: No, you don’t have to sit in the corner. This happens when a person talks too long and the repeater time-out timer (TOT) temporarily shuts down the transmitter. There will be a short pause, then the repeater will reset and the conversation continues.
ARRL Repeater Director book, 2024 edition
(Image/DX Engineering)

Try the DX Engineering N8DXE Repeater!

If you’re ever near Akron, Ohio, you can access the DX Engineering Amateur Radio Club (N8DXE) repeater at 146.985 MHz. It was recently upgraded to the Icom ID-RP2010V repeater, which allows for both digital and analog operation. D-STAR gateway access is unchanged. For analog, there is no PL to access the repeater. However, the repeater will transmit a 110.9 Hz tone so you can set up your analog radio for Tone Squelch. This will allow you to filter out the digital traffic. Of course, if you are in digital mode, it already filters out the analog traffic.

The post Ham Radio 101: Understanding Repeater Speak appeared first on OnAllBands.

Ham Radio 101: Do I Really Need an Amplifier?

Everyone wants to improve their signal quality, work more DX stations, make more QSOs, and earn higher contest scores.

Should you buy an amplifier or beef up your antenna system?

Both are good ideas, but is amping up worth the additional investment?

What’s in Your Ham Station?

For starters, let’s assume that you have a typical shack. Your 100W transceiver connects to a coax-fed dipole (or several) through a built-in or external antenna tuner. Thanks to the tuner, your rig can put out full power regardless of actual antenna/feedline SWR on the various bands you work. You use the same basic setup as most of your ham friends and the guys in the local radio clubs. 

If everyone has been using this setup, it must be good, right?  Maybe, maybe not. You tune in some stations calling CQ, but for some reason they don’t always answer your reply. Maybe it’s band conditions, or a stronger station is overpowering your signal. Shouldn’t it be easier than this?

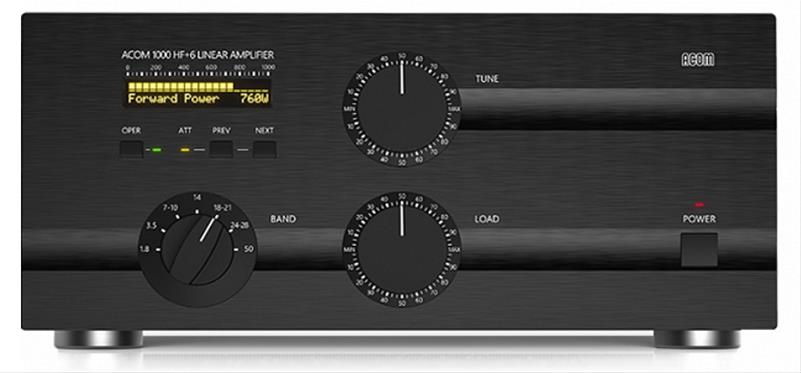
You pause for a moment and dream about adding an Acom 1000 HF+6 Meter Linear Amplifier to your station (see below). Certainly, 1kW will help you kick butt in a DX pileup and let you cut though all the noise and interference. Flip the switch, tune, and be heard!

Then reality sets in and you go back to making calls with your 100W radio.

ACOM 1000 HF + 6 Meter Linear Amplifier aom-1000_it_xl
(Image/DX Engineering)

Although you may not know it, you can likely get more signal for a lot less money. Rather than shelling out thousands for an amp up front, I’d suggest you try a three-step approach to getting your signal heard. Utilizing all three will get you the best results in the long run, but you may find improving your antenna system is enough.

***

A 3-Step Approach for Improving Your Ham Radio Signal

***

Step 1: Skill vs. Brute Force

Anyone can fire up a monster amplifier and generate a loud signal—and many do. It doesn’t take a whole lot of skill to muscle your way through a pileup with a legal-limit amp and snag that rare station.

But you can also practice your operating skills, which won’t cost you a thing.

Skill has tangled with brute force for a long time. Take the Marvel Universe, for instance. The Hulk relies on brute force, fueled by anger. His strength continues to increase until he’s strong enough to take out his enemy. In contrast, Captain America has skills like marksmanship and martial arts, and is an expert tactician and field commander.

Point is, although Captain America is an enhanced soldier, those skills are really his superpower—so develop your operator superpowers and make yourself heard!

One strategy I learned is to transmit on a frequency slightly above the main pileup or the last station worked. The DX station will often explore the upper edge of a pileup if he can’t pick out calls from the main section of the pile.

Another is to delay for a second or so sending your call so the last letter or two extend past the main buzz of the pileup. In my case, the station would then hear the “SH” and send “SH?” Then I send my call again and make the QSO. Timing is everything.

Also, CW and digital modes will give you significantly more mileage than SSB. Generally, they work well at power levels of 100W or less, but you should use 30W or less for digital to keep from damaging your finals.

Step 2: Budget-Friendly Renovations

Consider updating your antenna system as the next step to improving your signal. One way to improve your signal is to move antennas higher in the air. Build a taller mast, find a taller tree, or put up a tower.

If that dipole just isn’t cutting it, try a new secret weapon—a full-wave horizontal loop set as high as possible. Feed it with coax and use a tuner on bands above the fundamental frequency. That’s a quick and relatively easy way to snag an extra 2 to 10 dB, depending on frequency. 

Changing the feedline can mean more dBs. Disconnect the coax feedline from your dipole and replace it with 450-ohm ladder line. By using low-loss 450-ohm line you’ll likely experience a 6 to 20 dB increase.

If coax feed is your only option, upgrade to a lower-loss coax. For example, you’ll gain 0.7 dB by switching from RG-8X to 400Max and 1.3 dB by replacing RG-58 with RG-8X–based on 100 feet @30MHz. Minimize the number of connectors, switches, and adapters in your feedline system to prevent additional loss.

For less than the price of an entry-level amplifier, you can buy a Cushcraft A3S tri-band beam antenna and a medium-duty rotator. This pair, mounted reasonably high above ground, will offer a 5 to 7 dB steerable improvement to your signal. By rotating a directional antenna, you can often achieve a twofer—boosting the signal you’re trying to receive while attenuating unwanted signals.

On SSB, activate your rig’s speech processor with the proper settings. There’s another 3 dB (or more) improvement, this time in the modulation department—no purchase necessary.

Step 3: Power Trip

If you can hear people but they can’t hear you, it may be time to consider an amplifier. Most amateur radio operators find that when they use a reasonable antenna system, 500 to 800W of amplifier output is usually enough power. These midrange amplifiers also use readily available 120 VAC, so there’s no need to add a 240VAC line to your shack.

An amplifier that produces 750 to 800W of output power will have a 9 dB gain advantage over the 100W signal, which is about 1 1/2 S units. If you go from 750 to 1,500W, you will have a 3 dB advantage, which is only one half of an S unit. So why go to 1,500W? If you are in a DX pileup, that 3 dB may be enough for you to be heard over the other stations. 

If you operate on the lower bands—160 or 80m—there’s an added reason to get yourself an amp. Manmade and atmospheric noise can make communicating a challenge. The primary problem is thunderstorm activity. It creates radio noise that is reflected off the ionosphere just like regular radio signals. I’ve participated in nets on both 160 and 80m and recommend using an amp capable of 1 kW or more for reliable communications.

Wait…There’s More

Buying a new amp has a domino effect. You’ll need a beefier antenna tuner and wattmeter to handle the increased power, not to mention upgrading your antenna system to accommodate the extra power. A 240VAC line is mandatory for larger amps running at full power. Materials and an electrician to install them will likely run several hundred dollars more.

Keep in mind that once you have the power, you’ll want more—not less. You’ll also note that even a basic 500 to 800W amplifier will set you back $1,500 or more. Buy the best you can afford and use it responsibly. 

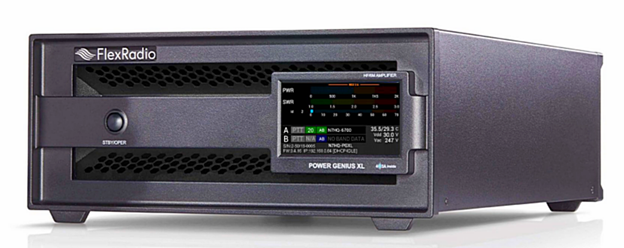
Here are some amplifier candidates to consider at DXEngineering.com, including the FlexRadio Power Genius XL below.

flexradio power genius xl hf rf radio amplifier
(Image/DX Engineering)

To Buy or Not to Buy a Ham Radio Amplifier

After looking at the facts, how much improvement does your station need? As always, the choice is yours. Amplifiers are the final option, especially after you’ve honed your skills and tweaked your antenna farm. Add a 10 dB amplifier to a 7 dB beam antenna and you’ve got a 17 dB improvement in signal strength.

When conditions are poor, an amp can make the difference between being heard and being lost in the noise.

The post Ham Radio 101: Do I Really Need an Amplifier? appeared first on OnAllBands.

Ham Radio 101: What is the 60 Meter Band?

First introduced in 2002, the 60 meter, or 5 MHz, band was originally only available in a few countries: United States, United Kingdom, Norway, Finland, Denmark, Ireland, and Iceland.

Over the years, an increasing number of countries’ telecommunications authorities have permitted amateur radio operations in the 5 MHz band. Allocations range from discrete channels to an entire frequency band.

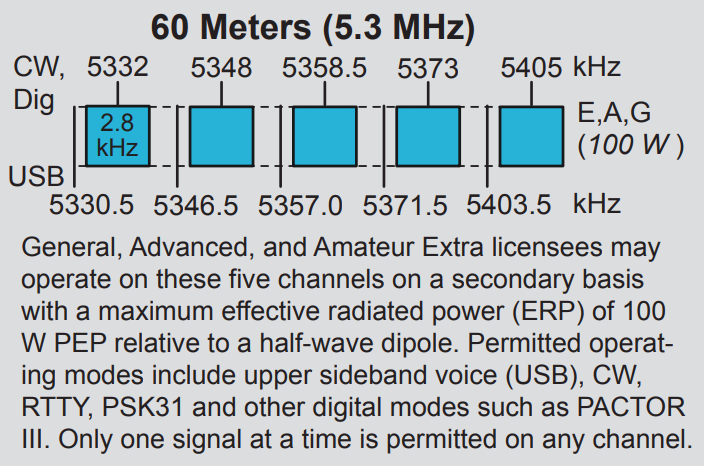
Currently, radio amateurs in the U.S. have access to five discrete channels on a secondary basis.

Below is the U.S. 60M Band Plan from the ARRL:

ARRL Band Plan for 60 meter band
Image from the 2017 ARRL band plan. (Image/ARRL)

Last year the ARRL asked hams to urge the Federal Communications Commission (FCC) to continue the existing use of the 60-meter band. A public comment period open until late November 2023 allowed amateurs to express support for the current 100 W ERP power limit (instead of reducing the power limit to 15 W EIRP) and continuing secondary access to the current channels.

arrl band plan 60 m breakdown
(Image/ARRL)

From Wikipedia regarding 60 meters:

“In the United States and its territories and possessions, channelized USB is mandatory. Where channelization is used, the USB suppressed carrier frequency (a.k.a. ‘dial’ frequency) is normally 1.5 kHz below the quoted channel frequency. For example, 5403.5 kHz is the ‘dial’ frequency for the channel centered on 5405 kHz. The ‘center’ of the channel is based on the assumption that the bandwidth of SSB transmissions is 3 kHz, at most. Transmitters that are capable of wider SSB bandwidths should be adjusted for 3 kHz bandwidth or less, so their emissions stay within the allocated channel.”

Modes permitted:

  • USB Voice
  • CW
  • RTTY
  • Data: This includes any digital mode modulated in a single sideband transmitter, with a bandwidth of 2.8 kHz or less whose technical characteristics have been documented publicly, per Part 97.309(4) of the FCC Rules. Such modes would include PACTOR I, II or III, 300-baud packet, MFSK, MT63, Contestia, Olivia, DominoEX, FT8, and others

Some 60M Ham Radio History

The ARRL explains why the FCC gave amateur operators channels instead of a band:

“The National Telecommunications and Information Administration (NTIA), which administers spectrum regulated by the federal government, raised eleventh-hour opposition to ARRL’s request and the FCC’s proposal that would have given amateurs a 150-kHz wide band at 5 MHz (5250 to 5400 kHz). The NTIA’s opposition, expressed after the period for comments already had expired, cited ongoing spectrum requirements of federal government licensees having homeland security responsibilities. Following some give and take between the FCC and the NTIA, the latter agency reviewed its assignments in the vicinity of 5 MHz and found five “lightly used” channels it felt could be shared. Contrary to speculation elsewhere, the channels are no harbinger of a new trend in Amateur Radio allocations in general. This is a special case.”

***

Questions? Share them in the comments below or email me at KE8FMJ@gmail.com.

The post Ham Radio 101: What is the 60 Meter Band? appeared first on OnAllBands.

❌