Reading view

There are new articles available, click to refresh the page.

Bist du auch neben der QRG?


Kartäuser Kloster im Valsainte. Etwa eine Stunde Fussmarsch von meinem QTH entfernt.

Dass ältere VHF/UHF-Transceiver neben der angezeigten Frequenz sind, kommt oft vor. Viele haben nicht einmal einen TCXO als Referenzoszillator eingebaut. Oder der OM hat die Kosten für diese Option gescheut. Es ist auch nicht jedermanns Sache, das Gerät zu öffnen, den richtigen Trimmer zu finden und die Frequenz einzustellen. 

Doch bei neuen Geräten wie dem Icom IC-9700 bin ich oft erstaunt, dass diese neben der QRG funken. Im 2m Band und in FM kann man noch darüber hinweg sehen. Doch auf dem 70cm Band verdreifacht sich die Frequenzabweichung bereits und auf 23cm ist man dann schon um ein Neunfaches daneben. Eine einfache Abhilfe würde der Anschluss eines GPS-Referenz Oszillators bringen. Doch manch einer sagt sich wohl: "Wegen ein bisschen daneben, gebe ich kein Geld aus. Dafür hat die Gegenstation einen RIT an der Kiste."

Doch die eigene "Kiste" wandert und mit der Zeit liegt man immer mehr neben der Sollfrequenz. Auch wenn man keinen GPS-Oszi vermag, ein einfacher Trick hilft, den IC-9700 wieder auf Linie zu bringen:

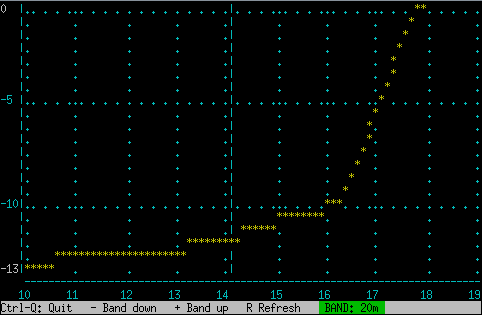
Dazu sucht man sich einen guten Bakensender. Die, die etwas auf sich halten, sind heutzutage GPS gesteuert und die Frequenz ist aufs Hertz genau. Hier in der Region ist es zum Beispiel die Bake in Bern auf 144.426 MHz. Die Wasserfallanzeige des IC-9700 wird dann auf "Center" gestellt und der "Span" aufs Minimum. Damit hat man ein Wasserfall-Fenster von +/- 2.5kHz. Die Skala zeigt zwar nur 500Hz Schritte, aber wenn man mit dem RIT die Bake auf Null stellt, kann man auf der RIT-Anzeige im Display immerhin auf 10Hz genau ablesen, wie weit man neben der richtigen Frequenz liegt.

Korrigieren kann man den internen Referenzoszillator des IC-9700 über das Menu "Set" > "Function" und "Ref Adjust". Dort gibt es einen Grob- und einen Feinregler für die interne Referenz. Da muss man dann halt etwas hin und her probieren, bis man die Bake auf Null hat, da man den Wasserfall nicht gleichzeitig beobachten kann. Doch kaputt machen kann man an dem teuren Gerät nichts.

So, jetzt seid auch ihr wieder auf der richtigen Frequenz, sofern die Bake in eurer Nähe genau ist. 

Sonst gibt es zurzeit wenig zu berichten - es herrscht Sommerflaute. Doch einige interessante Meldungen habe ich noch:

- Die legendären Schurr Morsetasten werden wieder fabriziert. Von Bergsiek

- Kenwood will einen neuen Mobil-Transceiver auf den Markt bringen

- Wisst ihr, dass auch der Mars eine Ionosphäre besitzt? Die NASA hat ein Propagation Handbook geschrieben für die Kommunikation auf der Marsoberfläche.

- Habt ihr euch schon gefragt, wieviel Power euer HF-Stecker verträgt? Hier kann man nachschauen!

- Und zum Schluss noch ein wunderbares Bild von "Roten Kobolden" (Red Sprites) die aus dem Himalaya Gebirge bis 100km in die Höhe schiessen!


Tossed Salad

  • N1EA relays news that Schurr Morse Keys is now Bergsiek Morse Keys. Stefan Bergsiek has taken over Schurr Morse keys from Gerhard Schurr and continues to produce the keys in small series.
  • Tomorrow (Sunday) is the NJQRP Skeeter Hunt. Here are all the details. Skeeter numbers will be handed out right up until Midnight Saturday/Sunday EDT. After that, the roster is closed.
  • The Summer 2024 issue of the INDEXA Newsletter (Issue #142) is available for download.
  • Everything still looks good for the August 26 - September 5, 2024 St Paul Island CY9C DXpedition.
  • A new version of MacLoggerDX (v6.52) is now available. See the notes for additional details.
  • No one enjoys reading the manual, but many would do well to read the WSJT-X User Guide available online. This document should always be the first source for help. Use your browser's search facility to find a keyword or topic.
  • According to the Ministry of Internal Affairs and Communications, the number of Japanese radio amateurs currently stands at 353,411.

August 17, 2024. What would you do?

Despite the glowing reports (perhaps misleading) from the ARRL our hobby is in decline. So how would you fix that?


YLs in Bikini's Riding Bulls ~ An Absurdity!

As the photo above suggests it is an absurdity to think of the subject matter and it is the same absurdity regarding the current lack of growth in our beloved hobby?

But first let us look at some data on worldwide ham licenses. But there is a Caveat here as station licenses do not translate to licensees. Many station licenses (which are in the count) are for clubs and groups and may have users who hold their own personal calls. So real behind the microphone nose counts are smaller numbers.

I found some data on licenses by country. Don't know the date of the review but the data appears in the range. No surprise -- Japan sits at the top of the pole.

Some of us have seen the bizarre solutions to address the lack of growth in the hobby from the "Nerds of Newington" like Incentive Licensing, Code Free examinations, the learn the answers to 20 questions and you are an Extra. Or the best promoting very expensive radios so that will attract offshore advertising and more hams. 

Our hobby is a technical hobby whether it is scratch building a radio transceiver inside of a match box or programming an FPGA on the kitchen table -- it is technically based relying on creativity, the quest for the better mousetrap or just plain challenging one's own grey matter. It is not about contests or operating from a state park screaming CQ POTA into the microphone!

Our licensing system is broken, and we need to start there. We have an Olympic games analogy. Nowhere is there a competition where you run 20 feet in less than 5 seconds, and you get a Gold Medal! Well, that is essentially the Extra class license today.

A suggestion is to look at other countries and what do they do.


These countries seem to start with a foundational type of license where you actually have to know something before jumping to a higher-class license. In the US, thanks to the ARRL you can know nothing and be an instant Extra Class.

I am in favor of reducing the number of license classes to three. The first is a Foundational, the second is an Intermediate and the last is the Extra. No more technician class -- you get a license, and you can operate anywhere. You also must pass through each class before advancing to the next class. Sure, that will weed out many, but holding a driver's license does not qualify you as a NASCAR driver. The same with ham radio.

Our hobby will grow and prosper when there are challenge goals and an opportunity to be in a group that is recognized for their technical skills. Getting a ham license is more than filling out a box top as it now seems to be.

The current US ham population are typically older so in a short time horizon there will be a natural diminution of the ranks. Time is ripe to make this change, and it has to be an organization other than the ARRL leading the charge. 

So, what would you do?

TYBNYGNT.

73's
Pete N6QW

Old age changes? - NOT amateur radio

At the moment my wife and I are lucky. As far as we know (!) , we have nothing much wrong with us. I still have a few things that are longer term after effects from my 2013 stroke, but compared with many I have been lucky I know. Most of me still works!

As we age, several of our friends have died or now have serious illnesses. My interest in sex has dropped off and the death of others no longer seems so odd. I recall a doctor once asking me (probably 10 years ago) "if it was all too much" and I retorted "no". If he asked me now I am less sure.

Although I find so much to be interested in, I get exhausted more easily and I am tired of being giddy most of the time. Life is harder than it was.

Doing Some Logging Math

Just crossed 55,000 logged at QRZ.com: Confirmed at QRZ.com is 71.6% A new country, if evenly spaced out, would be one out of every 256 QSOs (every 233 QSOs if the 21 unconfirmed DX Countries were confirmed at QRZ.com) Domestic QSOs account for 75.6% (so DX contacts average just under one-fourth) 73 Steve K9ZW

Garden yesterday - NOT amateur radio

So far, we have had a nice warm and sunny August on the whole. Up to very recently it was very dull and wet and we were beginning to think this summer was a wash-out. 

My wife puts a tick on the kitchen calendar when we have had a decent day. So far we have had 9 ticks, which is pretty good. Our grass is just starting to turn brown and will look bad in about a week unless we have a good downpour.

The photo shows our garden yesterday.

10m QRP FT8 (Saturday)

 In a few moments I shall (hopefully!) turn on my 2.5W 10m  FT8.

UPDATE 1054z:  Turned on about 1000z. 22 stations have spotted my QRP and I have spotted 65 stations here.


UPDATE 1127z
:  31 stations have spotted me so far. See map.

UPDATE 1236z:  So far today,164 stations spotted here and 52 people have spotted me.

bear2hugo.py - Migrating from Bear Blog to Hugo

I’ve written the following small Python script to migrate a Bear Blog to Hugo:

import csv
import os

with open('post_exports.csv') as csv_file:
    csv_reader = csv.reader(csv_file, delimiter=',')
    os.makedirs("./pages", exist_ok = True)
    os.makedirs("./posts", exist_ok = True)
    for row in csv_reader:
        dir = ""
        if row[11] == "True":
            dir = "pages/"
        else:
            dir = "posts/"
        with open(dir + row[4]+'.md', 'w') as post:
            publish = row[9]
            if publish == 'False':
                draft = "true"
            else:
                draft = "false"
            post.write("+++\n")
            post.write("slug = '" + row[4] + "'\n")
            post.write("title = '" + row[3] + "'\n")
            post.write("date = " + row[6] + "\n")
            post.write("draft = " + draft + "\n")
            post.write("tags = " + row[8] + "\n")
            post.write("+++\n")
            post.write(row[12])

It’s not really sophisticated but it does the job. Here’s all you need to know:

  • create a new directory, e.g. ~/bear2hugo/
  • create a new file bear2hugo.py in this directory and copy the above content into this file
  • Download the export file from Bear Blog via the menu item “Export all blog data”
  • Place the resulting file post_exports.csv together with bear2hugo.py in ~/bear2hugo/
  • Execute the script: # python3 bear2hugo.py
  • It will create two new directories pages and posts
  • It will parse through CSV file and create a Mardown file for each post and page inside the corresponding directories
  • You can now copy the files into your content/ and content/blog/ directory and use them with Hugo

DE-0094: A Vacation POTA by the Sea

Had a very nice and special POTA activation of DE-0094 Niedersächsisches Wattenmeer National Park:

Conditions were rough but I’ve managed to get 16 stations into my log, including two from the Azores. It was great to sit on a dyke, watch people kite and enjoy the view of the sea while talking to stations all over Europe.

My rig was the usual: Xiegu G90 and a 5.4m long telescopic vertical antenna with four 5m radials.

Zero Retries

“Zero Retries is an independent newsletter promoting technological innovation in Amateur Radio, and Amateur Radio as (literally) a license to experiment with and learn about radio technology.” This is how Steve Stroh (N8GNJ), the editor of Zero Retries, describes his weekly newsletter.

But to call it just a newsletter does not do justice to his work. I have been reading and following this site for a long time and am always fascinated by how many high-quality articles he publishes every week. Steve doesn’t just limit himself to writing news but is obviously very interested in promoting the hobby of amateur radio and conveying its fascination. Important projects such as the M17 project are regularly pushed by him in order to help drag this valuable project out of its niche.

In the meantime, the newsletter has reached a size that would justify publishing the content as an ePub (hint hint). I would actually love to read it on an eBook reader.

My recommendation? Click here, subscribe and have a nice weekly read on inspiring amateur radio related topics.

QDX and Fldigi on Debian Linux

The following instructions describe how to configure Fldigi for operation with the QRP Labs QDX transceiver on Debian Linux 12 / Raspberry Pi OS (64bit).

In the configuration menu, click on Soundcard -> Devices and select PulseAudio:

Afterwards, click on Rig Control -> Hamlib and configure it as follows:

With these few settings it almost worked for me - but only almost. The QDX switched to transmit mode, but no signal was emitted and the red LED flashed twice continuously. This indicated that the audio signal was too low.

To fix this, open the PulseAudio Volume Control tool and set the volume under Output Devices to 11dB:

If PulseAudio Volume Control is not installed on the system, this can be done using the following command:

# sudo apt install pavucontrol

Notes on the QRP Labs QDX

On this page I am continuously recording all the findings that I have been able to collect in connection with the QDX Transceiver Rev 6 from QRP Labs. What I am writing here might seem negative since it’s mostly about issues and how to fix them but I am actually a big fan of this device and have already ordered a second kit.

A post on my QDX build can be found here.

Low output power on 15m

After I’ve finished building my QDX (high bands version), I measured the output power of all bands and got these results:

  • 20m: 4.6W
  • 17m: 4.9W
  • 15m: ==2.4W==
  • 12m: 3.5W
  • 10m: 3.5W

After reading https://qrp-labs.com/qdx/qdxtrouble.html I was confused why there is significantly less power on 15m than on 17m as they share an LPF. VA3RR gave me the excellent hint to check if the power output on 15m decreases when I compress the windings on L3 - which actually was the case. I followed his advice and reduced the windings of L3 from 12 to 11 and furthermore prettified the spacing between the windings of L2, L3 and L4 which resulted in the following:

  • 20m: 4.7W
  • 17m: 4.6W
  • 15m: ==3.4W==
  • 12m: 3.9W
  • 10m: 3.9W

No High SWR Protection

As the QDX does not have an SWR measuring bridge, it does not have a protective circuit to protect the device from high SWR. I was warned against using the QDX together with an automatic tuner, as even the short spikes during the tuning process can lead to the destruction of the four BS170 transistors.

As an alternative to not using an ATU, I was given the following options:

Reducing the Output Power

One recommendation is to temporarily or permanently reduce the supply voltage to reduce the output power. This should help to protect the PA transistors, especially during the tuning process. I have carried out experiments on this, to determine which voltage is needed for a specific level of output power.

The following table shows the output power in Watt per band in dependency of the supply voltage. This refers to a 9V build of the QDX Rev 6.

9.0V 8.5V 8.0V 7.5V 7.0V 6.5V
20m 4.7 4.3 3.9 3.4 3.0 2.5
17m 4.6 4.2 3.9 3.4 2.9 2.4
15m 3.4 3.0 2.8 2.5 2.2 1.8
12m 3.9 3.5 3.3 2.9 2.7 2.1
10m 3.9 3.5 3.1 2.8 2.5 2.0

At 6.0V the QDX would only boot into its flash drive mode.

I’ve decided to settle with a supply voltage of 7.5V.

Replacing the Transistors

On groups.io/g/QRPLabs I have so far been able to find the following attempts to replace the BS170 transistors, which are installed as standard and are considered to be quite sensitive:

Replacement with TN0110 transistors. These are supposed to be more robust, but have the disadvantage that their polarity is reversed. As a result, the round and not the flat side of the transistors rest on the circuit board. As I operate the QDX without a housing, this would even be an advantage if I use a heat sink instead of the washer.

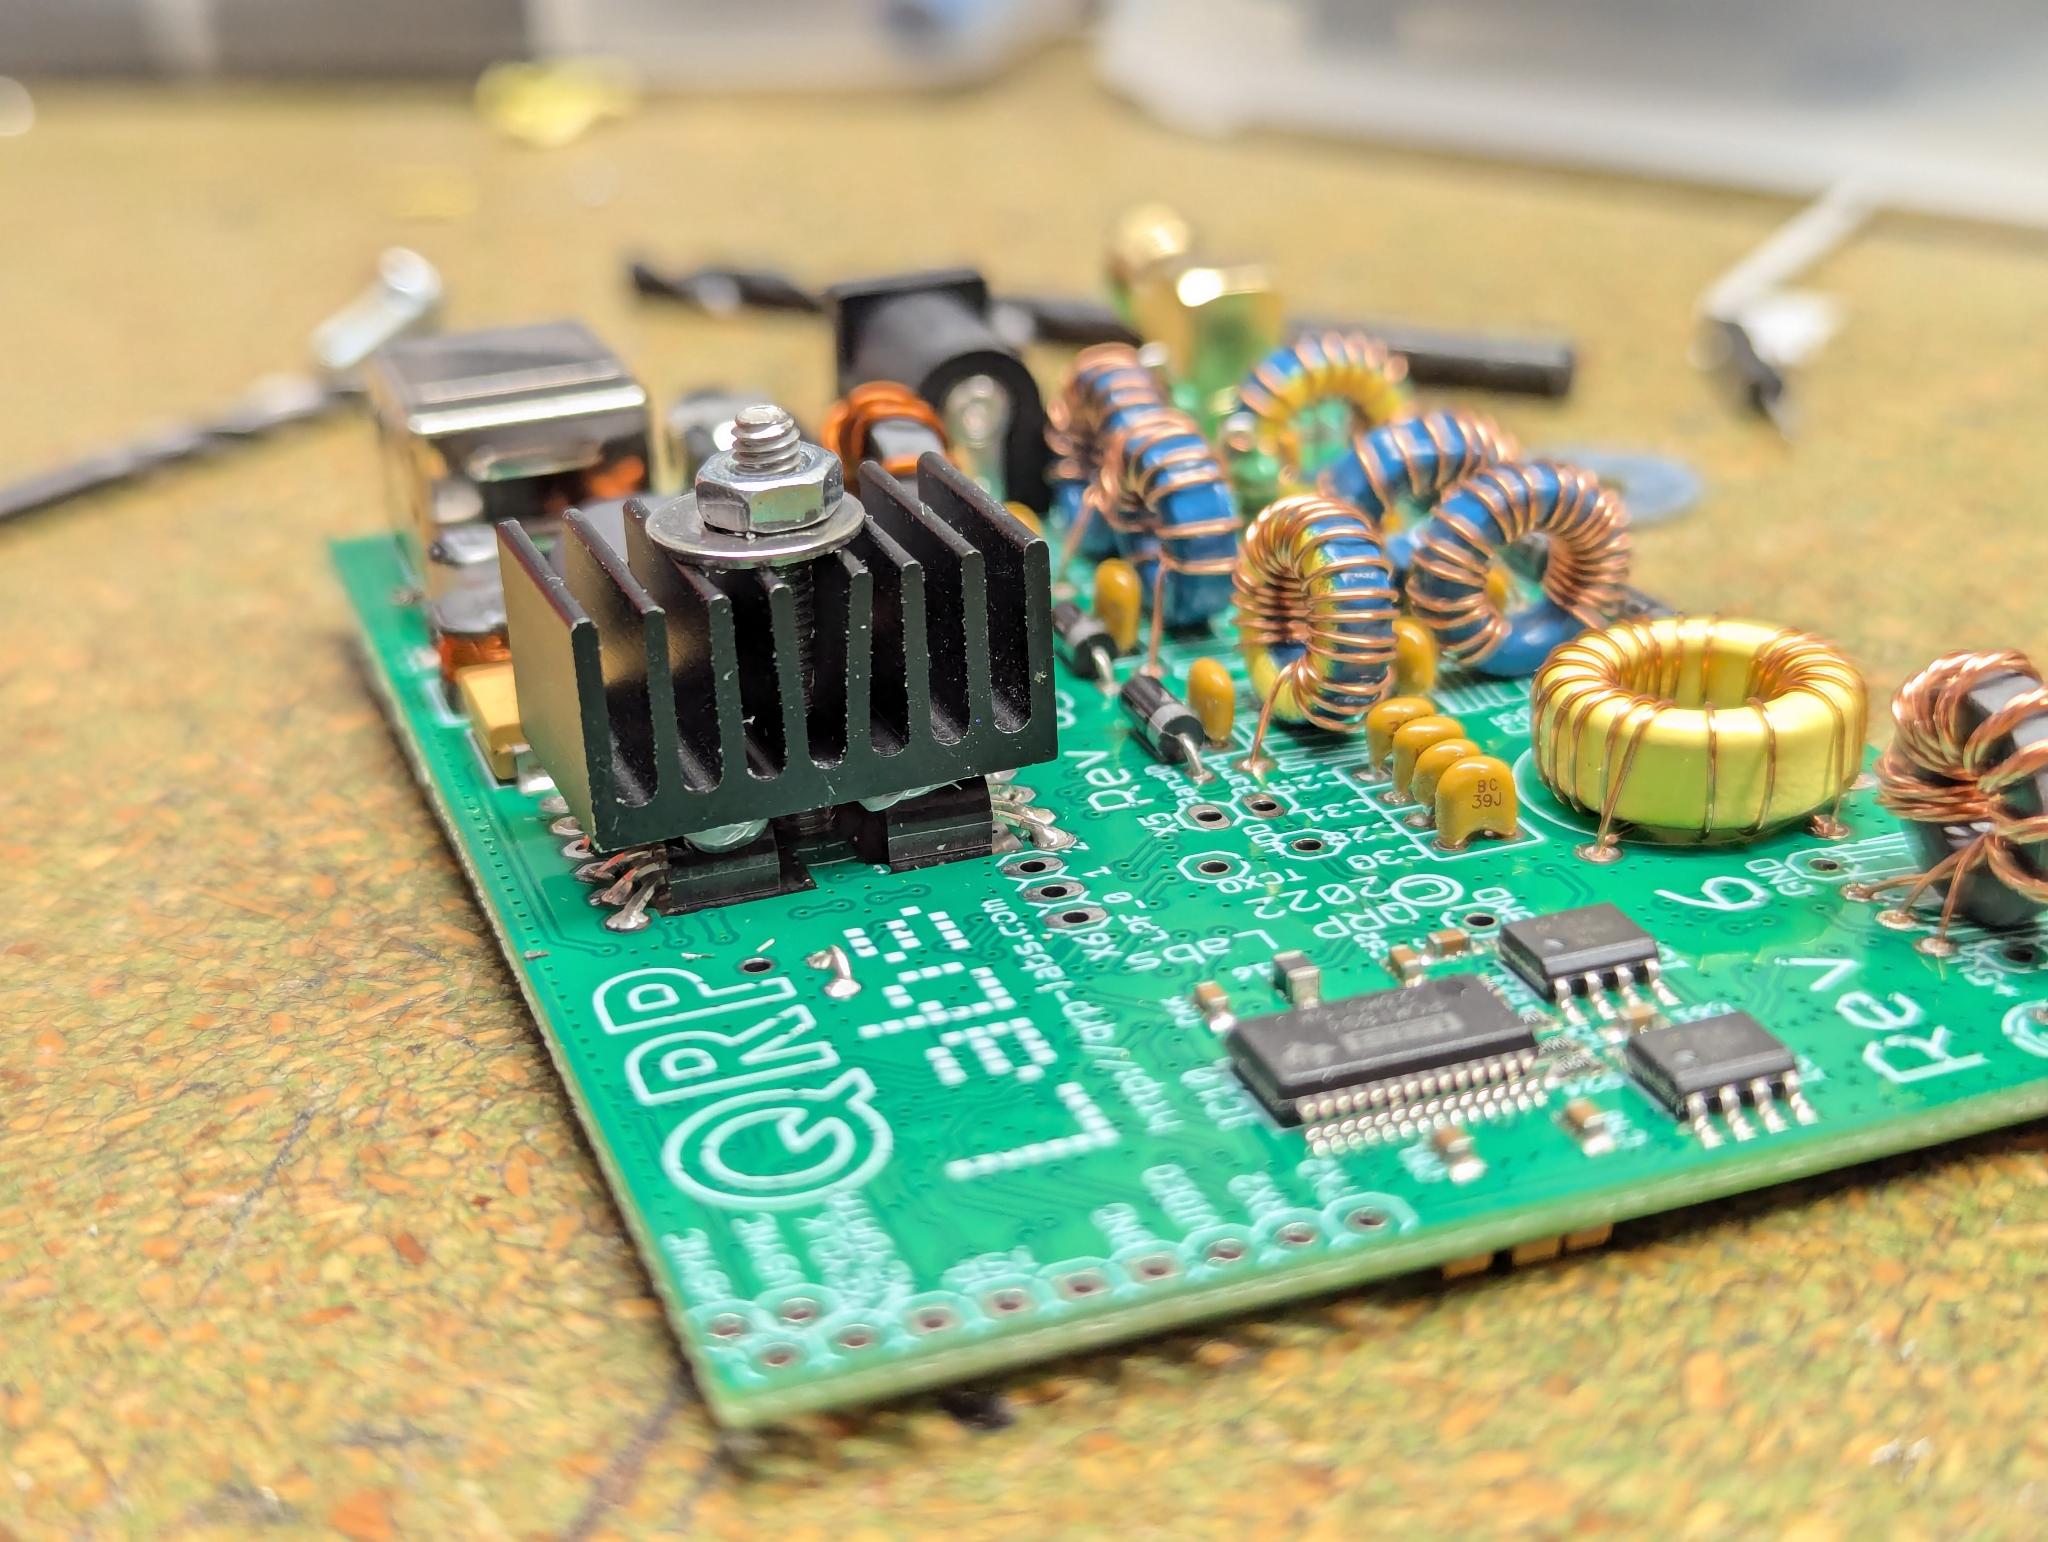
(Note: This picture shows the heat sink with the four BS170)

Exchange for two FDT86256 mosfets. This procedure developed by WB2CBA is described in more detail here: https://github.com/WB2CBA/QDX-PA-MODIFICATION. The whole thing is now even available as a kit: https://www.tindie.com/products/jasonkits_qrp/qdx-mosfet-pa-mod-kit/. However, it is recommended to drive it with 6V instead of the original 5V. More information here: https://groups.io/g/QRPLabs/topic/qdx_pa_upgrade/103093403

Attenuated RX on 20m

Problem

The RF filter sweep for the 20m band resulted in the following graph:

This is the result of the image rejection sweep for the 20m band:

(Partial) Solution

I fixed this issue by rearranging the windings on L12 and resoldering all solder joints of L12. Turned out I didn’t burn all of the wire’s coating the first time:

This looks much better but not really fixed - until you read this thread on groups.io.

Looks like 20m is a compromise band of the high band version as the 80m band is on the low band version. The issue is that I primarily work on 20m but there seems no better solution that to build a low band or even a mid band QDX.

The QubeDX - a modular CubeSat style QRP Transceiver

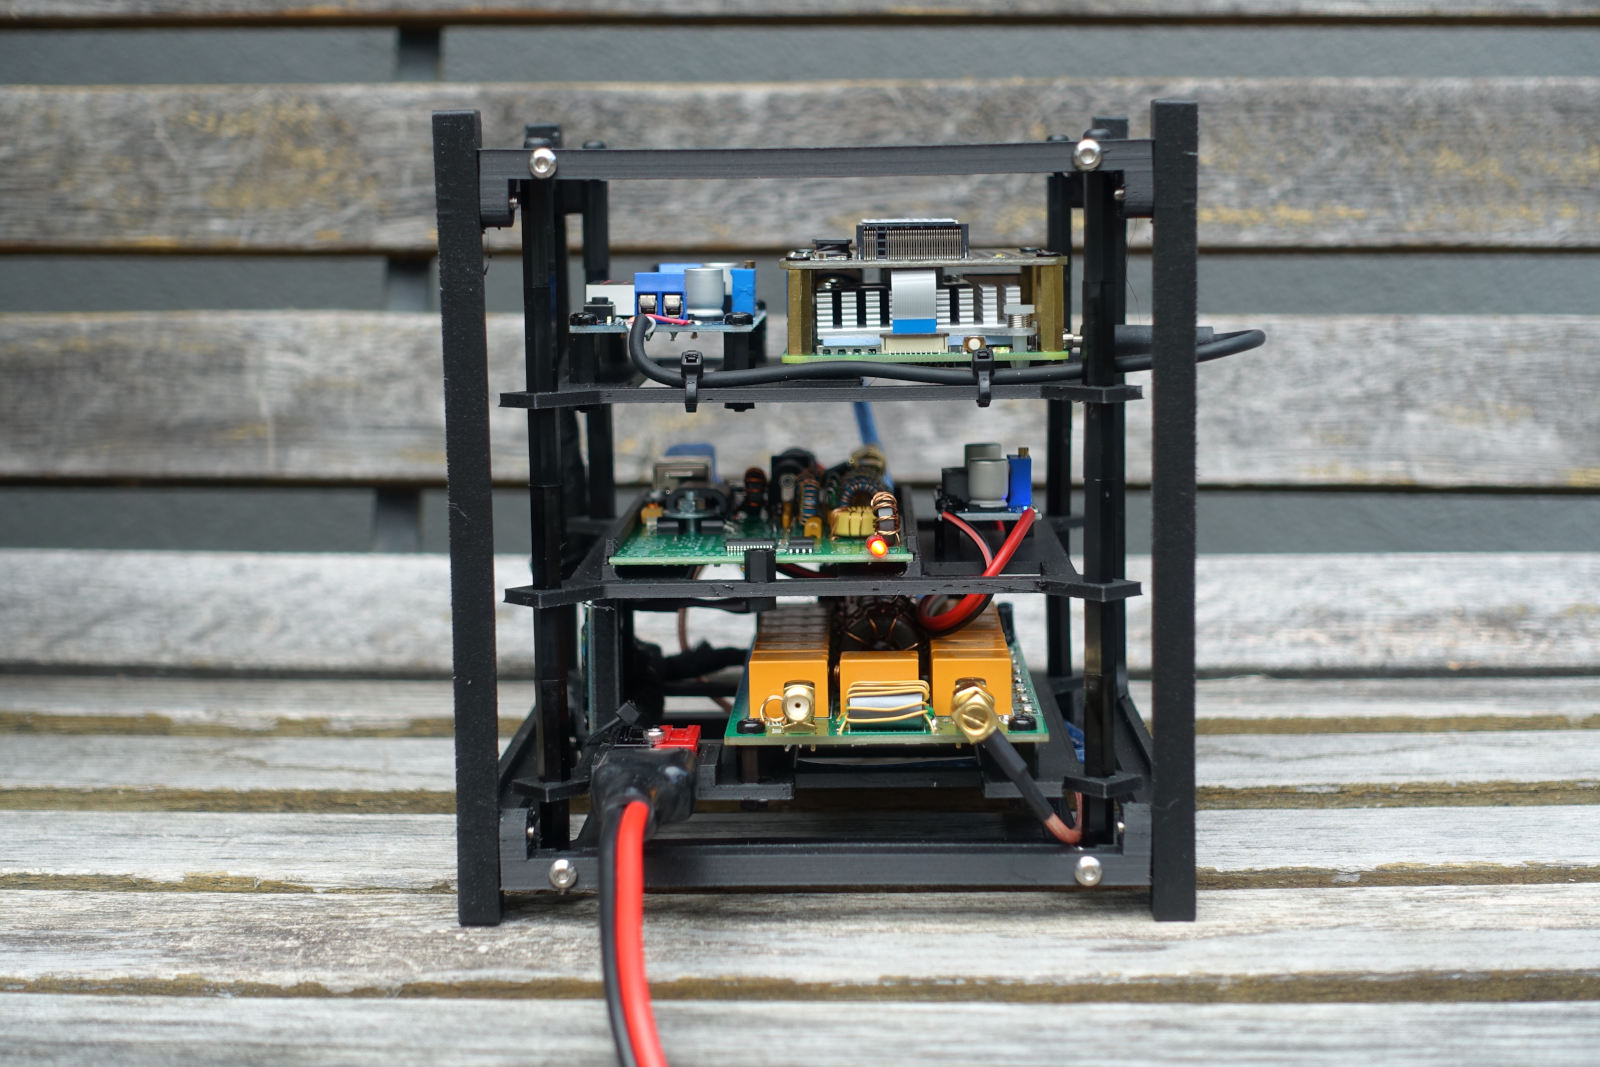
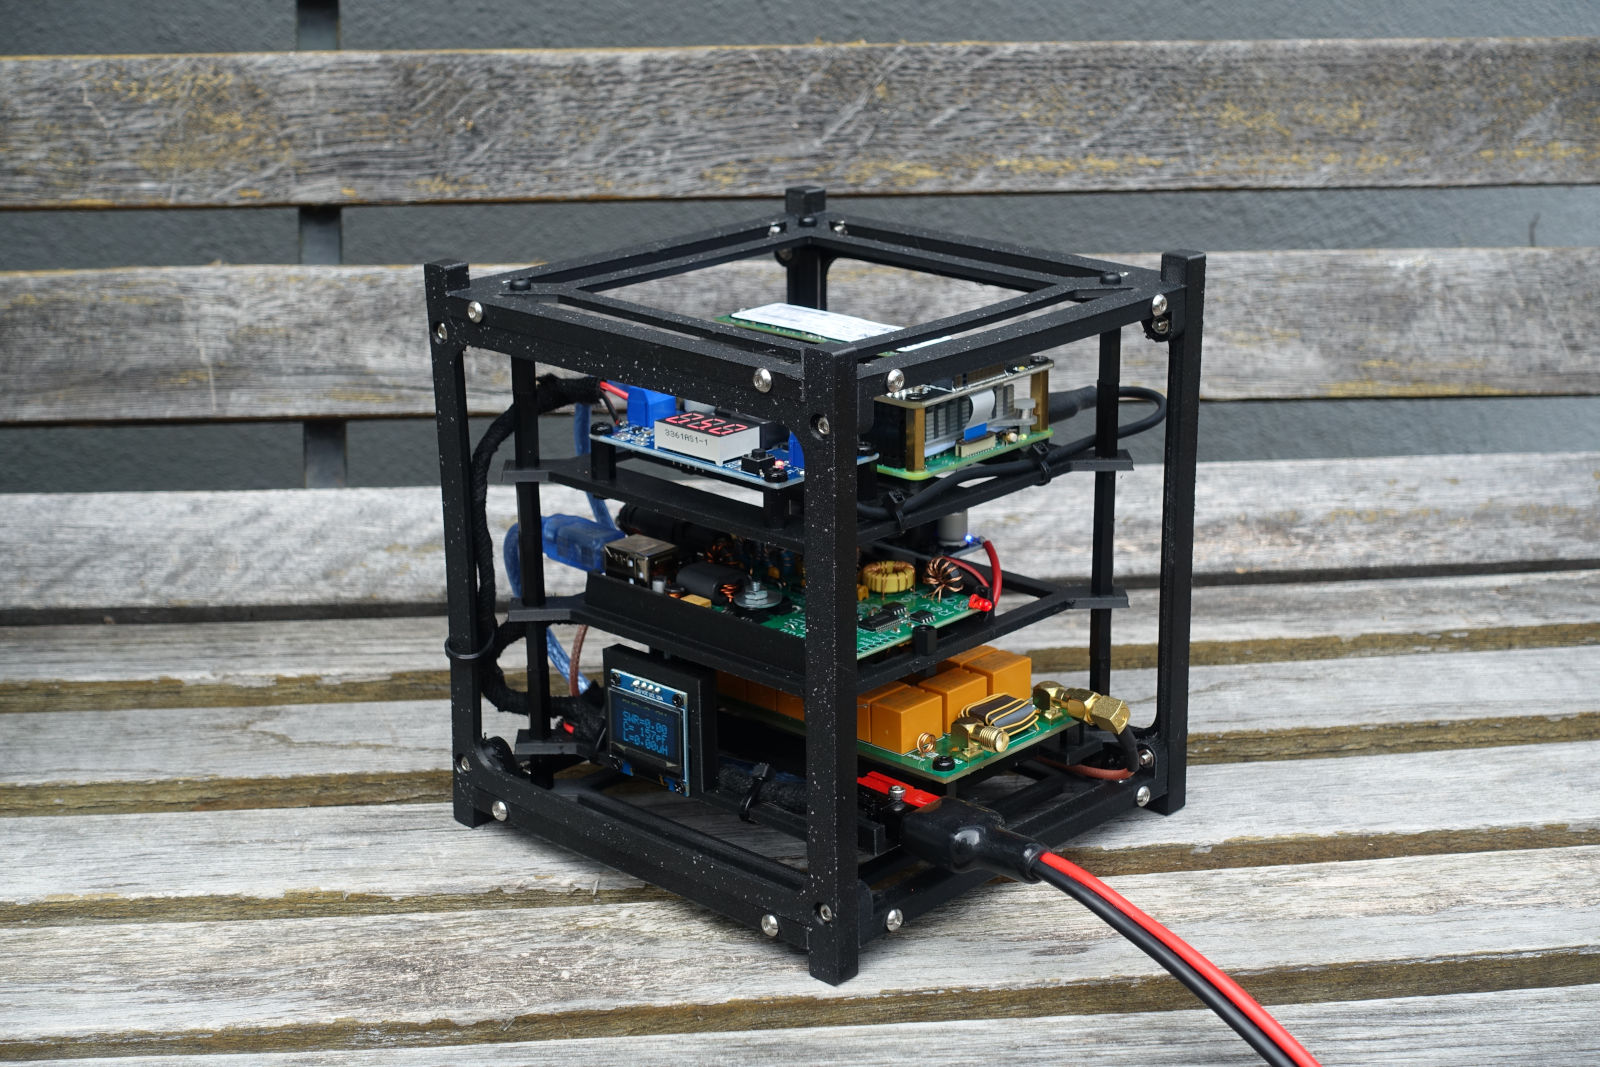
(the frame is actually dead straight, the distortion comes from the camera)

This article is about the implementation of the idea of building a (decorative) QRP radio for digi mode operation that can be operated remotely via Wi-Fi. One possible use would be to place the device together with a simple vertical antenna and a small battery, e.g. temporarily in the garden, so that it can then be operated from the computer from inside the house. The basic idea is to be able to conveniently control the device remotely via VNC.

I had set myself the following conditions:

  • The transceiver should be inexpensive and easy to set up
  • The setup should include an automatic antenna tuner that does not require any manual interaction
  • A Wi-Fi-capable single-board computer should be integrated, on which the required software (WSJT-X, JS8Call, Fldigi) can be executed
  • The entire system should be able to be operated with 13.8V and only require one power supply line
  • The costs should not exceed 250€, ideally around 200€
  • It should be cool looking / decorative (from a techie’s perspective)

I then decided in favor of the following components

Before the implementation began, I first had to come up with an idea for a suitable enclosure. After seeing a CubeSat at Hamradio 2024 in Friedrichshafen, I had the idea of making the entire setup look like a CubeSat and building it on a modular, skeleton-like structure. I finally found inspiration in the following design on Thingiverse: https://www.thingiverse.com/thing:4096437

Unfortunately, I had to realize that a 10x10x10cm cube didn’t offer enough space for my project, so I created a 14x14x14cm version based on the previously linked project. I enlarged the side panel and the base plate accordingly and designed 3 new modules for the following components (from bottom to top):

  • ATU, OLED display and Powerpole connector
  • QDX transceiver and buck converter (7V, please see my notes on the QDX)
  • Raspberry Pi 5 and buck converter (5V)

All 3D printable parts used in this project can be found on Printables.

First of all, the individual components had to be assembled:

Antenna Tuner Module

The kit for an ATU-100 to N7DDC can now be obtained for just 35€ including shipping. Apart from the binocular transformer, I built it according to the instructions. The transformer only needs 5 instead of 10 windings on both sides to be able to use it for QRP operation. After the kit was finished, I downloaded the original firmware and flashed it to the micro controller with a PICKit3 programmer. I made the following two modifications:

  • QRP operation by setting cell 05 to the value 01
  • Fully automatic tuning based on the measured SWR by setting cell 02 to the value 01

You can find more details in the ATU-100 manual on Github

For more information on the QDX in combination with an ATU, please see my notes on the QDX.

The tuner was then installed together with the display and a Powerpole connector on the specially designed and printed module carrier:

Transceiver Module

Now it was time to set up the QDX transceiver. The unprecedentedly good assembly instructions from QRPLabs left no questions unanswered, which is why the assembly turned out to be quite simple.

The finished QDX was then inserted into its module carrier. In addition to the QDX, a buck converter was installed on the carrier, which regulates the 13.8V for the QDX down to 9V.

Raspberry Pi Module

The Raspberry Pi was mounted together with the NVMe module in sandwich construction on the corresponding module carrier. There was still space next to it to accommodate a buck converter, which regulates the 13.8V down to 5V for the single board computer.

Assembly

Now the CubeSat frame was printed and screwed together with M3x10 stainless steel screws and the corresponding nuts. The three pre-assembled module supports were then installed in the frame one above the other using M3 nylon spacers so that they were screwed to the frame with four screws each at the top and bottom.

The cabling was then installed:

  • A 30cm SMA to SMA coaxial cable with angled connectors to connect the ATU to the QDX
  • A short USB cable to connect the QDX to the Raspberry Pi (CAT and audio)
  • Three two-core cables for the power supply, each running from the Powerpole connector to the ATU and the buck converters
  • Two two-wire cables from the buck converters to the QDX (hollow plug) and the Raspberry Pi (USB-C)

The Result

The following pictures show the finished setup:

Updates and Modifications

I am documenting all updates and modifications here in this separate post.

Partly-baked idea: Earning the “ham radio hacker” title

Last week, I attended DEFCON, where I gave my “Ham Radio for Hackers” talk and mingled with a number hacker types. This talk seems to have struck a chord. It was featured on Hack-a-Day, and recently, Steve Stroh, N8GNJ, commented that I am “fast becoming the Amateur Radio Evangelist of techies / hackers / makers.”

All this has got me thinking, though, that perhaps I’m not really walking the walk, so to speak. After all, I’m using an Icom IC-7610 in the shack and an Elecraft KX-3 out in the field. I am using a K3NG keyer that I built as my main keyer, and I have been building my own antennas and baluns, but to really earn the title “ham radio hacker” perhaps I need to step up a little more.

A piece of electronic equipment.
The VU2ESE sBitx is very hackable.

So, how do I really earn that title? What comes to mind is that I could sell my current closed-source gear (dare I say appliances) and go with all homebrew and/or open-source gear. For example, for the shack, I could sell my IC-7610 and purchase an HF Signals sBitx. The sBitx is a 40 W, fully open source, high performance HF SDR transceiver with built-in digital modes, including FT8, RTTY, PSK31, and more, in addition to CW and SSB. Based on a Raspberry Pi 4, this radio is very hackable.

For VHF/UHF operation, I could go with any of the radios that support OpenRTX. Open RTX supports M17 on some radios, too. There’s also the Quansheng UV-K5. There are many open-source firmware hacks for this radio.

Antennas I pretty much have covered. I bought a Buddipole about 15 years ago, but aside from HT antennas, that’s the only commercial antenna that I currently own.

These are all just partly-baked ideas at this point. I don’t know if I’ll ever actually do this, but now that I’m retired, I certainly have the time to do it. Please let me know what you think. Are there other cool open-source/homebrew projects out there that I should also consider?

❌